I noticed that I particularly enjoyed making particle effects last year and have always wanted to know how water is made in engine, so this was the perfect brief for me.
Monday:
On Monday I spent the majority of the day collecting reference images on pinterest and finding as many tutorials as possible to make the different elements required of me by the brief. This included shader guides, particle effect guides and blueprint guides. I wanted to create water vfx that acts realistically in its waves and ripples, but still has a stylised tone to it, much like the water seen in RIME and Sea of Thieves:


I collected image and video reference of both stylised and realistic water in different situations: still water, ocean water, pond water, ripples caused by floating items and droplets of water disturbing the surface. I wanted to create a stylised garden pond with plants floating on the top, with a water droplet particle effect trickling down from above, causing a ripple and splash effect on impact.
At the end of the day, I used this written guide and following videos to create my water shader.
I studied and replicated the nodes shared by Olivier Cannone to understand the effect each part had on the material, then changed elements of it to achieve the effect I desired.
This breakdown was particularly useful to figure out what an industry standard material would be built to look and act like, which helped me to create a cheap shader that would be game ready.
This guide was also helpful when I had issues following the written guide, and helped me to understand the function and purpose of all of the nodes I was using. This in turn made it easier for me to change them to my own needs in line with what I wanted out of the shader without as much unknown error.
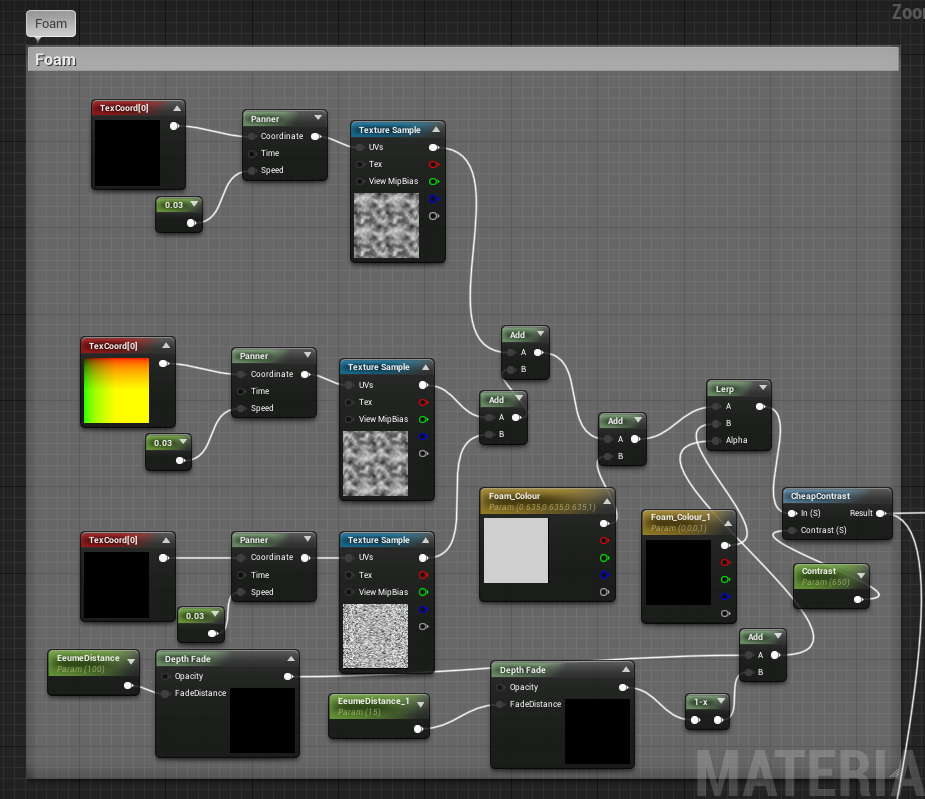 |
| This created an adequate effect, but I may scrap or change it later if it doesn't fit with the clean pond water image. I used TexCoord nodes to change the tiling size of the textures I created from photoshop cloud and noise filters, then the panner node was used to scroll the textures in different directions to emulate movement. |
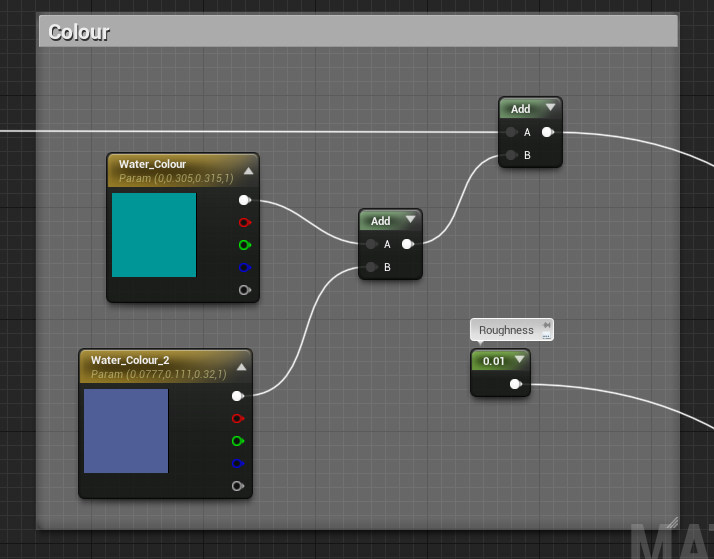 |
| When following the guide, using a depth fade and lerp here made the water pink, so I removed it and simply added the colours together. Later, when tweaking the colours, I re-added the depth fade nodes and changed the colours, but I suspect I will change them again after modelling the water feature to be a darker, more translucent green more in line with the reference images used. |
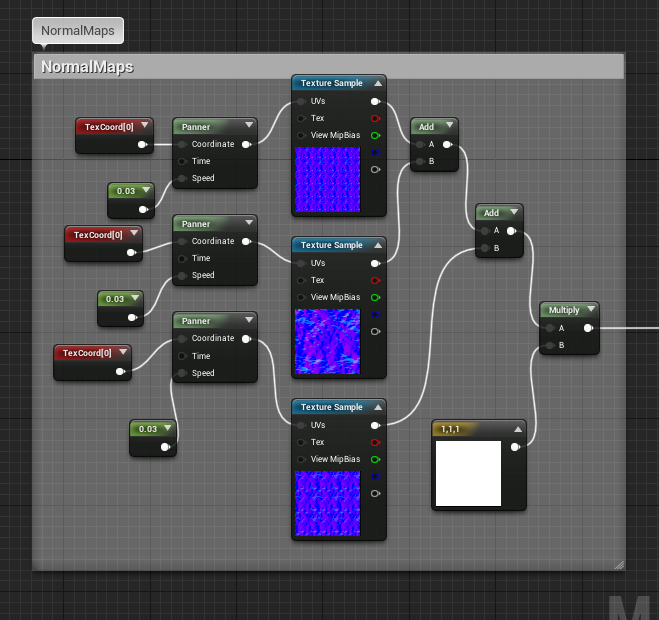 |
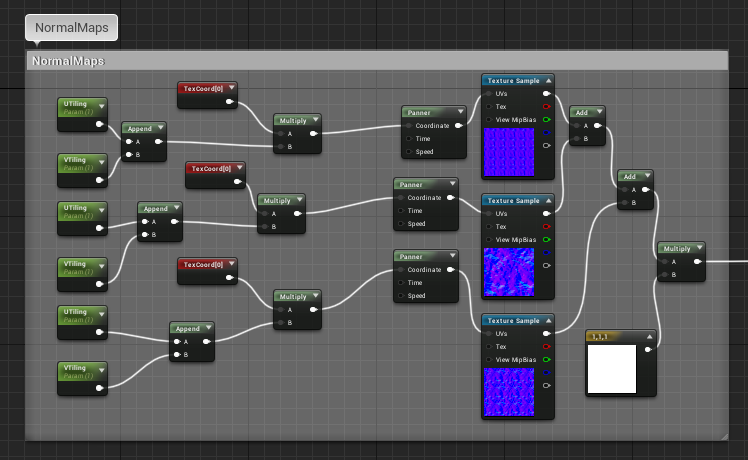
| I created the normal maps by layering the photoshop cloud filter effect a few times and adding a water ripple image over the top, then adding a few brush strokes and generating a normal map from it. |
 |
| The pink water that made me scrap the previous colour settings |
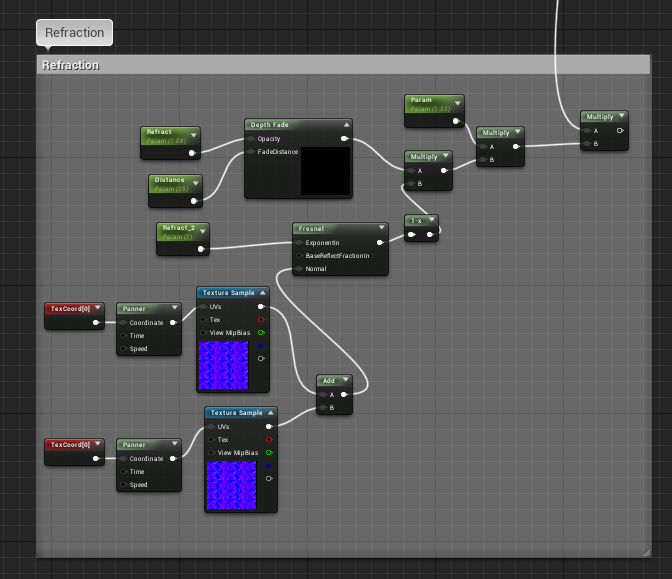 |
I abandoned this refraction attempt after realising that I could make it much simpler with an effect that I preferred: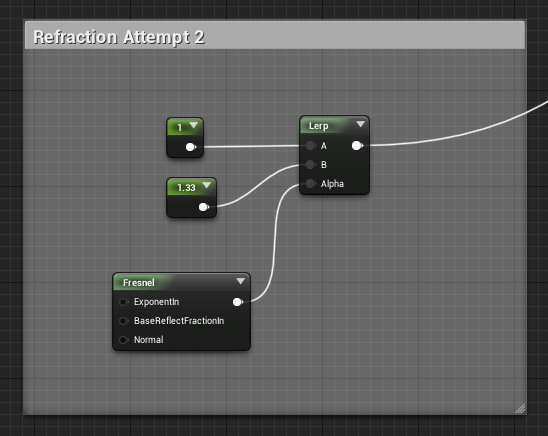 |
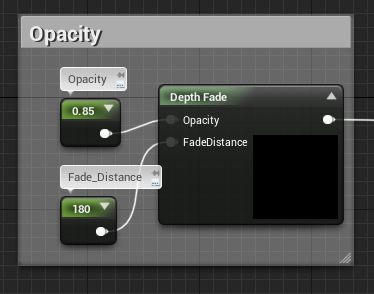 |
| I used depth fade for opacity so that the water would become more opaque the deeper it went, to simulate the layers of water between the eye and an object submerged in it. |
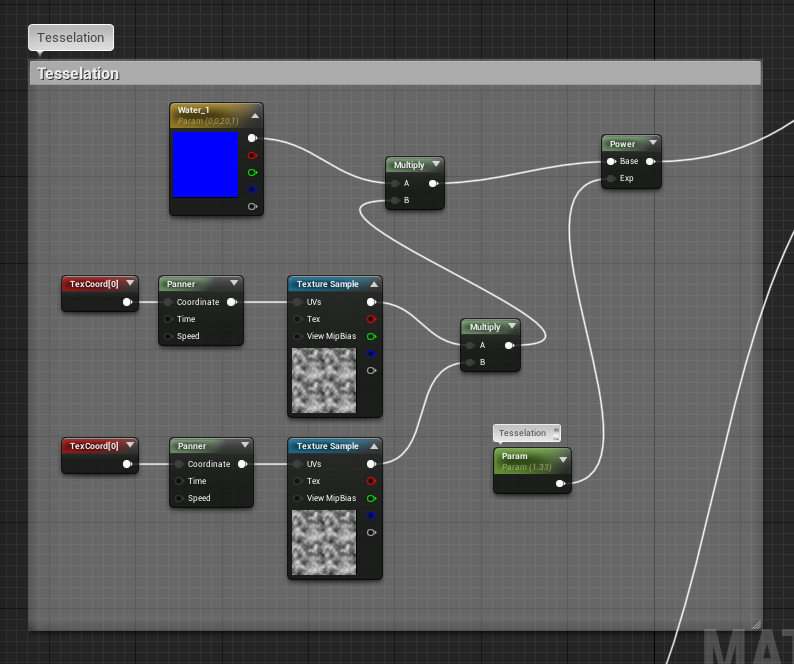 |
| Here I did a similar effect to what I did for the normal, but this time panning two textures to create surface tessellation to create silhouette detail in the waves. |
The final effect was satisfying and looked dynamic, but I noticed that when scaling the plane down, it scaled the texture tiling down with it, creating too much detail in the normal. To fix this, I added UTiling Scalar parameters that could be changed easily in the material instance settings:
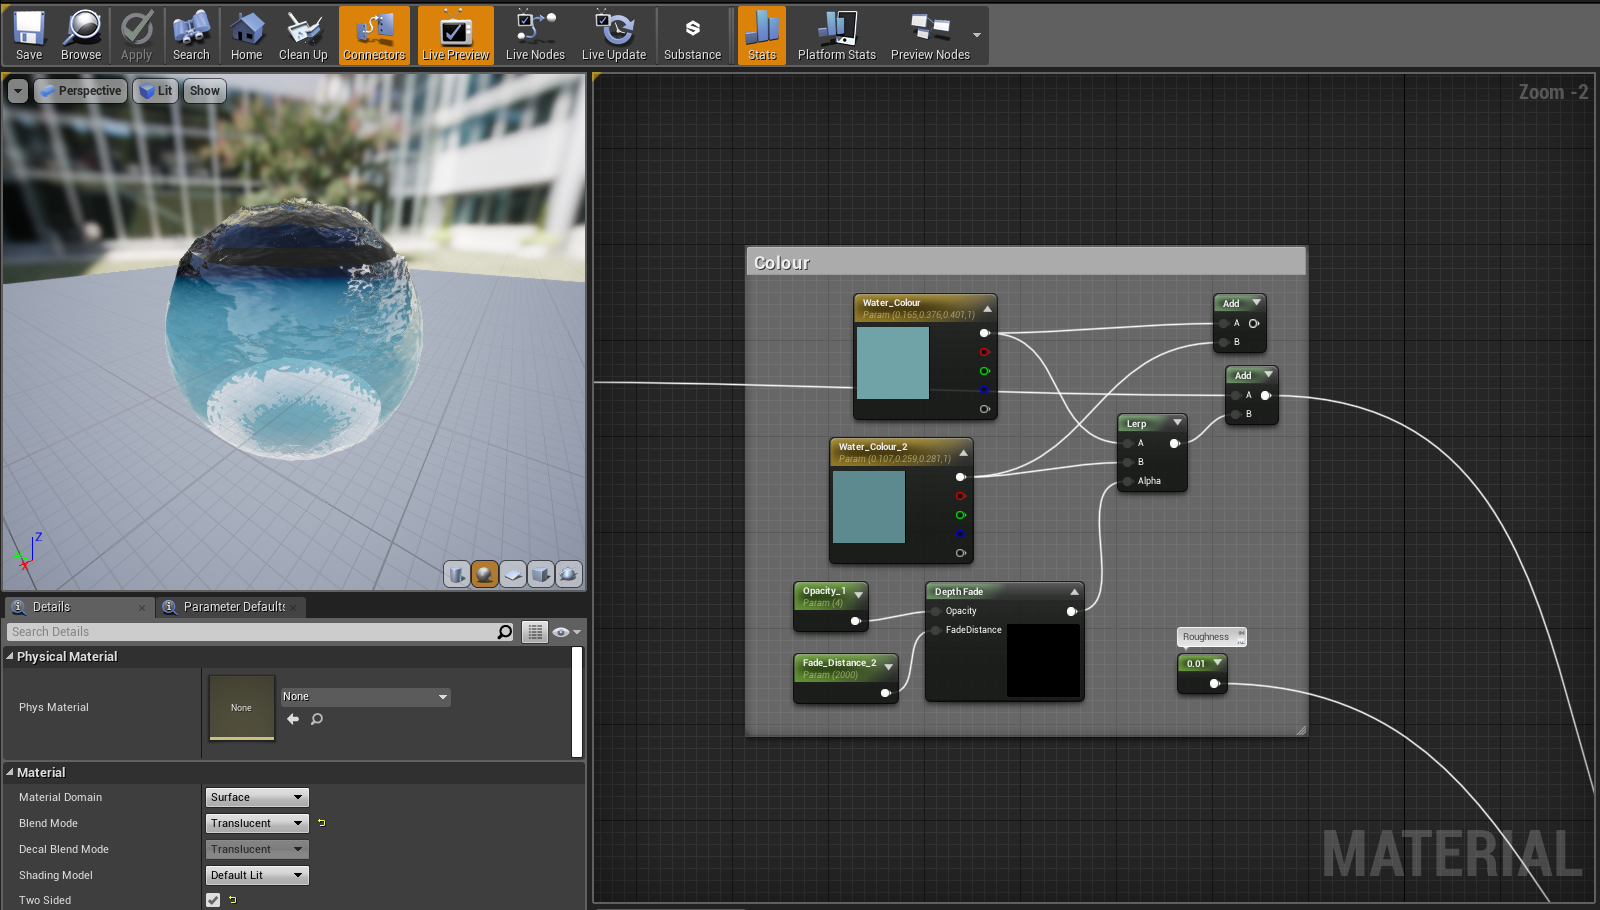 |
| Material after tweaking the colours and depth fade more |
 |
| Material as it looked at the end of monday |
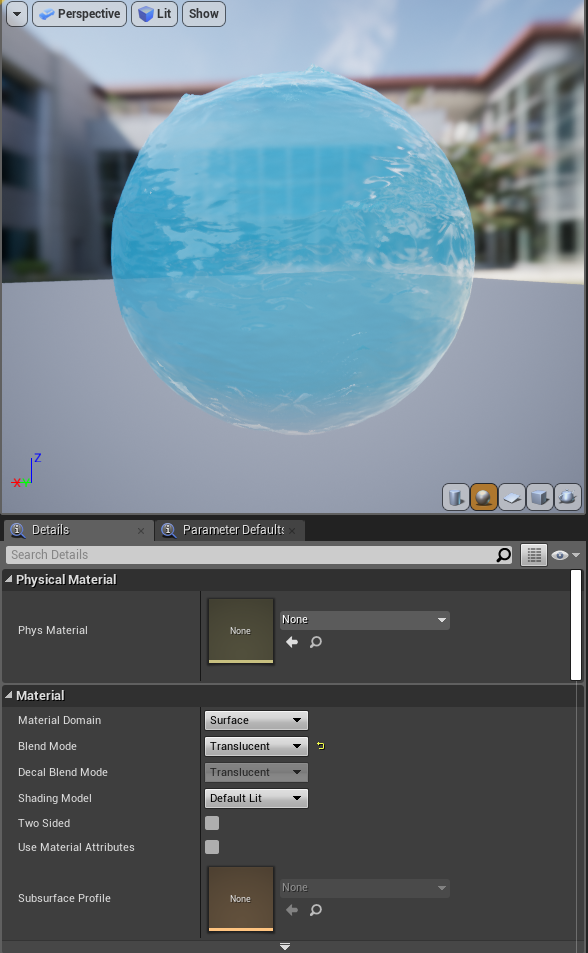
 |
| Material as it looked at the end of the week |