On Monday I got to start on the fun stuff, the vfx itself!!
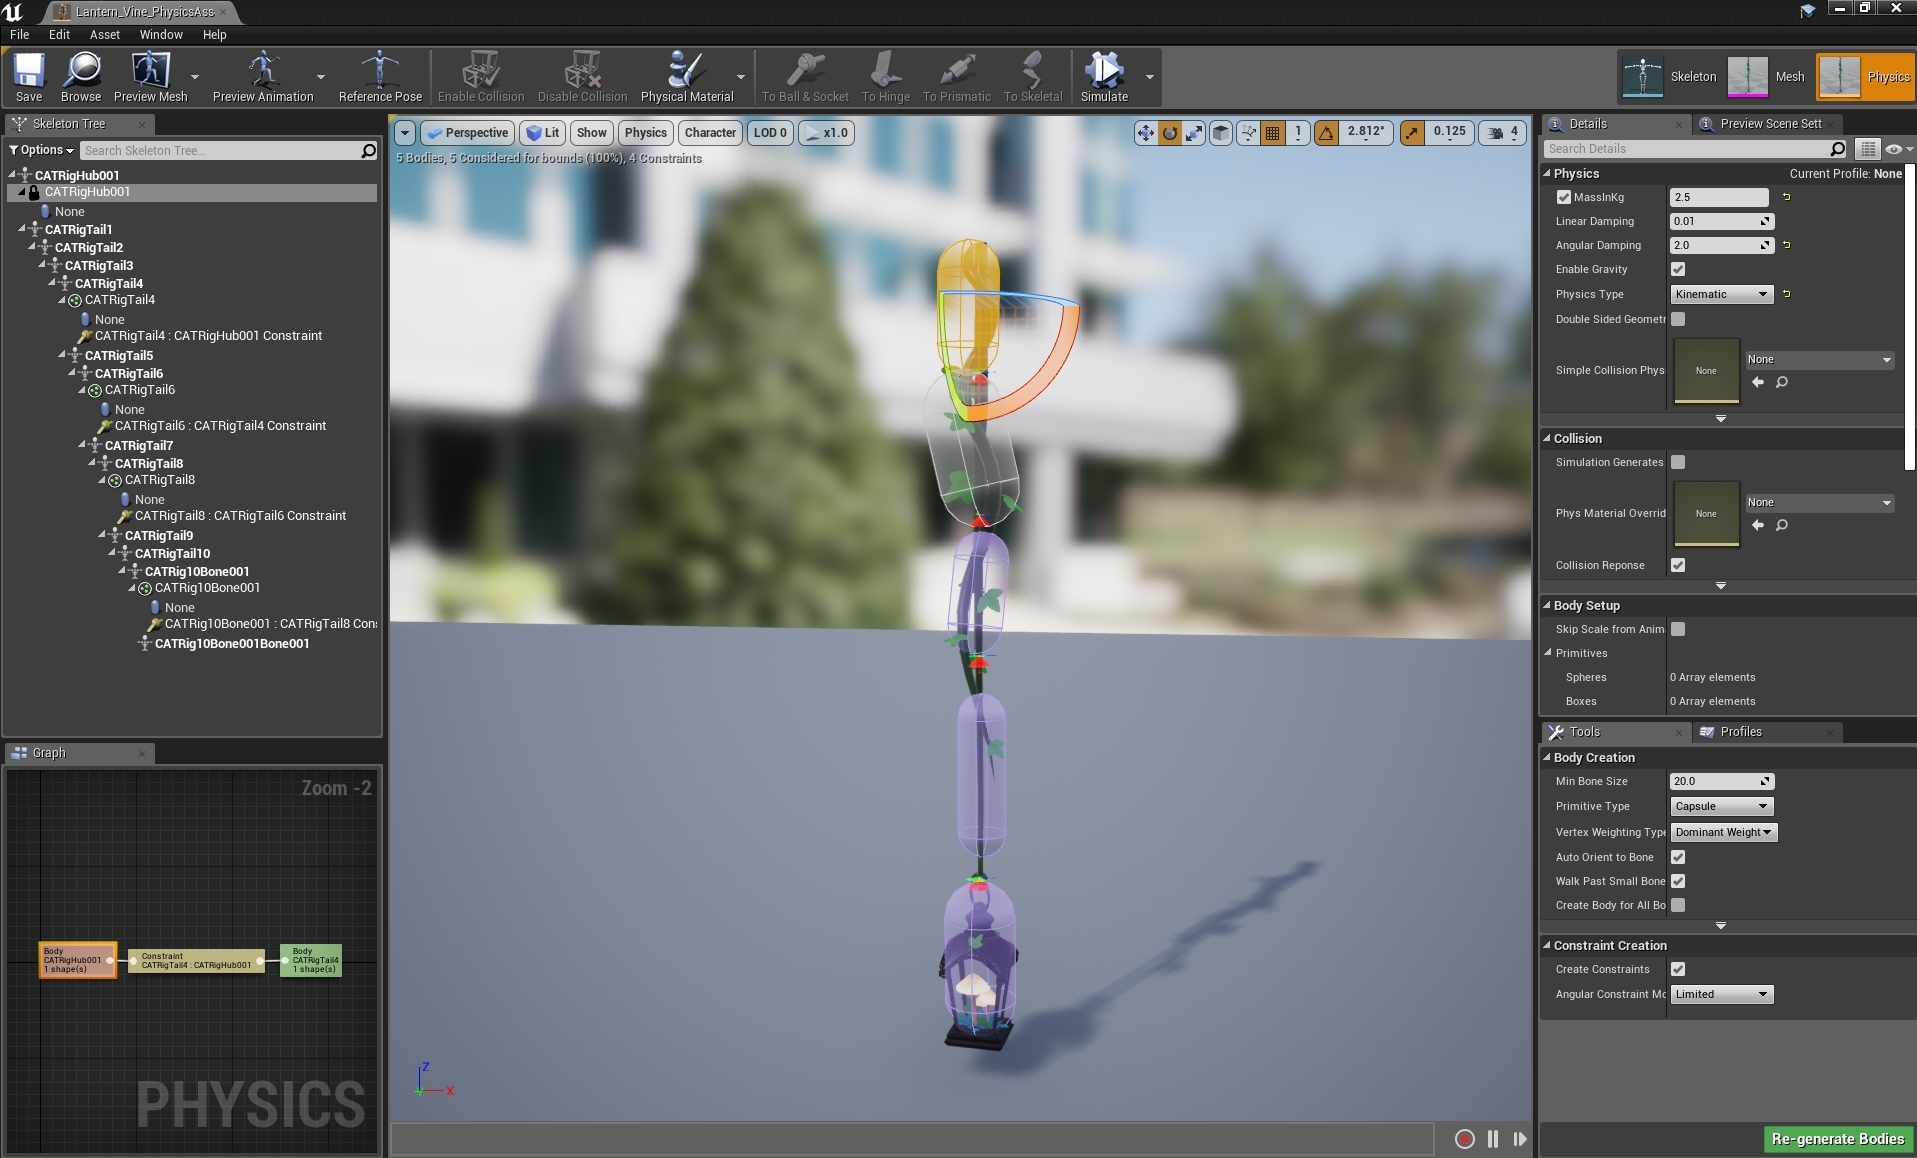
I continued following the vine lantern tutorial to create a physics asset with a kinematic top bone, so that it would stay in place and not collapse to the floor, leaving the rest of the bones to dangle in place. I then added weight and linear dampening to each bone so that it wouldn't sway too much or go crazy when in the scene. I couldn't figure out why only some of the bones had properly been imported and not others, but it didn't effect performance too much other than having the kinematic area slightly too long at the top of the vine:
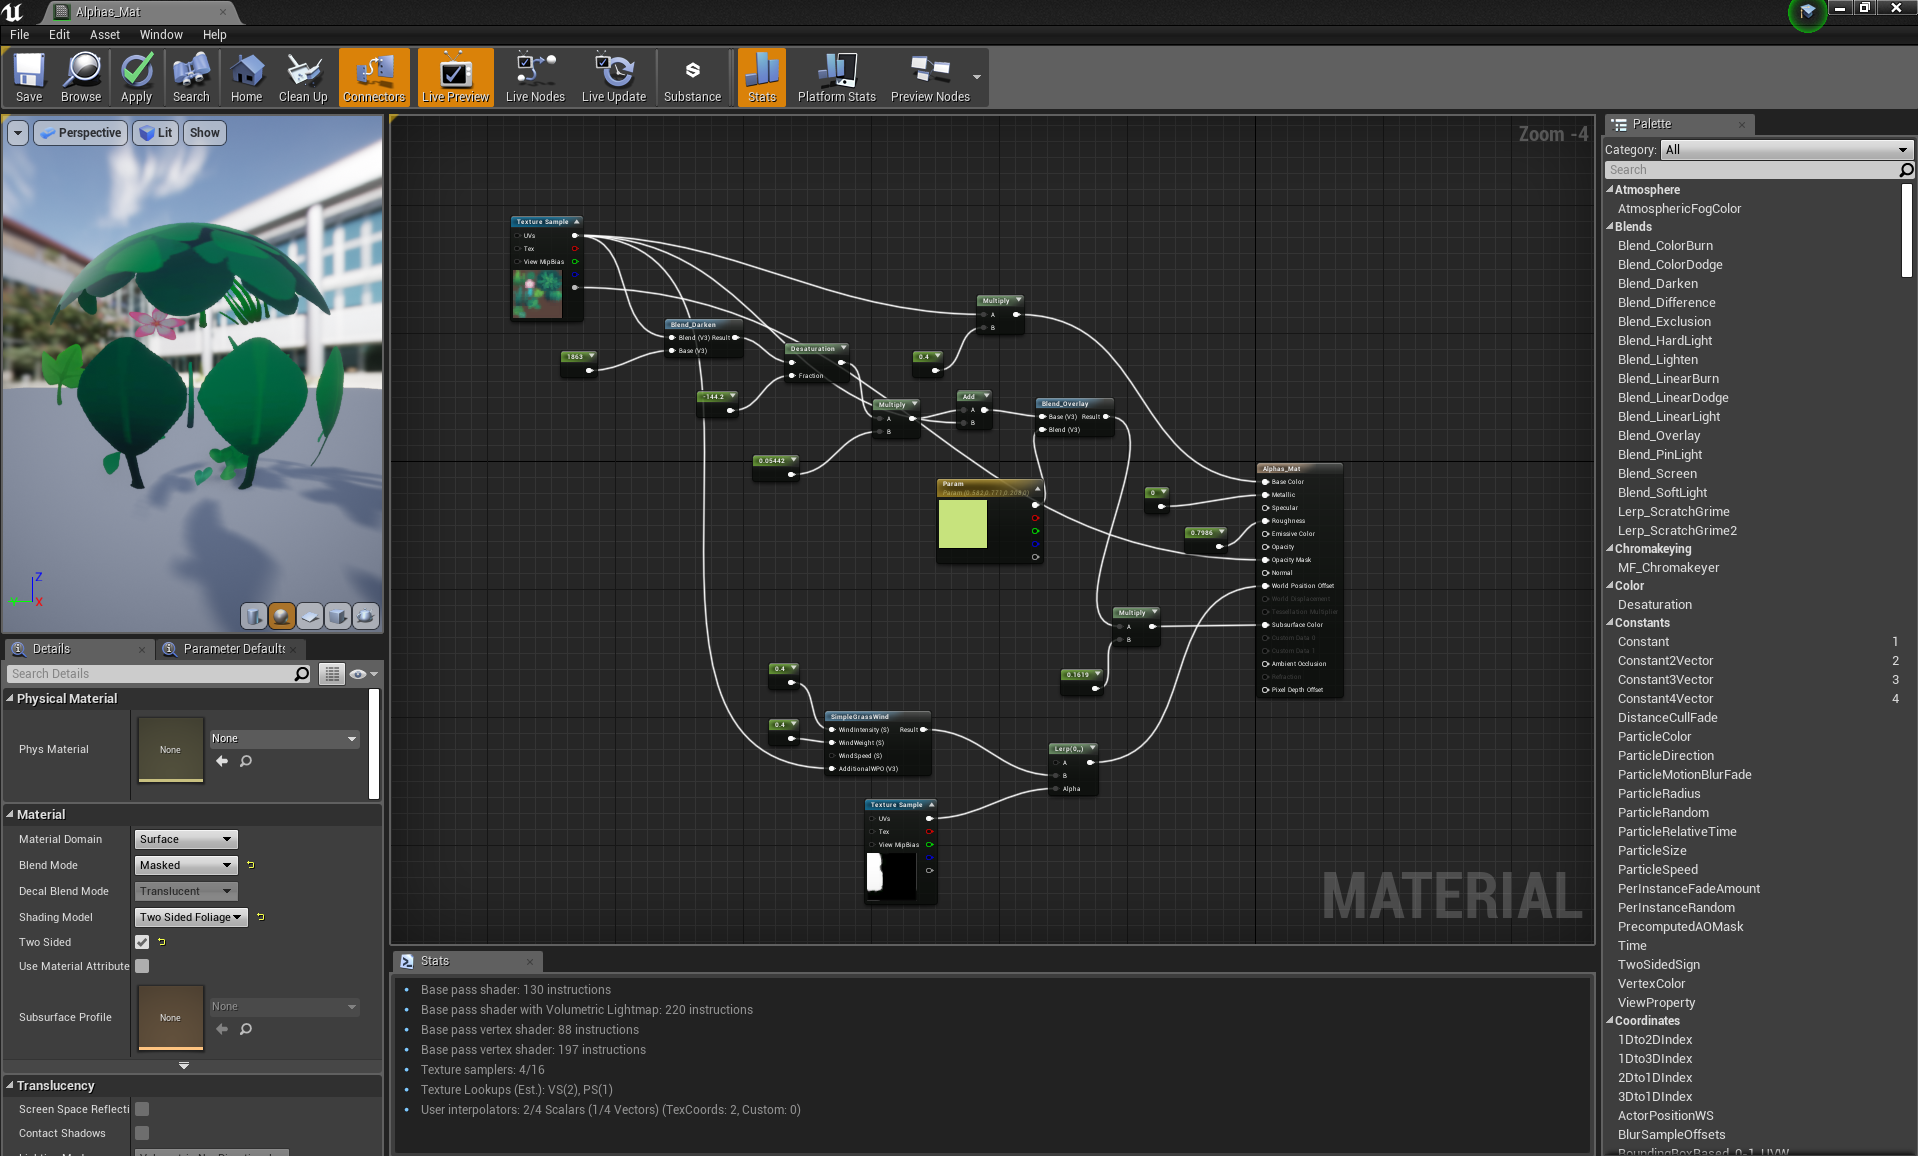
I also worked on getting a basic wind effect in the scene, using UE4's base simple grass wind with a mask. I also made sure to add subsurface to two sided foliage, but had to get creative with nodes as I realised I'd placed a pink flower on the same map as green leaves and couldn't simply slap a vector parameter colour node onto it.
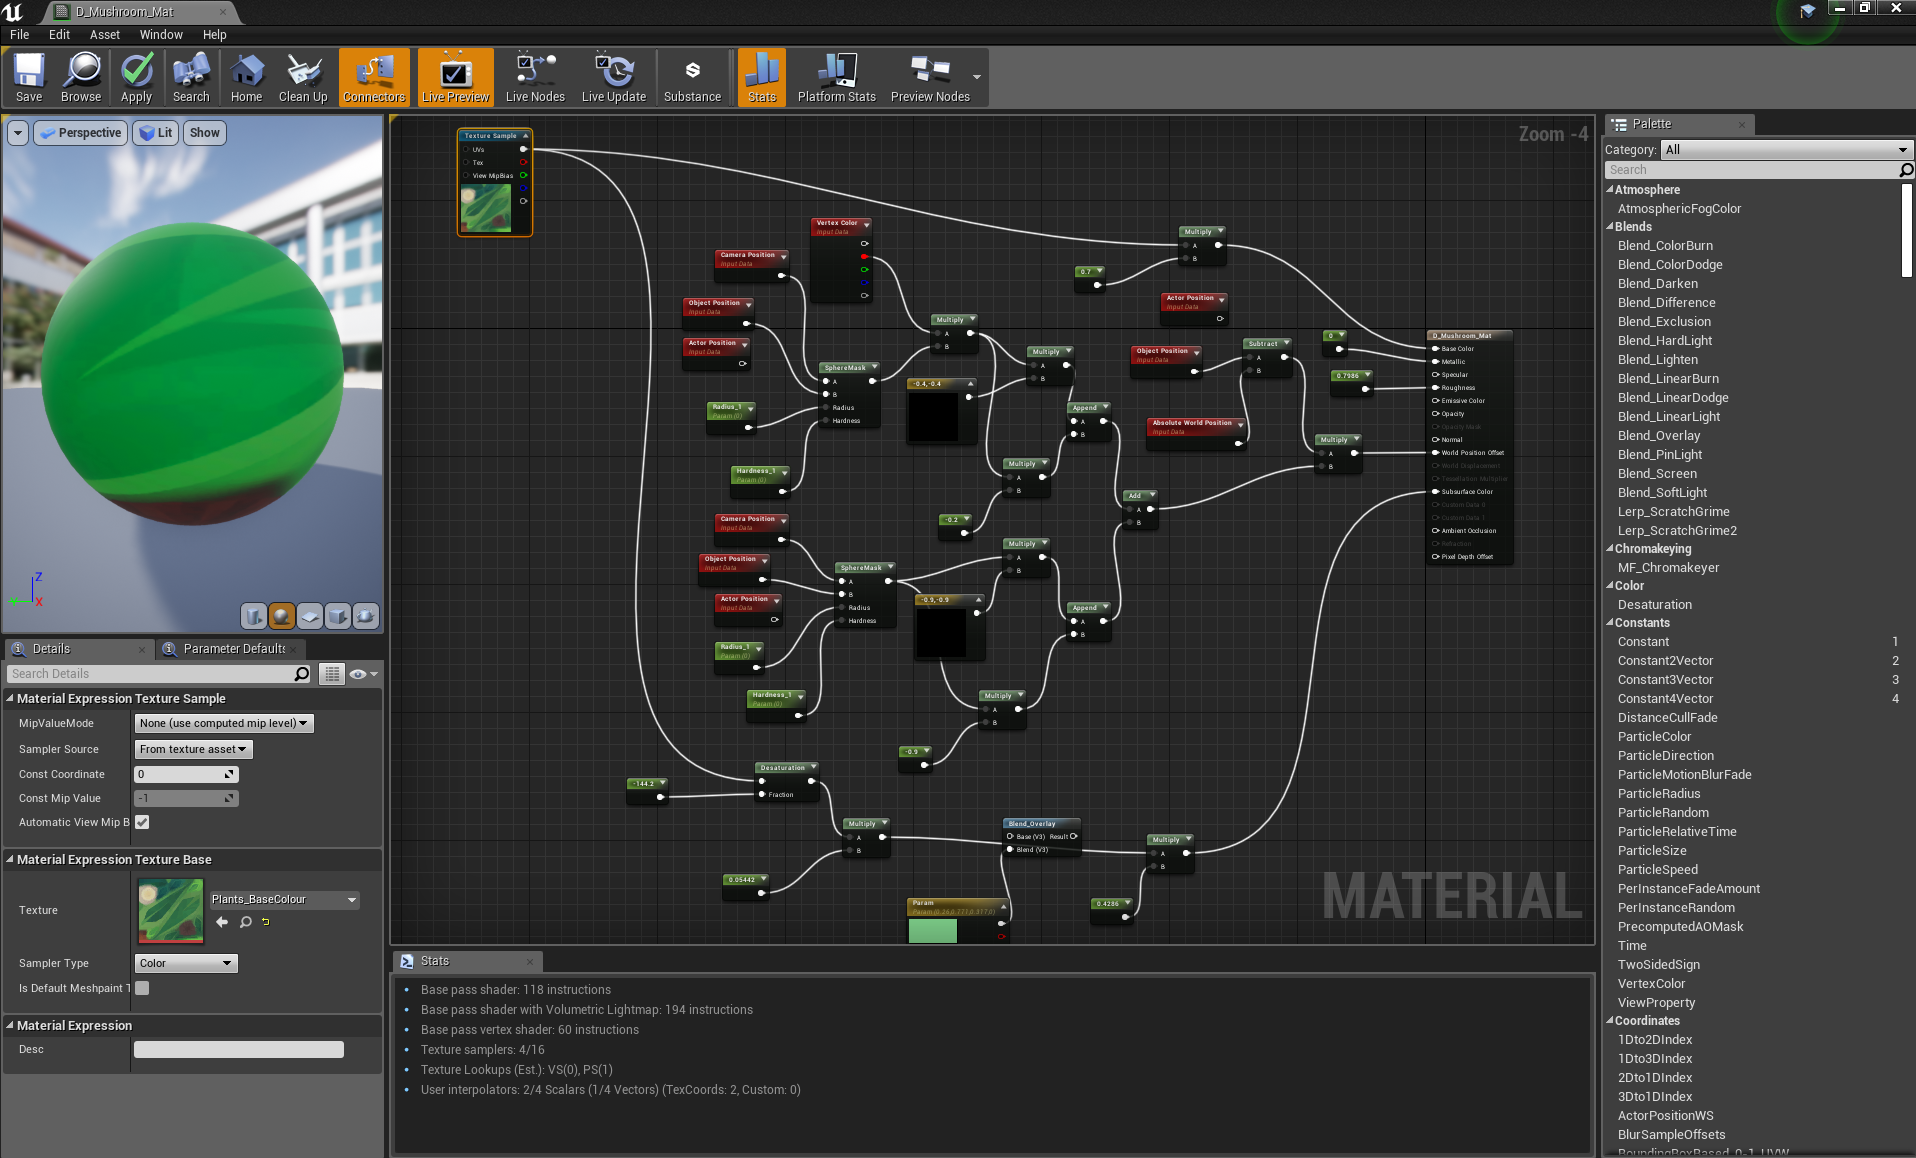
For the mushrooms on the tree, I went into the material editor and adapted this guide to create mushrooms that grow in size based on camera distance:
I had to vertex paint the stalks in UE4 itself as I didn't have the texture budget elsewhere, but it proved to be relatively easy:
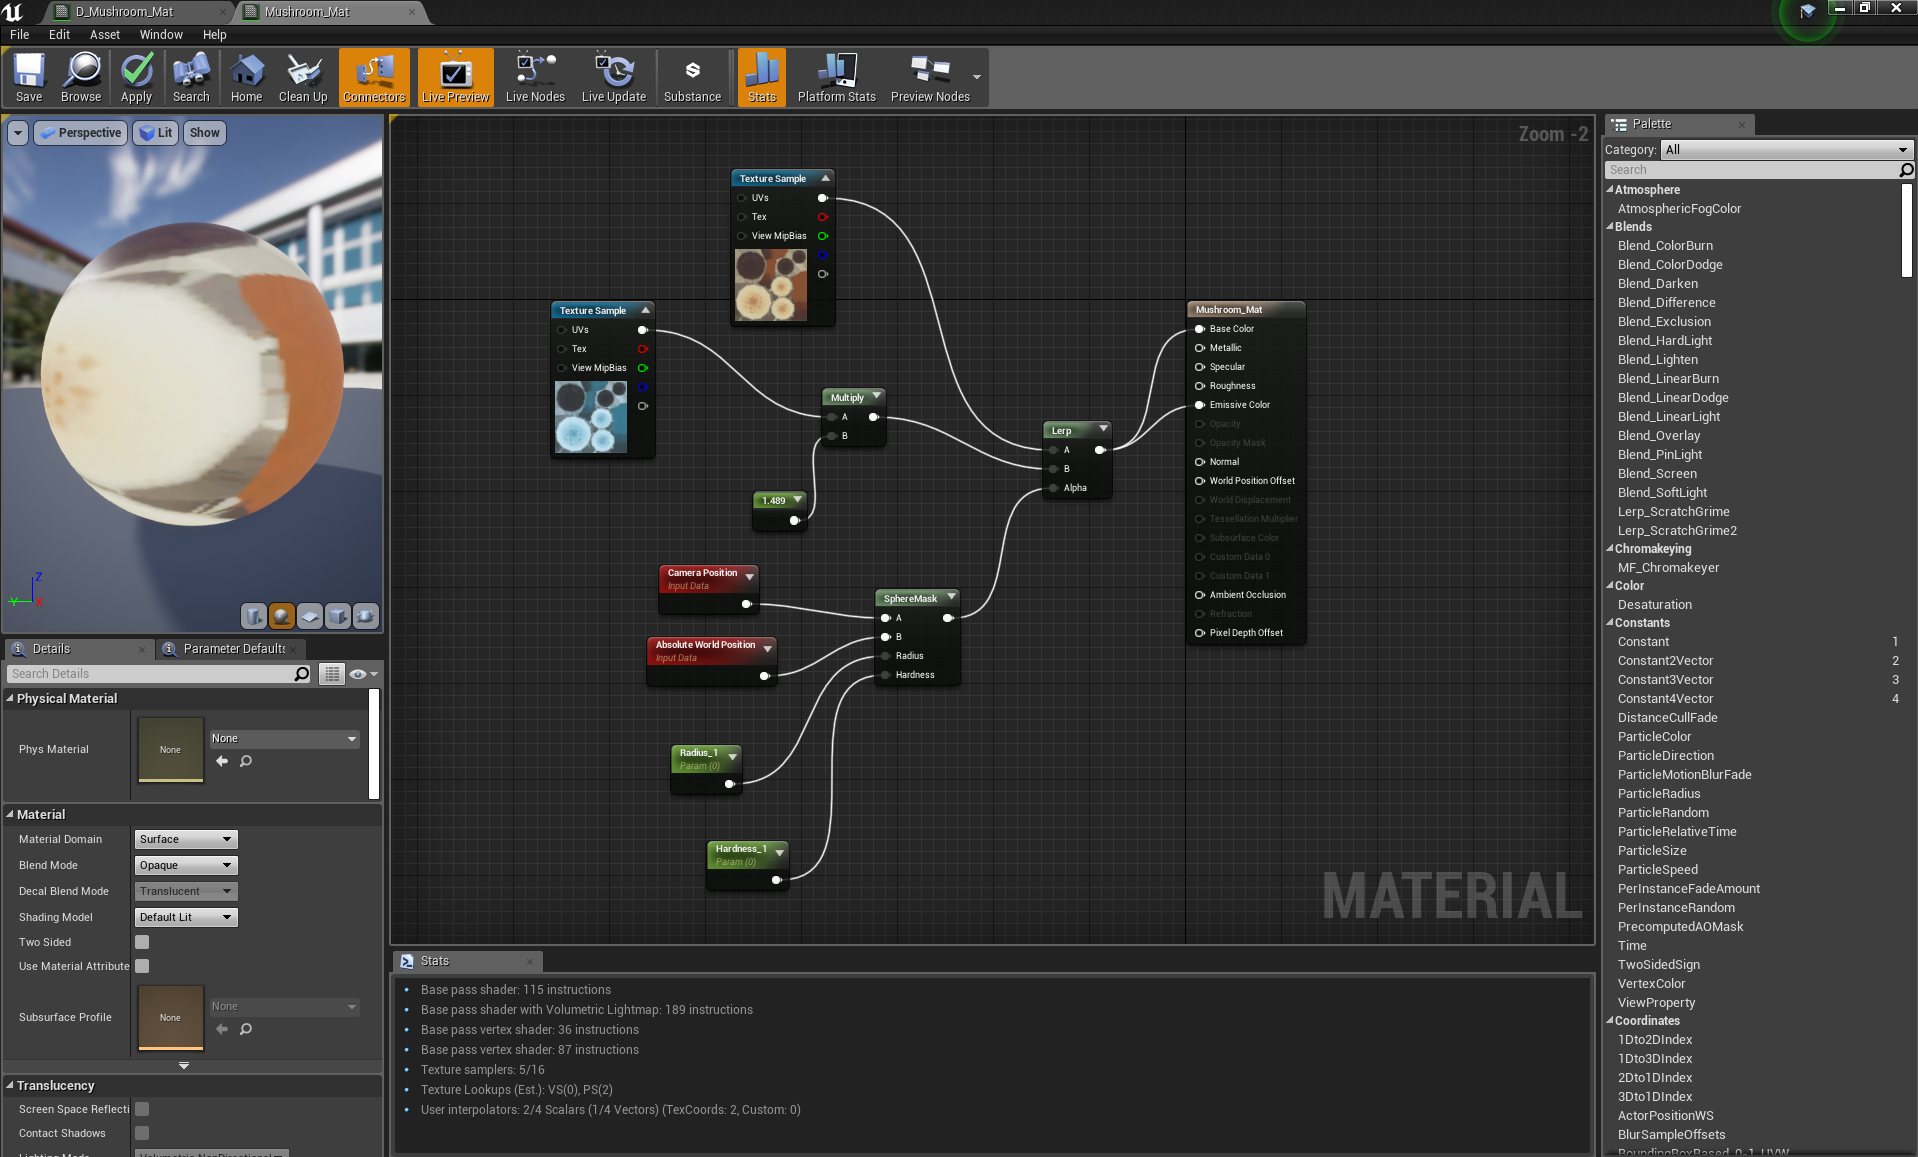
I also used the same method to fade in a colour change to the mushrooms inside the lanterns:
After this however, I decided that it wasn't good enough. I didn't want the mushrooms to simply react to the camera distance, I wanted it to have a dynamic response to the character itself. It would still react if the camera was simply rotating closer to it while the character wasn't, and that simply didn't seem immersive enough- I decided to delve into blueprints later to perfect them.
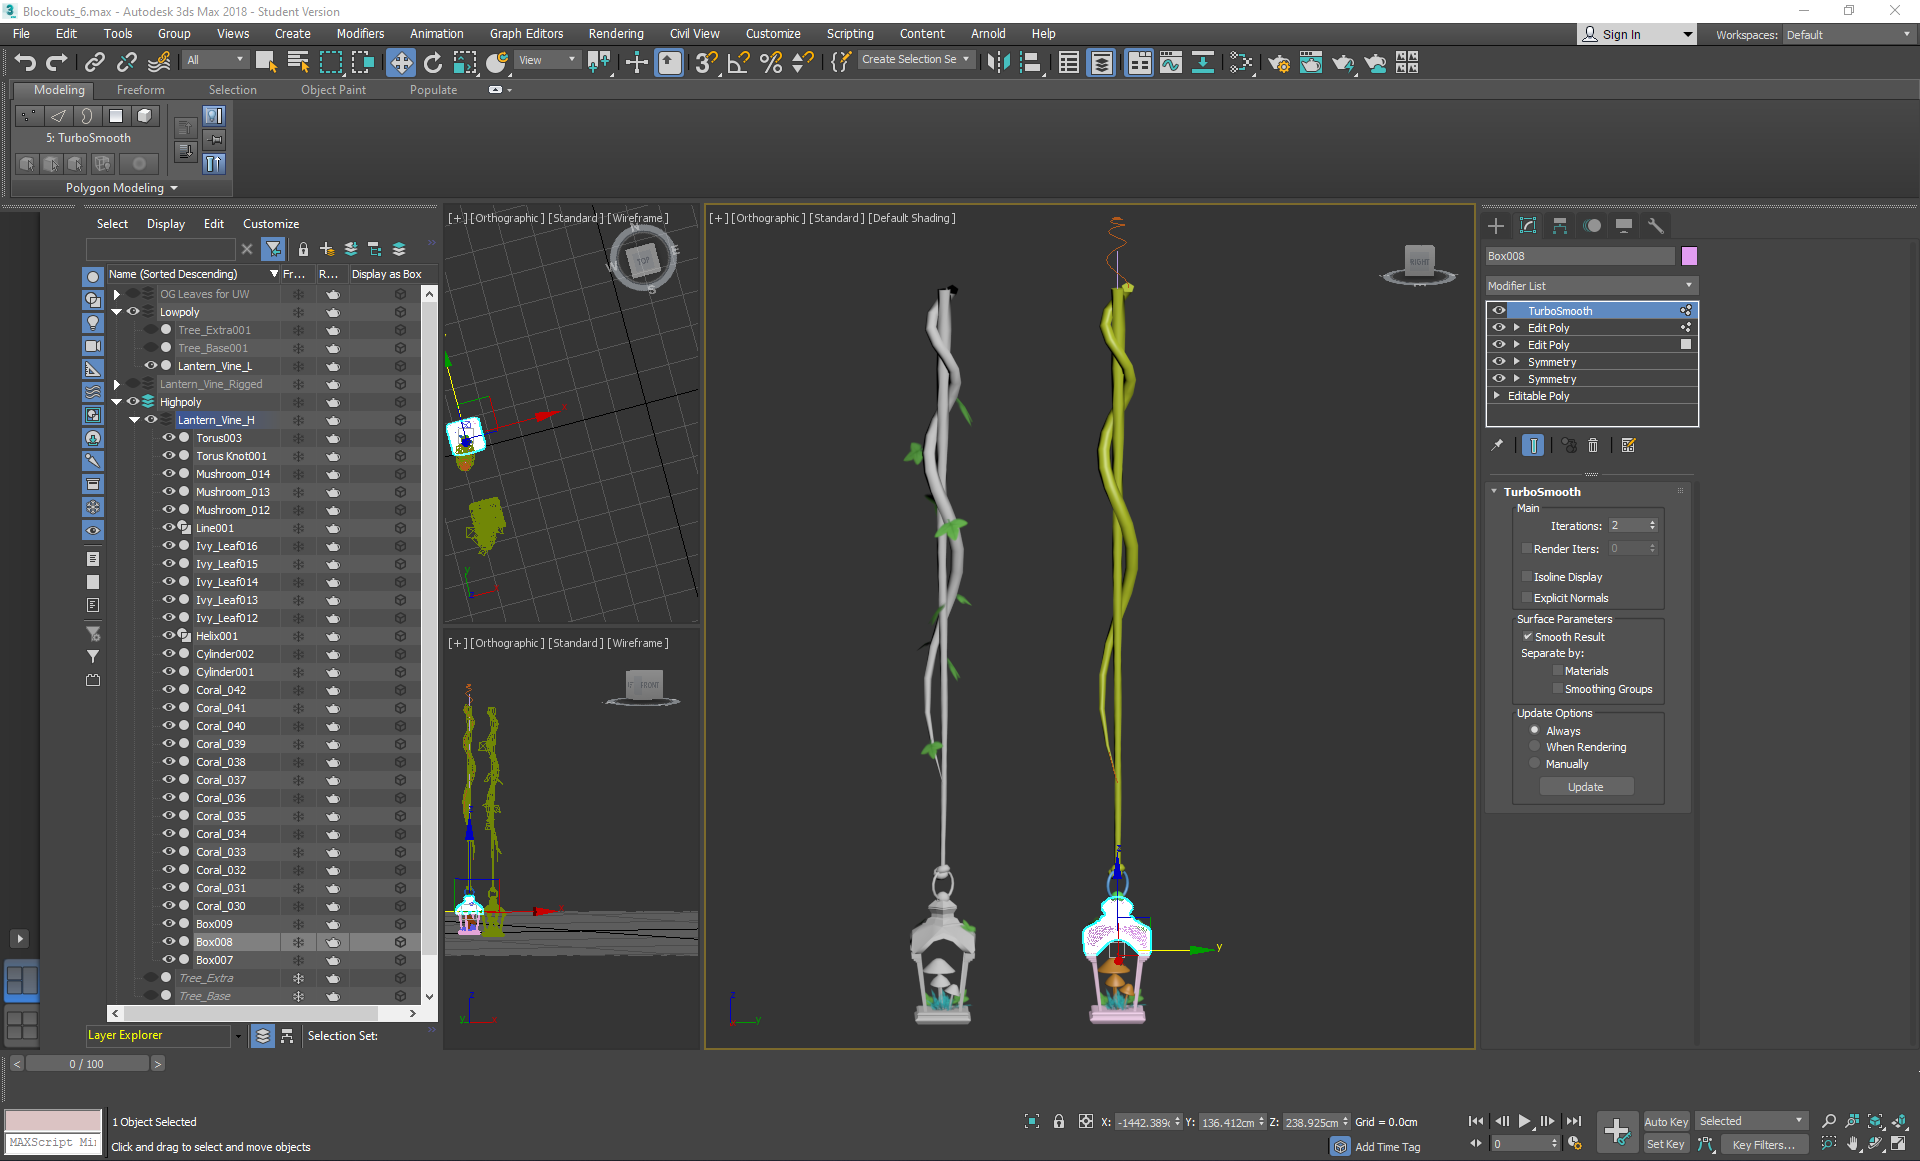
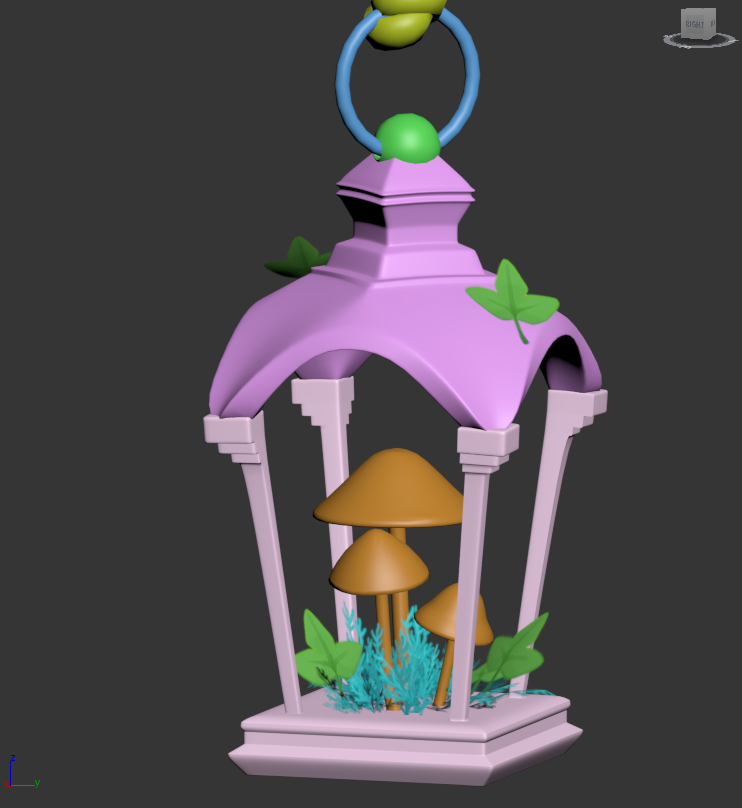
On Monday I decided to ignore the tree for a bit and to start focusing on the vine lanterns:
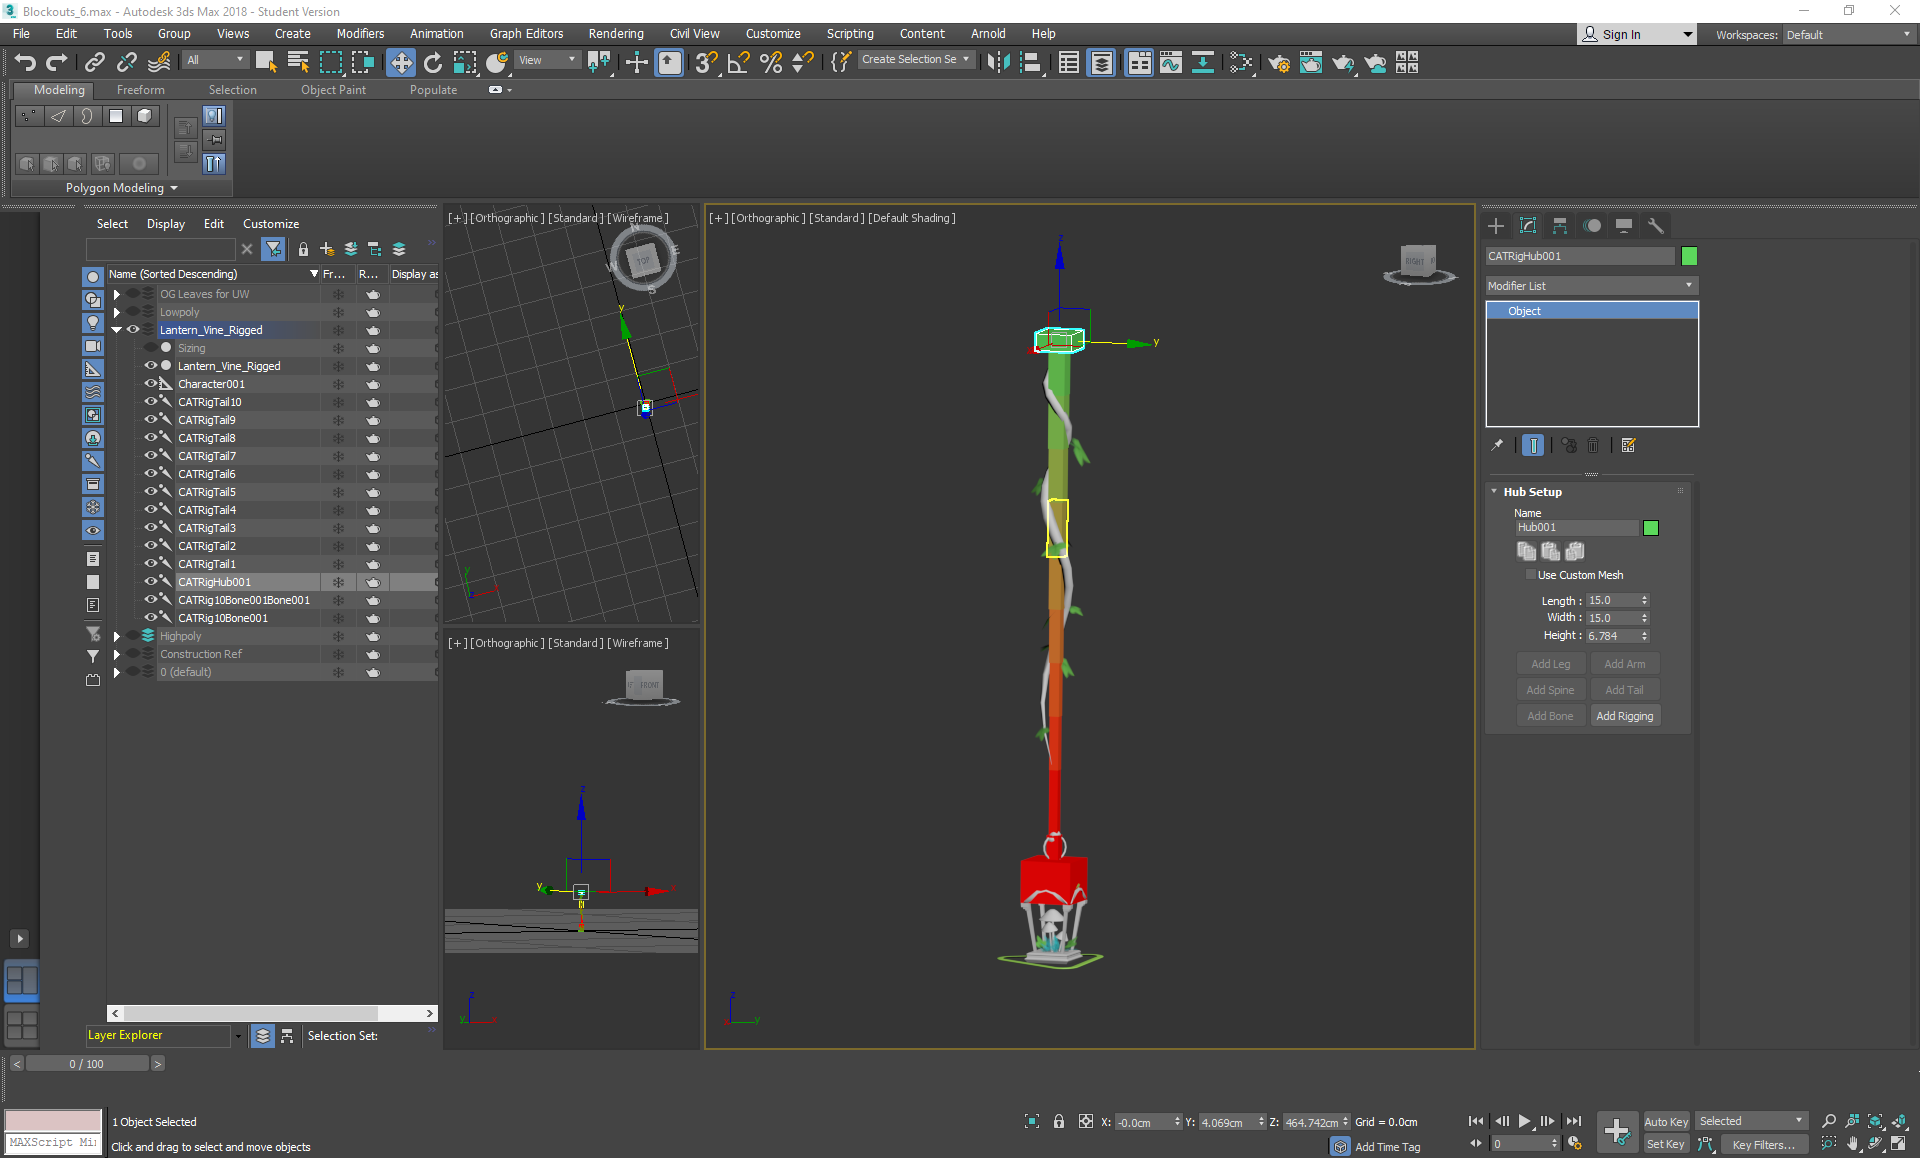
I used a lot of symmetry and box modelling to create a highpoly and lowpoly version of a lantern attached to a vine, using a line and helix splines on path deforming binding (WSM) modifiers to shape cylinders into a vine shape, then using the animation position constraint to attach leaves along them. I used a torus knot to create the knot at the end, and tried to position the metal ring so that it would come out of the knot in realistic areas rather than clipping straight through the flesh of it.
I intentionally rotated the top a little despite the reference I was using in order to create some more interest and contrast in the way that it was built:
After this was completed, I then went on to create the bones of the vine, as I wanted it to have physics within the scene.
I followed this tutorial using CAT bones and rigging it to the mesh, then went back to it later in the week to follow their guide on exporting to UE4 and implementing a light.
On Monday I once again looked through the briefs and found that a new project had been added: the Foliage VFX. I knew instantly that I wanted to do this one over any of the others and started to gather my reference images.
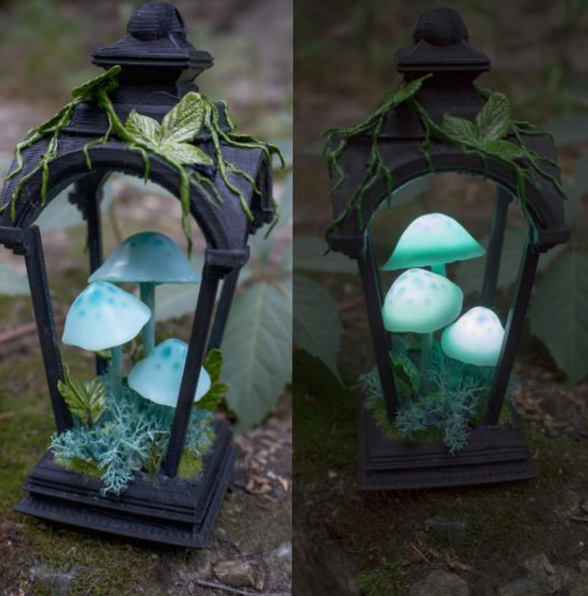
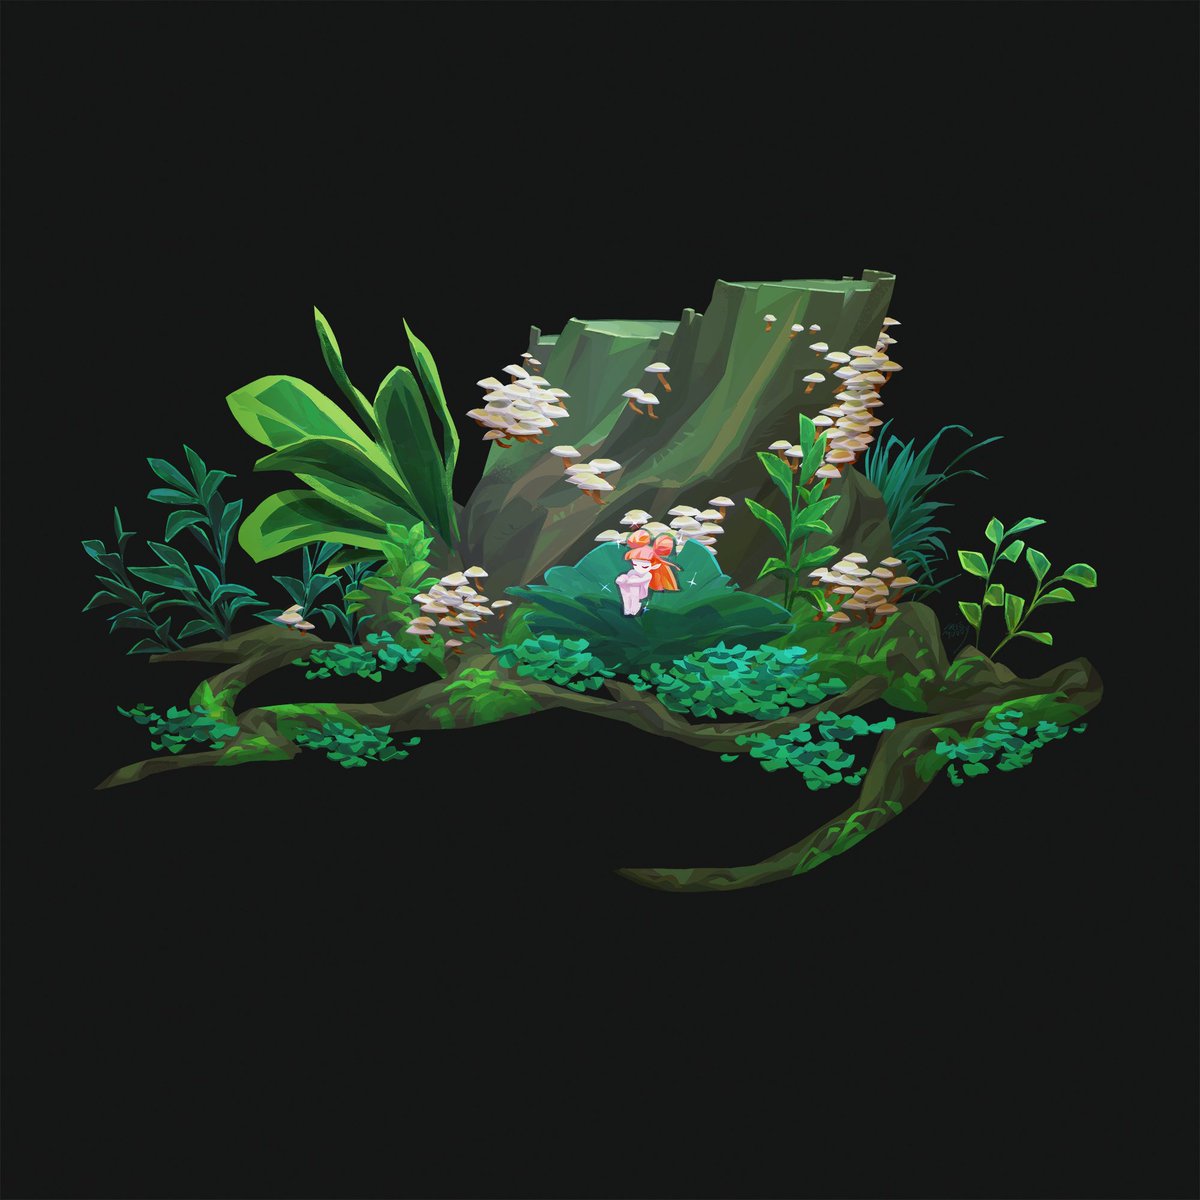
These were the two main influences that I had found on pinterest (click on images for source artists), which I wanted to combine into a small immersive tree diorama:
For this, I then gathered additional reference images:
I collected other alpha sheets to help me think about where I would place different plants and from what angle I should paint them (for example layering the tree leaves into a dome). I used photographs to understand how details left out of the concepts should be rendered for close up viewing, and included reference images from games such as breath of the wild for the way that the assets are presented in a stylised manner.
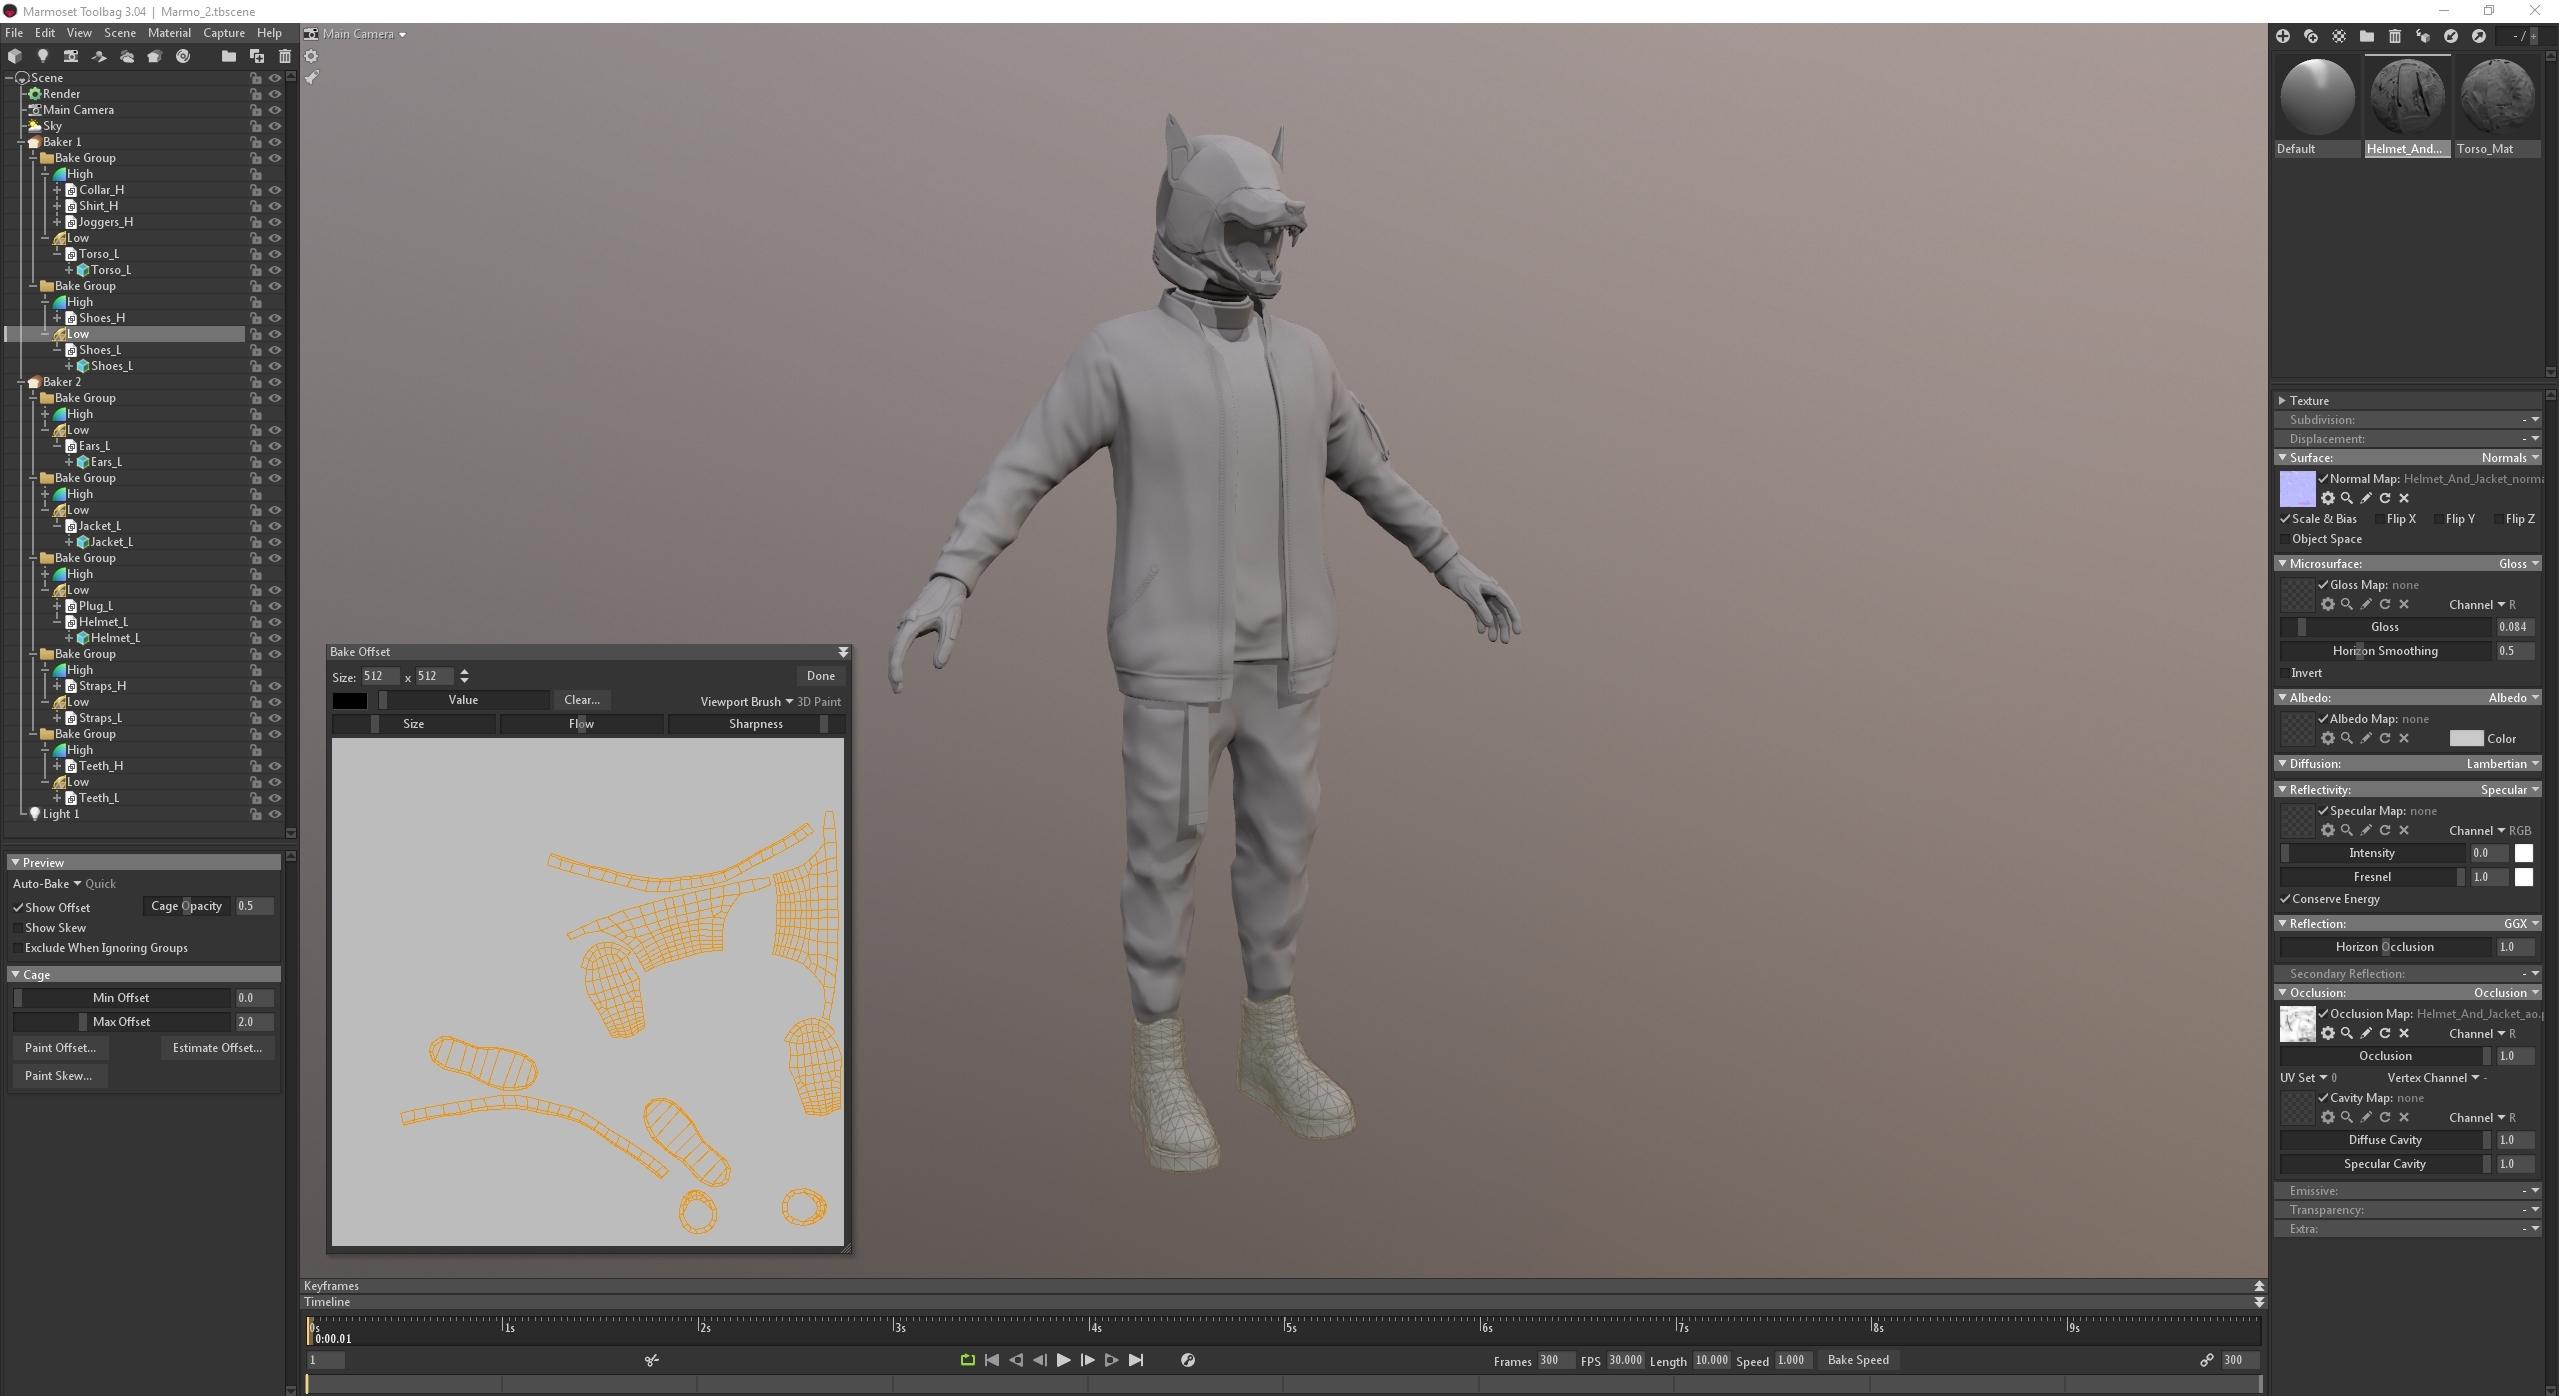
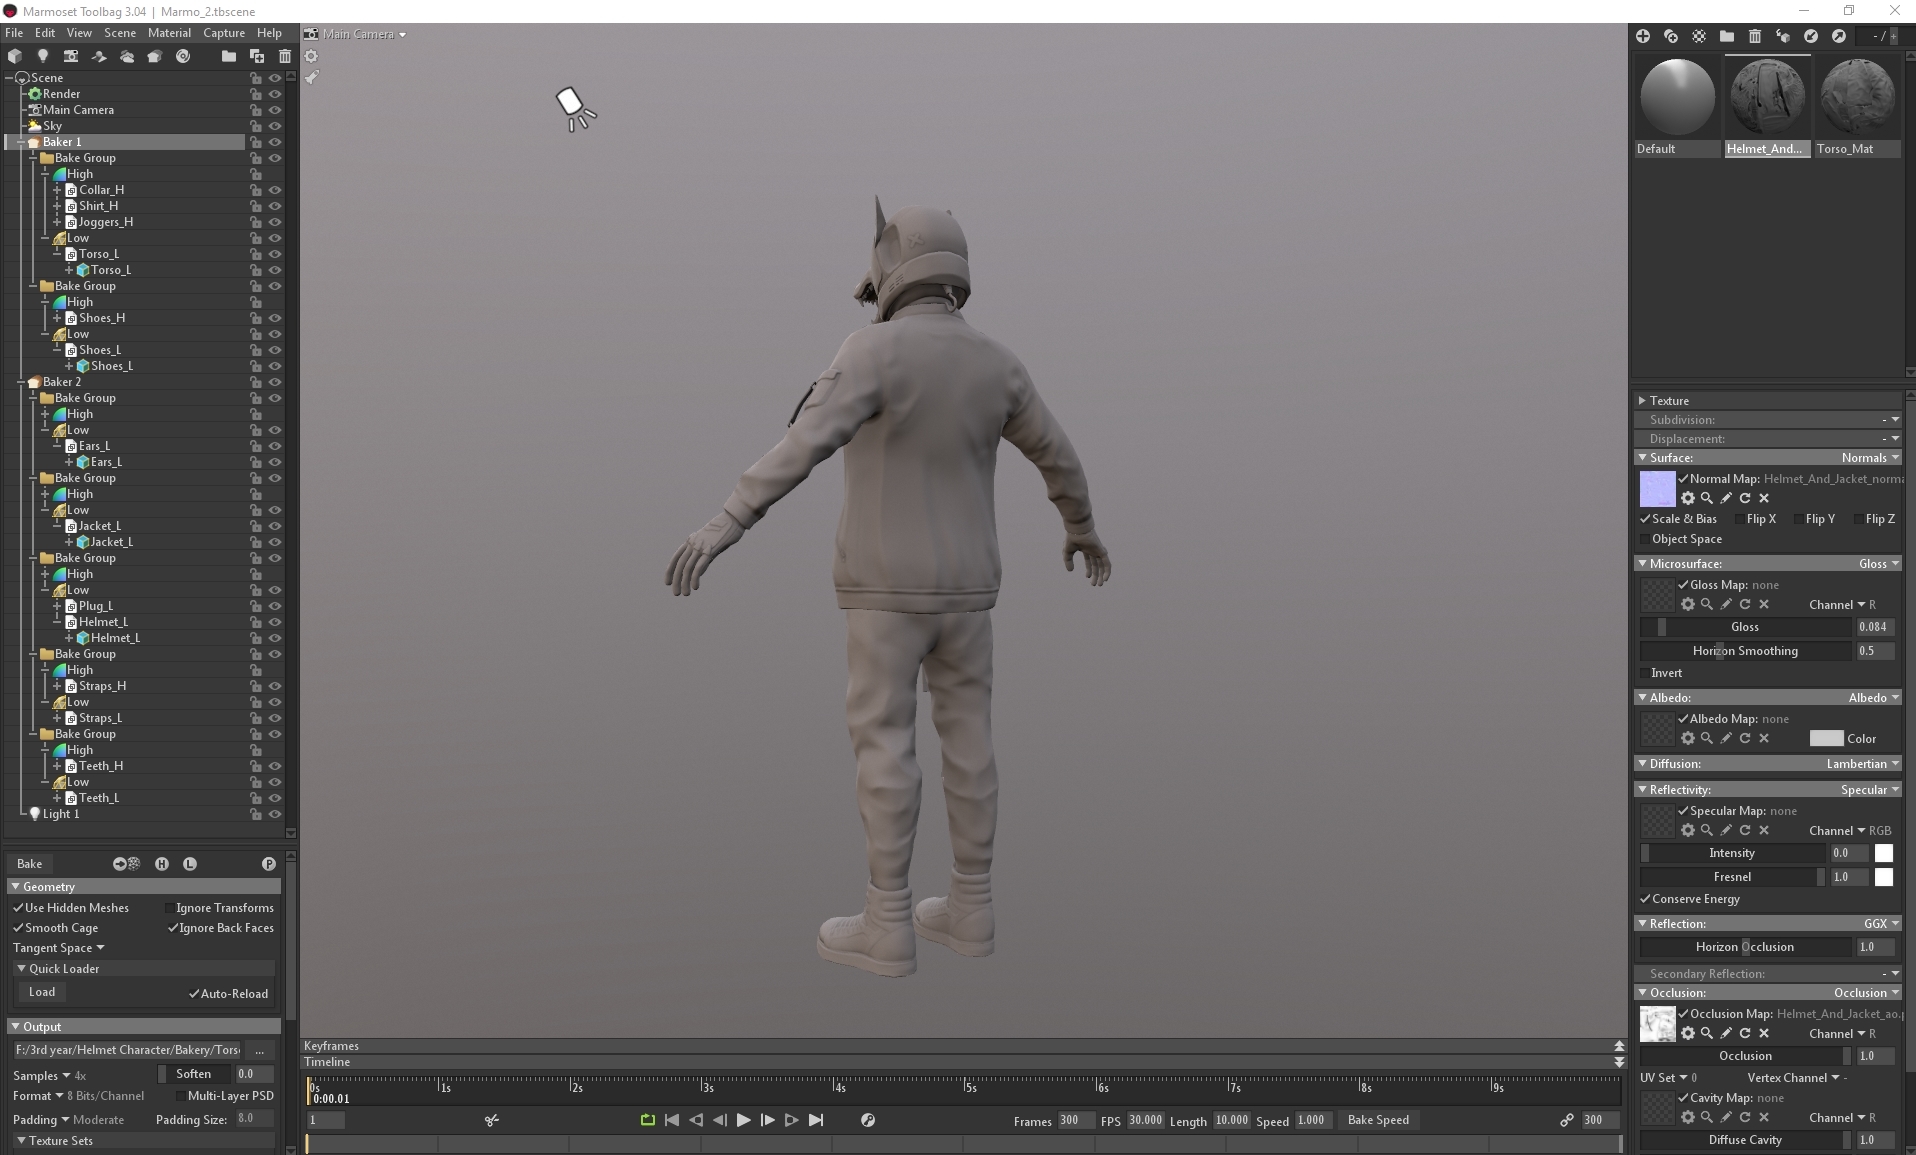
On Monday I baked the character in Marmoset using 2 separate Bakers for the 2 separate maps that I had created:
I separated each asset into individual bake groups to avoid them baking onto each other and creating errors. For any baking errors that did occur, I used the paint offset tool to paint on a larger or smaller cage, and for any errors that couldn't be fixed I went itno photoshop and fixed manually using the spot heal brush. With the baker I produced normal and normal (object) maps, ao maps as well as curve maps to be used later in substance painter.
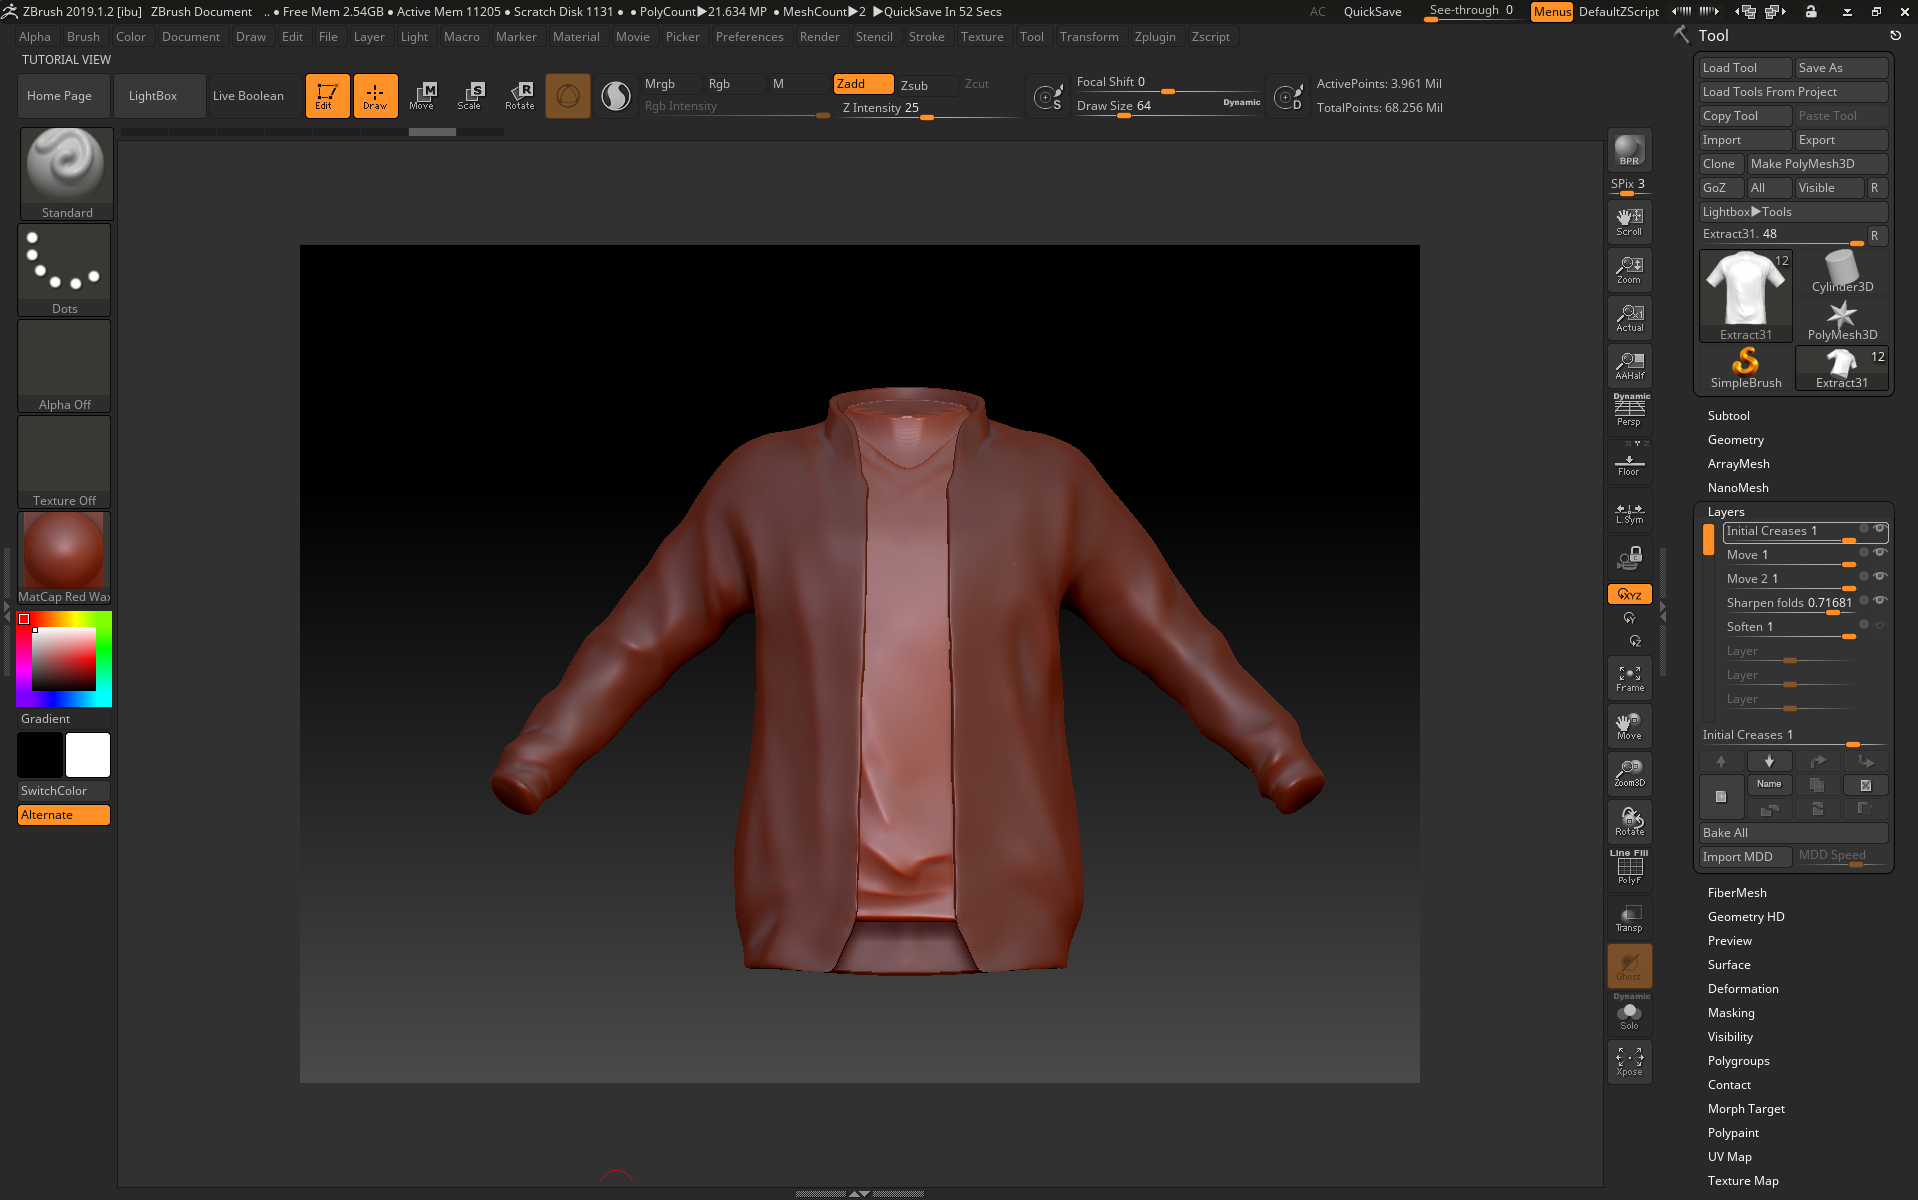
On Monday, I started working on the jacket and shirt in zbrush:
I started with the shirt by extracting it from the torso mesh, then using hpolish on both zadd and zsub modes to flatten out the shirt where it would be hanging off of the torso rather than clinging to it.
I used damstandard on zadd and zsub to create the folds, pinching and softening where needed. I also used the move tool to adjust how the shirt hangs from the body, and using the trim rect/lasso tool to close the holes on the sleeves and trunk of the clothes to make it easier for me to flatten and manipulate the edges later when combining them with the rest of the sculpt.
For the collar, I masked off an area, gradient-ed it a little bit and then used the move tool to drag it upwards, doing the same with the zip areas of the jacket. I then used hpolish to neaten up the edges, switching between symmetry and non symmetry mode so that I could adjust the structure of the jacket while still being able to sculpt in some asymmetrical folds (on a low subdivision layer).
I continued sculpting the shoes on monday, getting further into the details of the sculpt.
Once again, I used layers to add stitching and other surface details. To optimize this, I subdivided before entering layer mode so that I would still be able to access my lower subdivisions while sculpting. I used the IMM curve strap to make a blockout of one half of the laces, then carefully moved them into place with the move elastic tool and pinch.
For these shoes, I mostly referenced these images:
I used Monday to gather up reference material for the sculpt and to find the concept I wanted to use. I created a pureref file based around a concept by Catlesstail on twitter:
As the concept was a helmeted character and the head on the concept seemed to be a little too small to fit a human head inside, I decided to adapt the proportions a little to fit the brief.
Now that the concept had been decided upon, I went on a research binge to find as much real life reference as possible to strengthen the concept, especially in terms of materials.
I paid particular attention to obtaining multiple views of different kinds of clothes so that I could combine them into a cohesive sculpt.
On Monday I continued modelling more of the assets to go with the VFX. I started on the water pipe and used turbosmooth to increase the poly count, making sure to keep the game-ready lowpoly version on hand to bake onto later:
Once this task was completed, I moved onto zbrushing the planks for the wood. I decided to use zbrush for the more organic materials in the scene, while the water pump would only be modeled in 3ds max.
I exported my bucket as a .OBJ with the zbrush preset so that when I loaded it into zbrush it could be split into subtools based on groups, making the sculpt neater:
Disclaimer: For the cracks, slashes and metal texture I used the Orb_Slah_Curve, Orb_Slash_clean, Orb_Flatten_EdgeProtect and Orb_hammeredMetal brushes from the zbrush orb brush pack. The remainder was sculpted using hpolish, trim dynamic, pinch, move, nudge, dam standard, slash and smooth tools.
On the second week I started working on the waterfall aspect of the water feature and how it would react to the pool of water beneath it.
Monday:
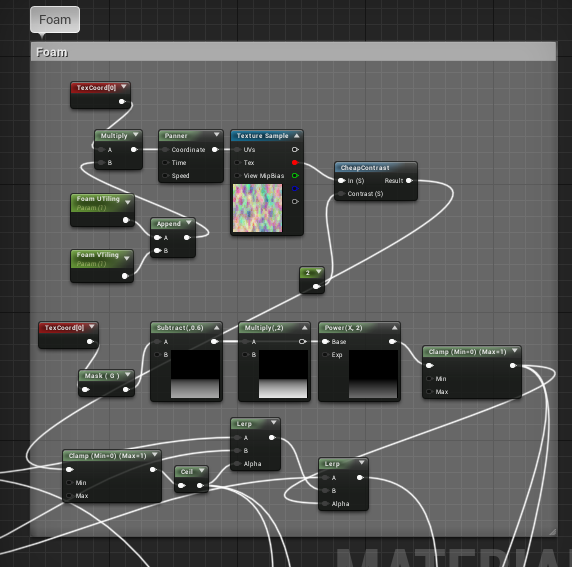
On Monday I worked on making a waterfall shader that would match with the shader I made for the rest of the water. For this, I combined nodes from my prior shader with the panning and other aspects I learnt from this tutorial as well as a toned down foam effect I learnt from this tutorial, without the displacement and only using the colour/opacity masking.
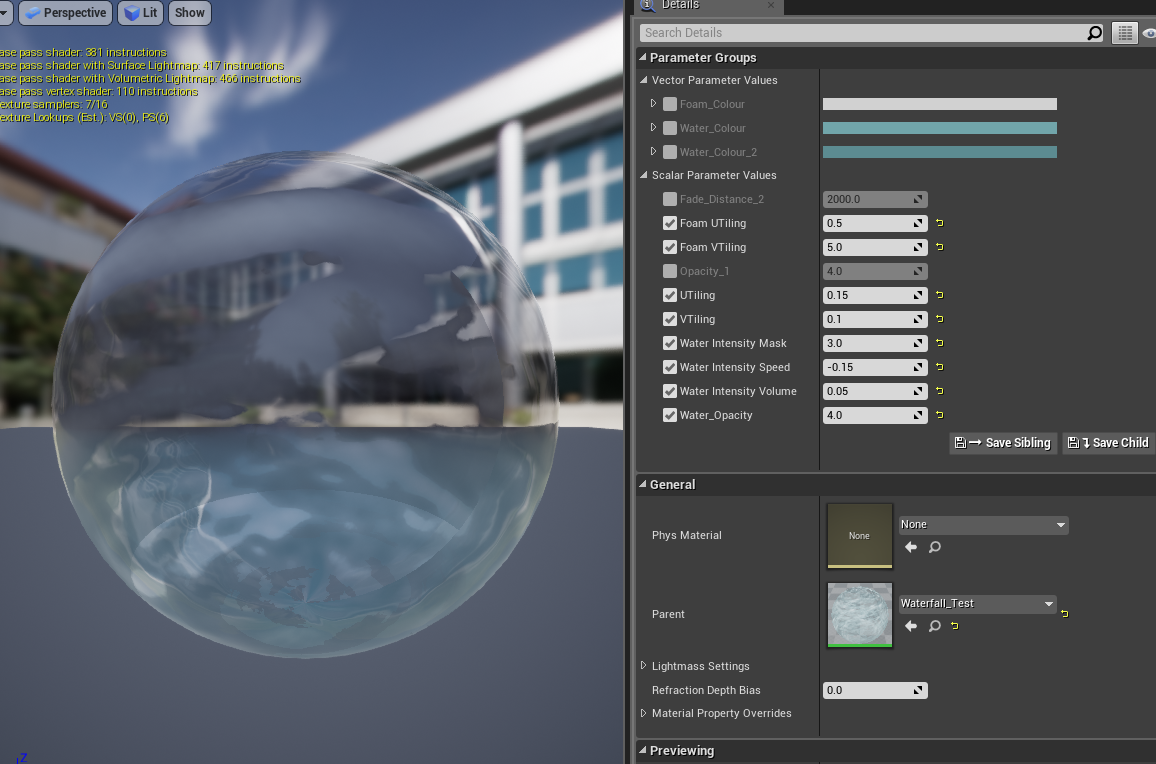
I then made a instance of this to adjust the speed, opacity and UV Tiling to fit the scale and intensity of water that I wanted to place on my test mesh, which was a simple stretched plane that I grabbed from UE4:
I decided to not spend too long trying to adjust the colour, as I thought it would be a waste of valuable time if I had to change it later when combining my final assets.
For this water shader, I mainly referenced the following images for the colour and opacity:
I noticed that I particularly enjoyed making particle effects last year and have always wanted to know how water is made in engine, so this was the perfect brief for me.
Monday:
On Monday I spent the majority of the day collecting reference images on pinterest and finding as many tutorials as possible to make the different elements required of me by the brief. This included shader guides, particle effect guides and blueprint guides. I wanted to create water vfx that acts realistically in its waves and ripples, but still has a stylised tone to it, much like the water seen in RIME and Sea of Thieves:
I collected image and video reference of both stylised and realistic water in different situations: still water, ocean water, pond water, ripples caused by floating items and droplets of water disturbing the surface. I wanted to create a stylised garden pond with plants floating on the top, with a water droplet particle effect trickling down from above, causing a ripple and splash effect on impact.
At the end of the day, I used this written guide and following videos to create my water shader.
I studied and replicated the nodes shared by Olivier Cannone to understand the effect each part had on the material, then changed elements of it to achieve the effect I desired.
This breakdown was particularly useful to figure out what an industry standard material would be built to look and act like, which helped me to create a cheap shader that would be game ready.
This guide was also helpful when I had issues following the written guide, and helped me to understand the function and purpose of all of the nodes I was using. This in turn made it easier for me to change them to my own needs in line with what I wanted out of the shader without as much unknown error.
This created an adequate effect, but I may scrap or change it later if it doesn't fit with the clean pond water image.
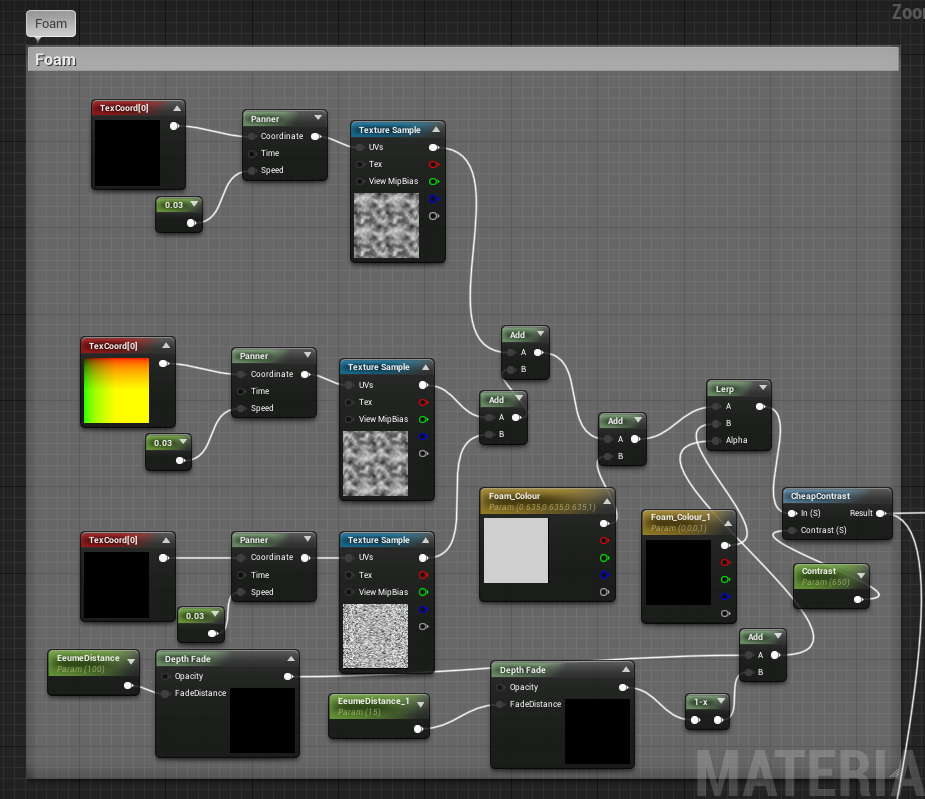
I used TexCoord nodes to change the tiling size of the textures I created from photoshop cloud and noise filters, then the panner node was used to scroll the textures in different directions to emulate movement.
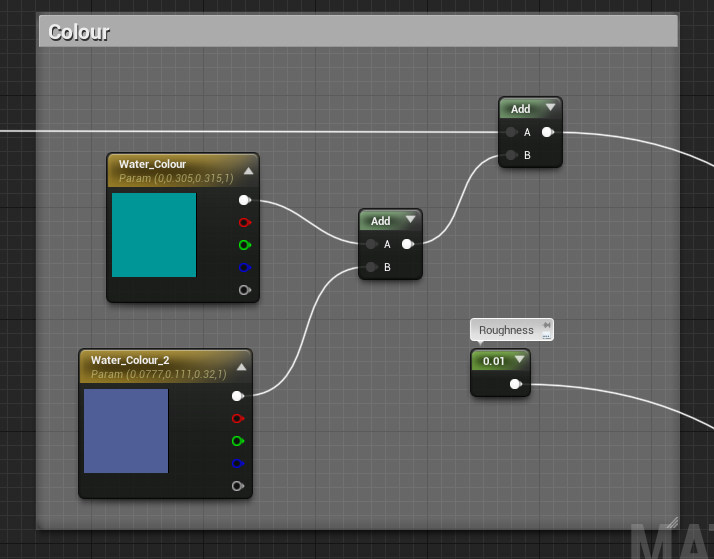
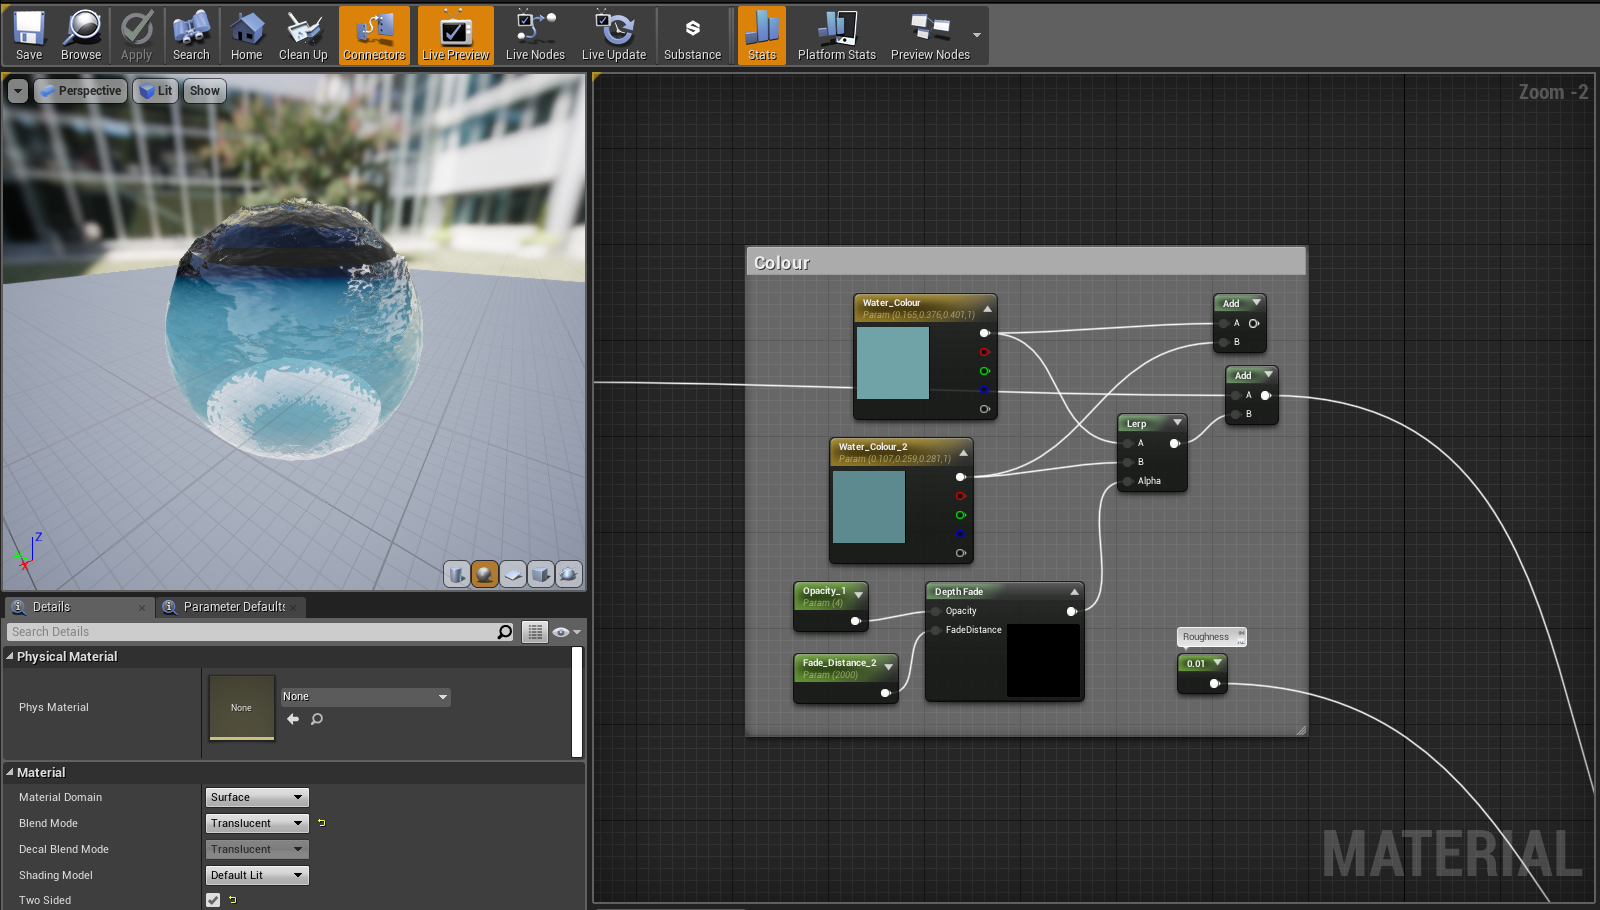
When following the guide, using a depth fade and
lerp here made the water pink, so I removed it and
simply added the colours together. Later, when
tweaking the colours, I re-added the depth fade nodes
and changed the colours, but I suspect I will change
them again after modelling the water feature to be
a darker, more translucent green more in line with the
reference images used.
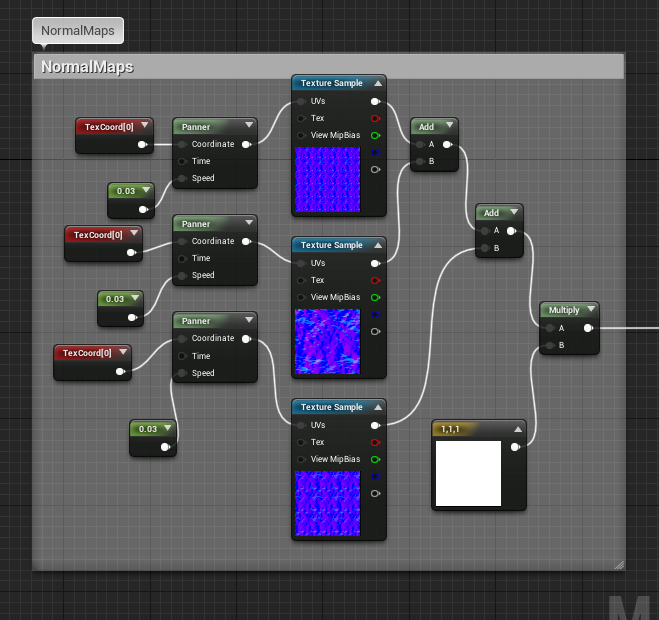
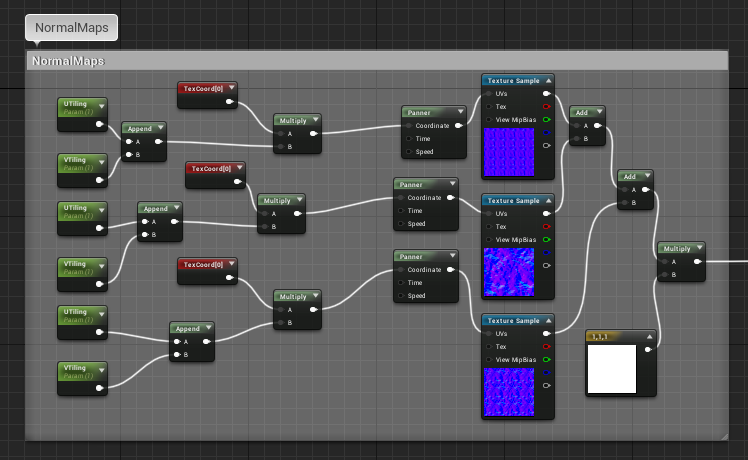
I created the normal maps by layering the photoshop cloud
filter effect a few times and adding a water ripple image over
the top, then adding a few brush strokes and generating a
normal map from it.
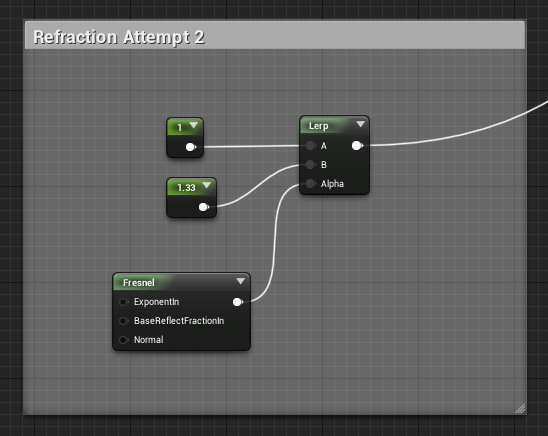
The pink water that made me scrap the previous colour settings
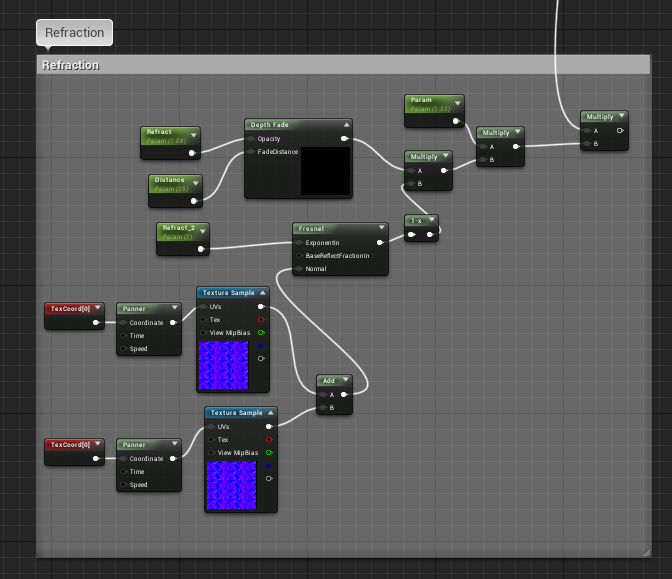
I abandoned this refraction attempt after realising that I could make it much simpler with an effect that I preferred:
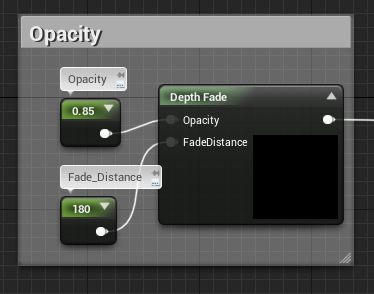
I used depth fade for opacity so that the water would become more opaque the deeper it went, to simulate the layers of water between the eye and an object submerged in it.
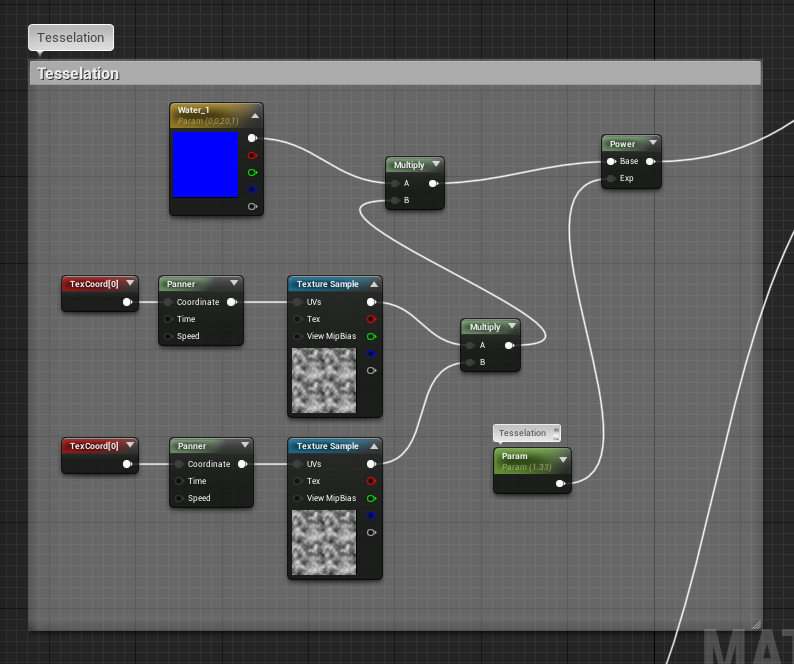
Here I did a similar effect to what I did for the normal, but this time panning two textures to create surface tessellation to create silhouette detail in the waves.
The final effect was satisfying and looked dynamic, but I noticed that when scaling the plane down, it scaled the texture tiling down with it, creating too much detail in the normal. To fix this, I added UTiling Scalar parameters that could be changed easily in the material instance settings:
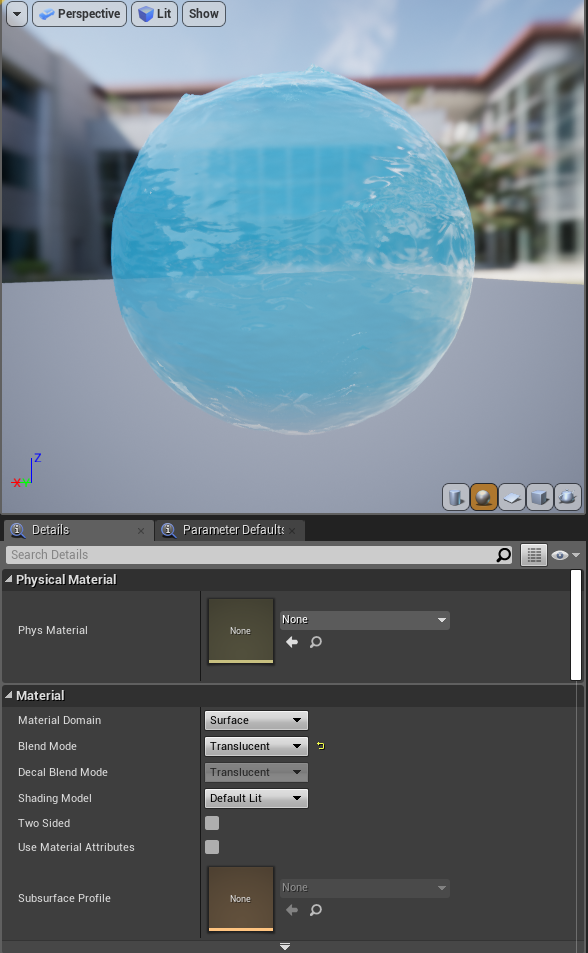
Material after tweaking the colours and depth fade more