After learning how to make the global material parameter and the grass wind effects in blueprints, I decided to put what I'd learnt to use on some unrelated things: the mushroom growth from before.
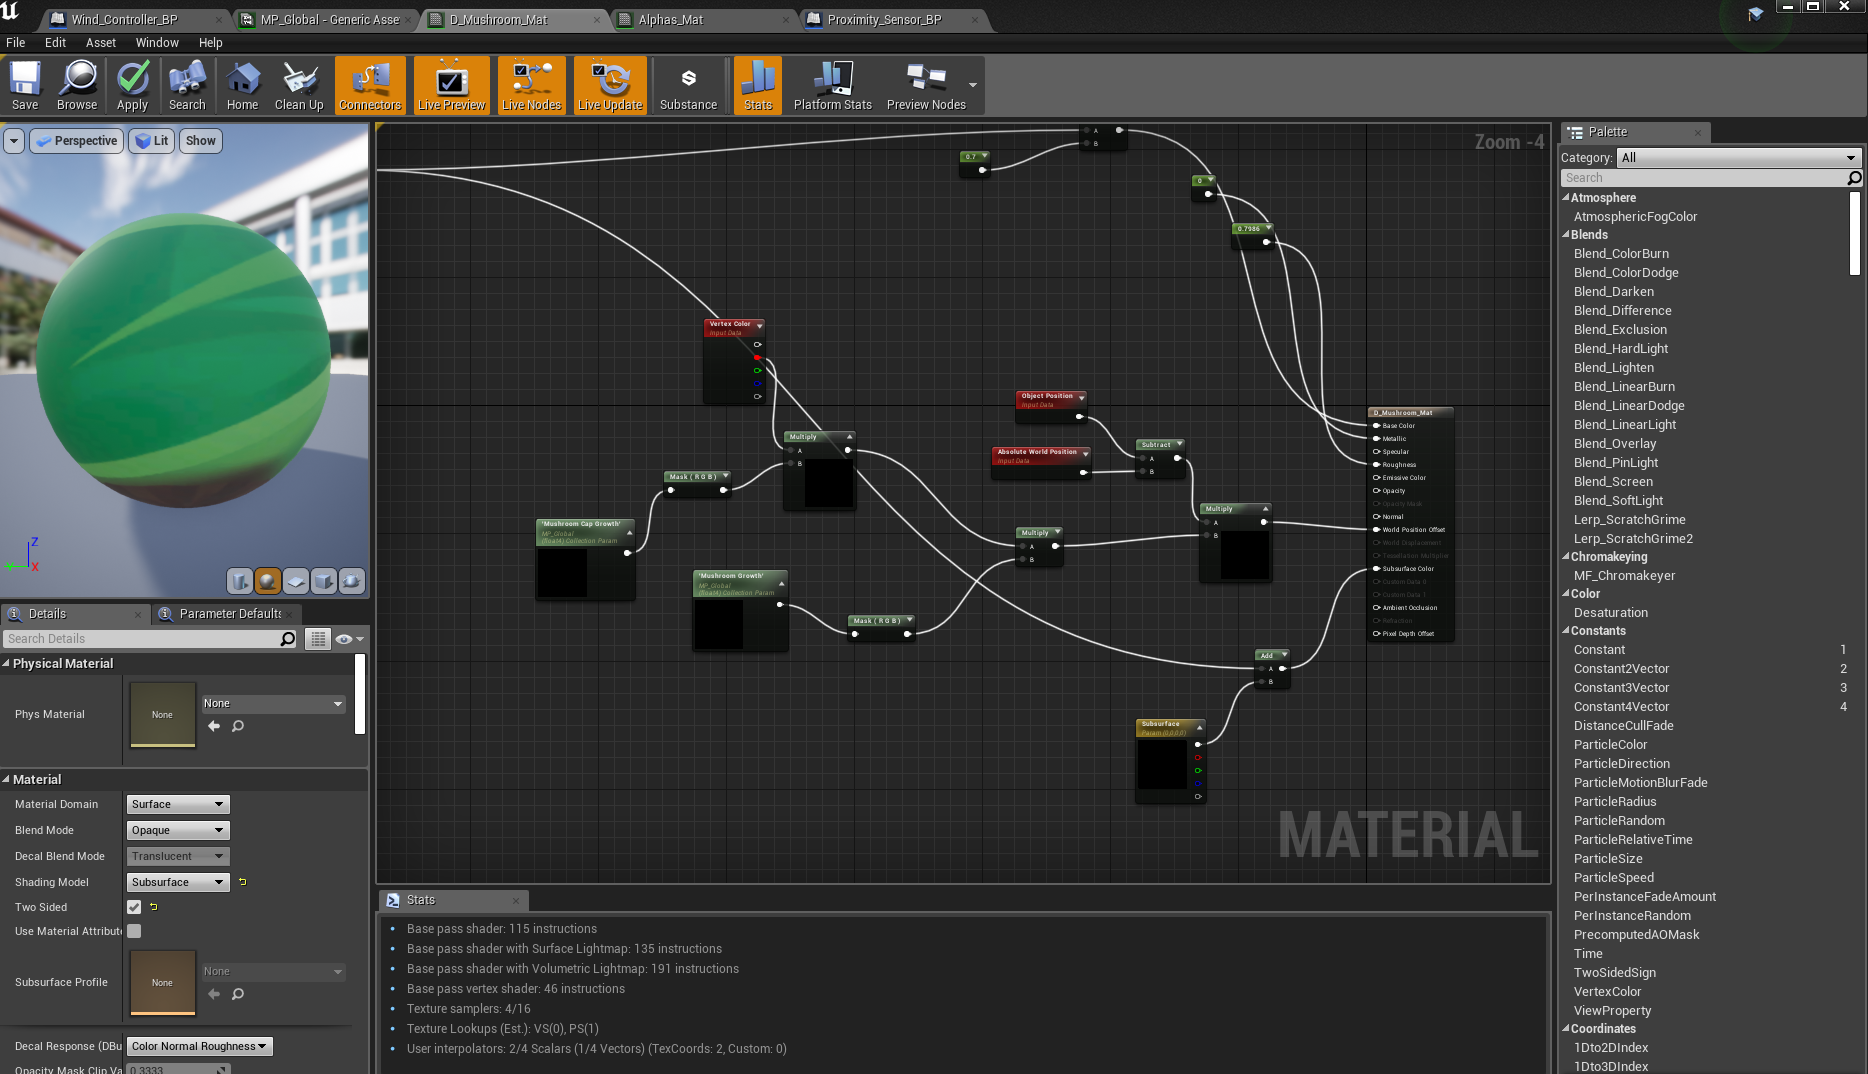
I cleaned up my nodes and replaced anything that was previously controlled by the camera proximity with a collection parameter node to be used in a blueprint:
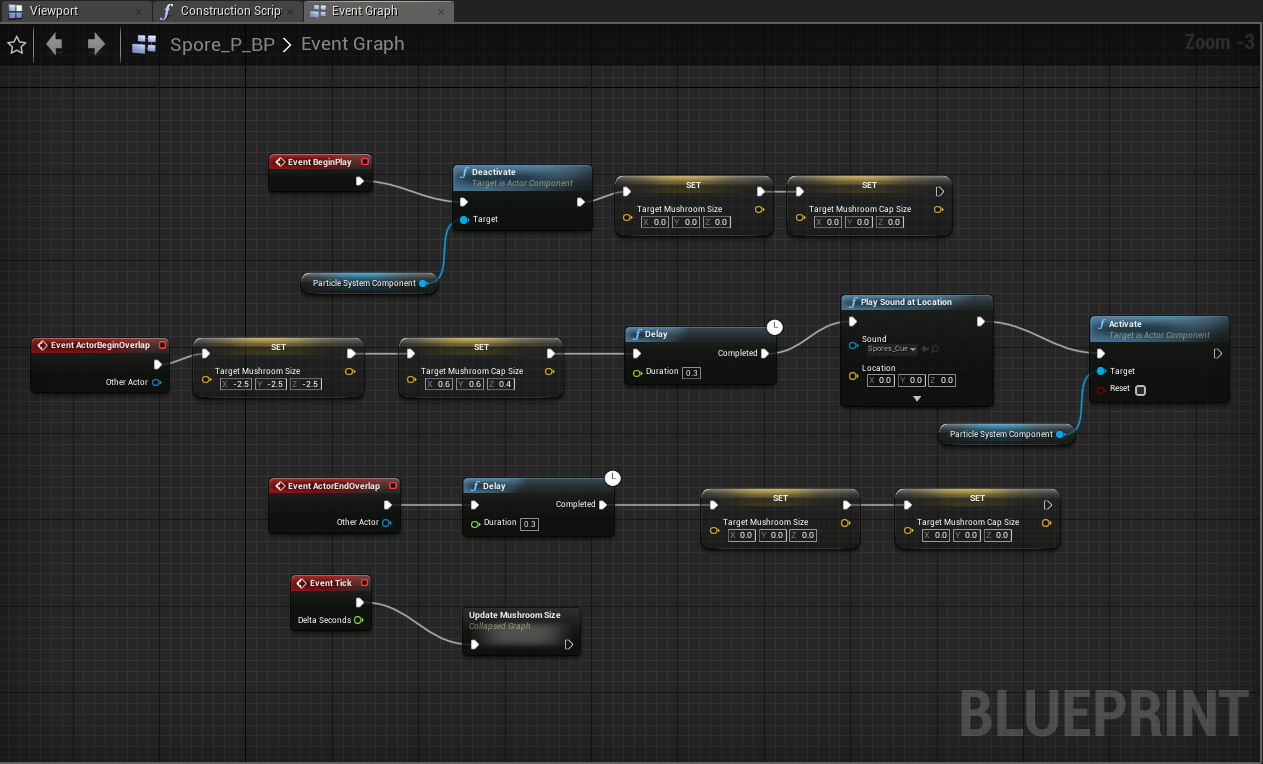 |
| Play Sound at Location added at a later date |
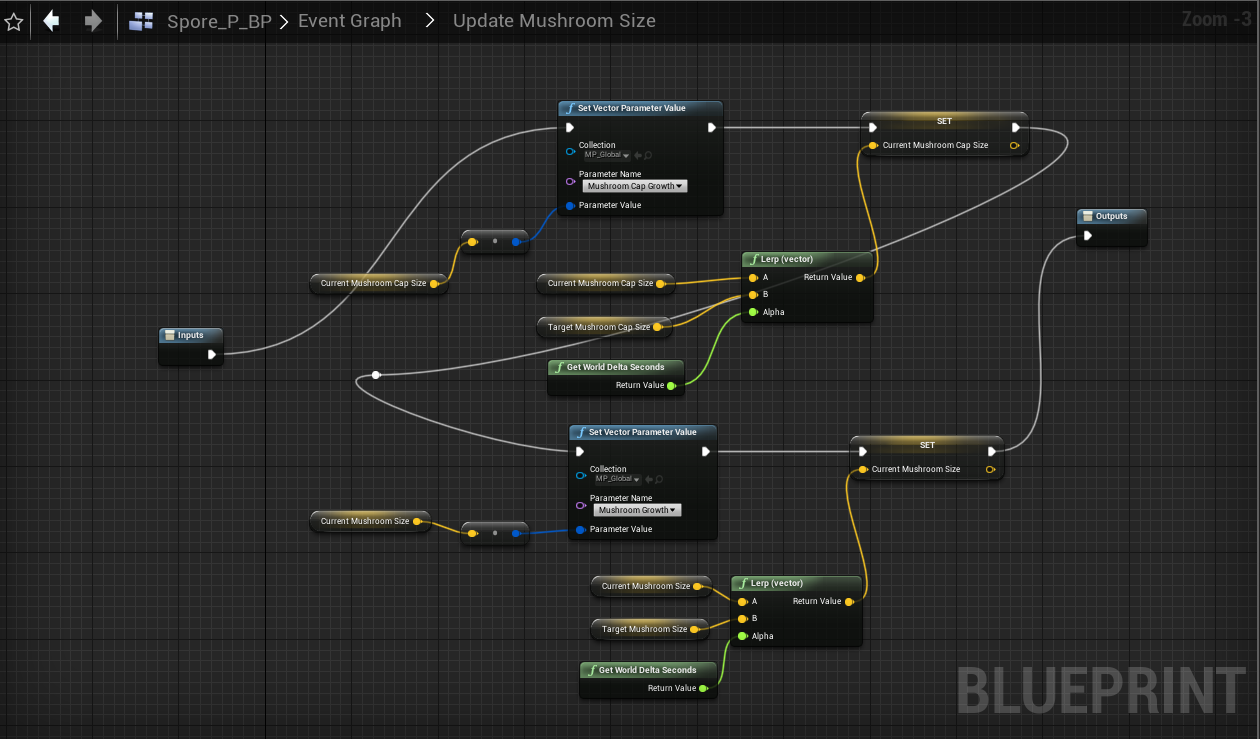
I added Vector Variables for the mushroom cap size and the overall mushroom size and used the same method as when I was updating the wind direction, this time affecting the size of the mushrooms, but only on overlap of the particle effect collision from earlier.
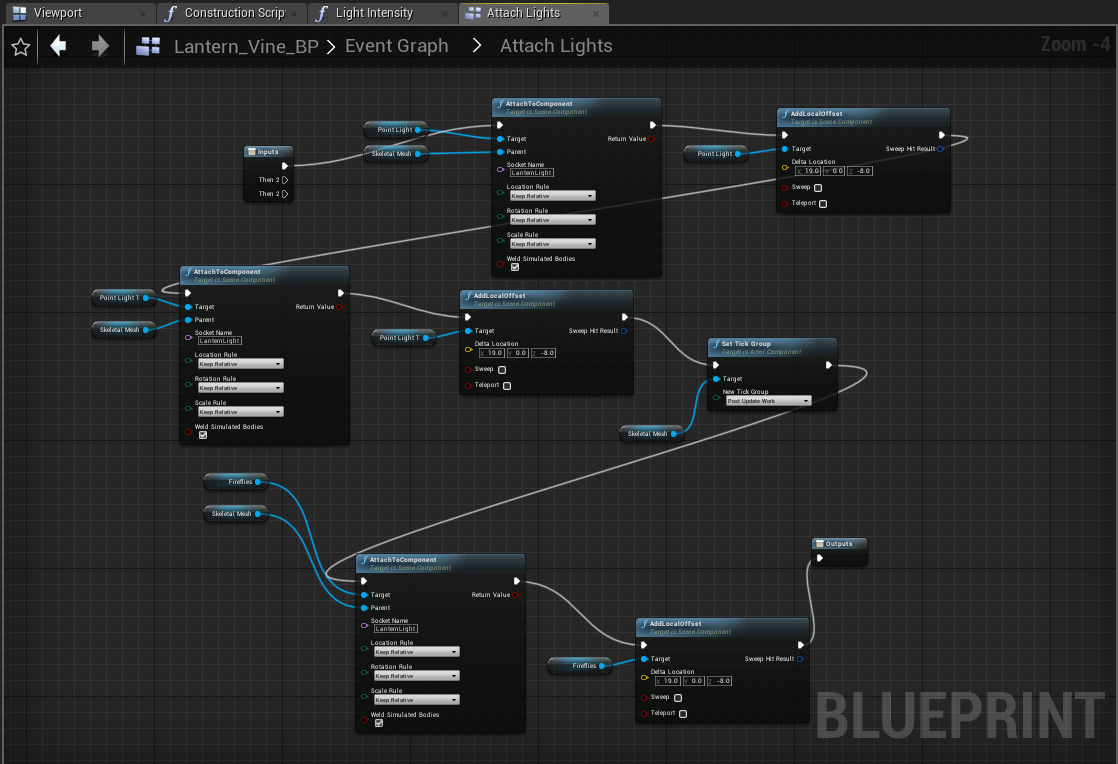
After completing this, I then moved onto completing the earlier physics asset tutorial, this time following it to add a light to my mushroom lanterns:
This is where it got a bit more complicated. The tutorial taught me how to attach a light to a socket in the bone, but not how to change the position of it or how to turn it on or off so I had to do some experimenting. I couldn't use the same method as before, because the light intensity wasn't in my parameter collection and didn't have a material to edit with a vector variable. Instead, I tried to use an event tick that was only enabled when the character overlapped with the collision sphere- it didn't work.
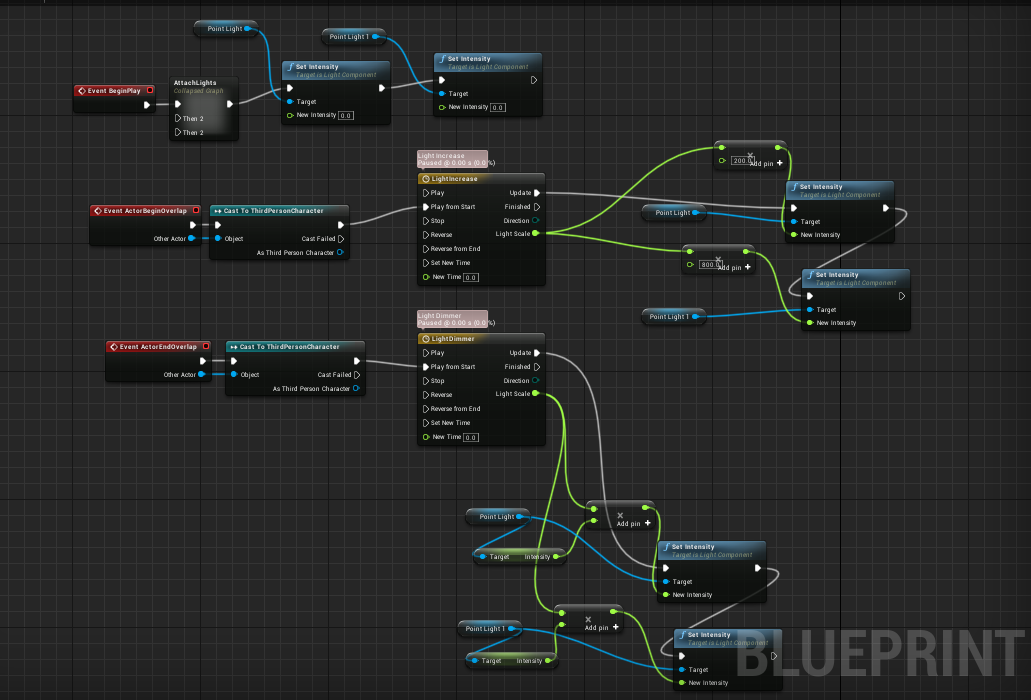
After a few more attempts using different methods, I managed to get it to work using a timeline:
By using a timeline, I could set a number to increase or decrease over a certain period of time, of which I could then times by the float intensity that I actually want the light to end up at, which perfectly slots into the set intensity node. I could then set this to only occur upon actor overlap, which was perfect:

No comments:
Post a Comment