Showing posts with label Friday. Show all posts

Saturday, December 7, 2019

Foliage VFX: Week 3 Friday

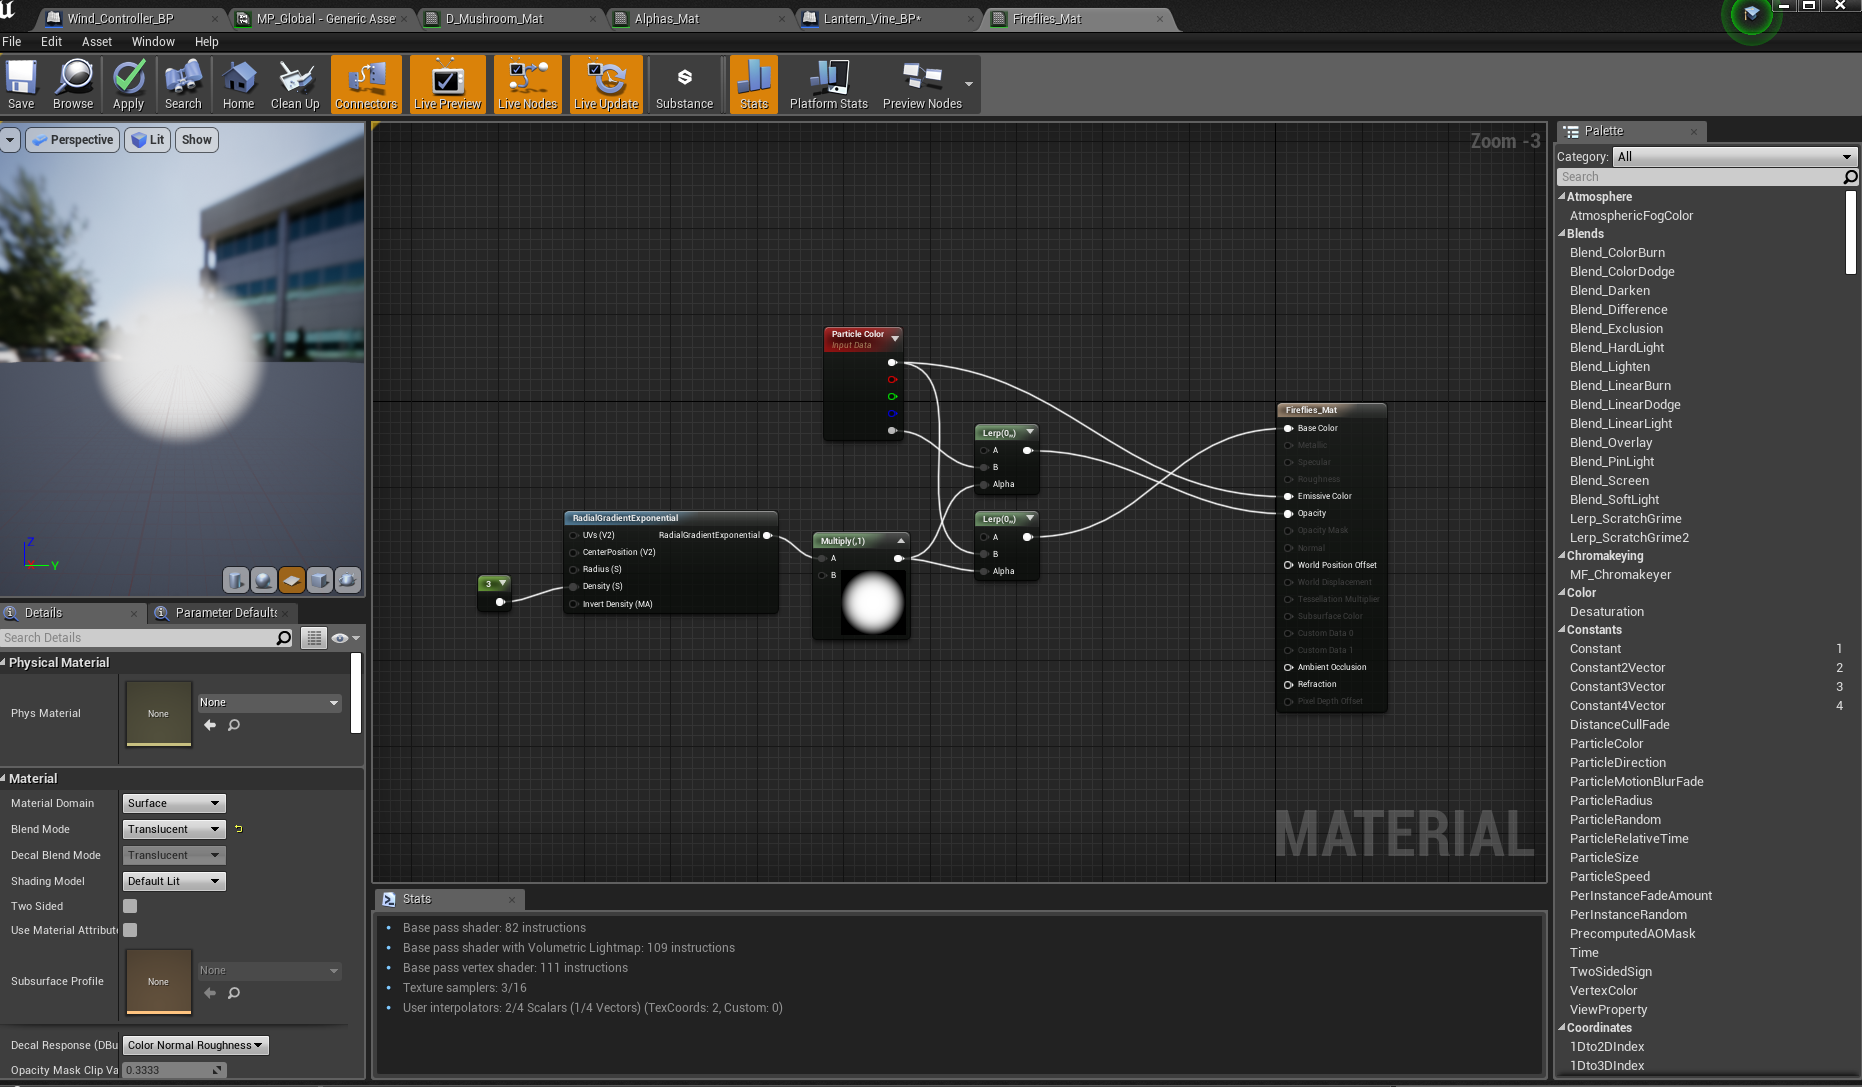
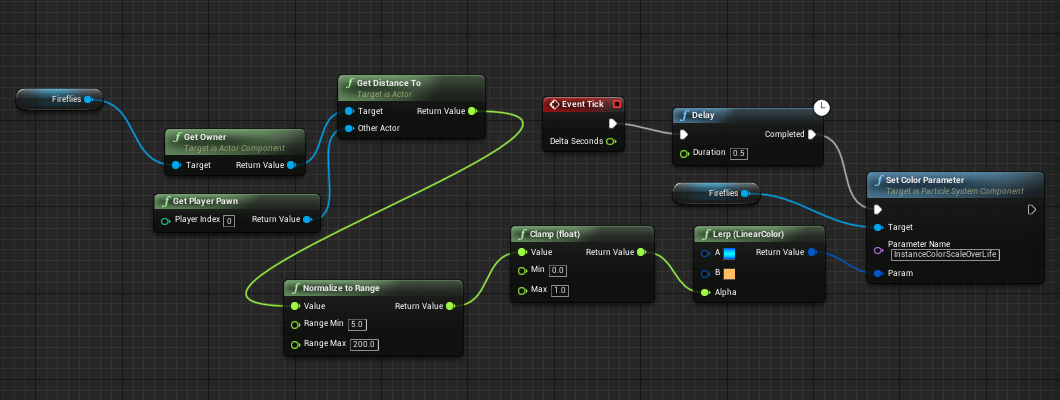
On Friday I added some extra details, like firefly particles that change colour on proximity:
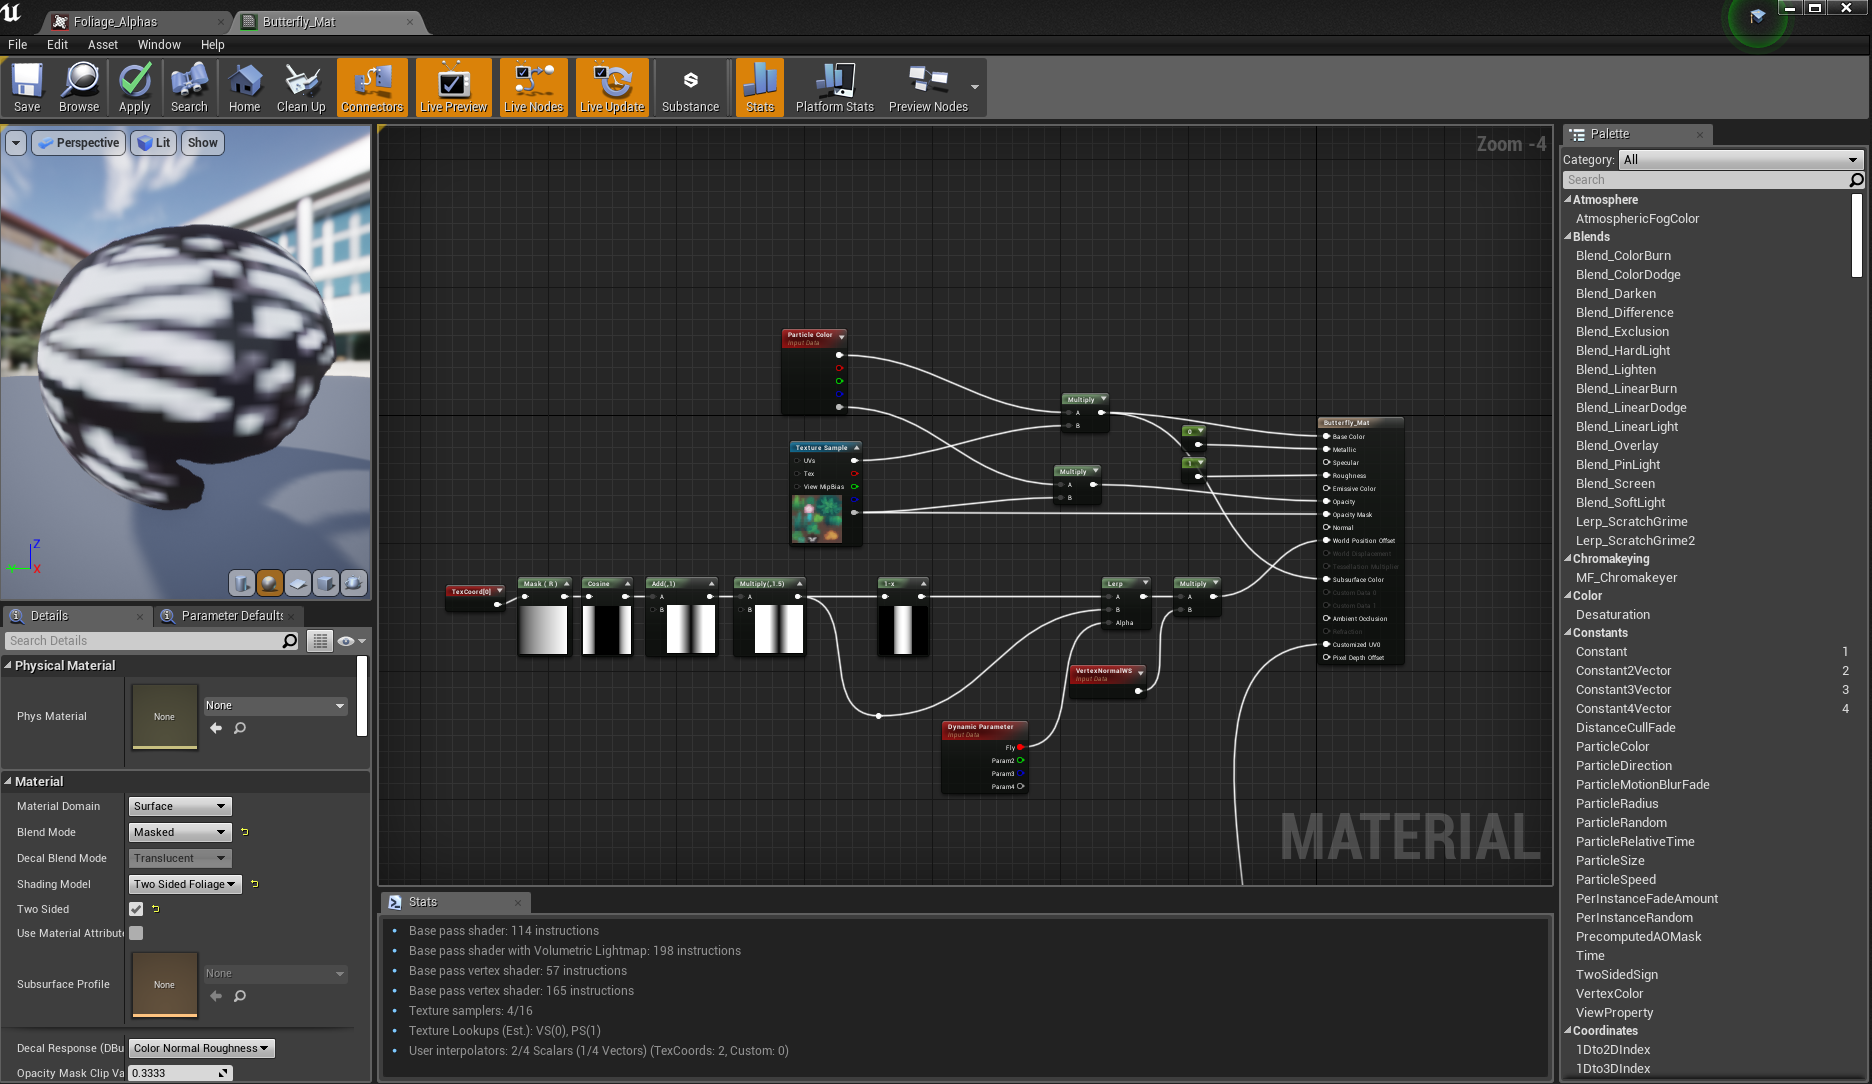
A butterfly particle effect loosely following this tutorial:


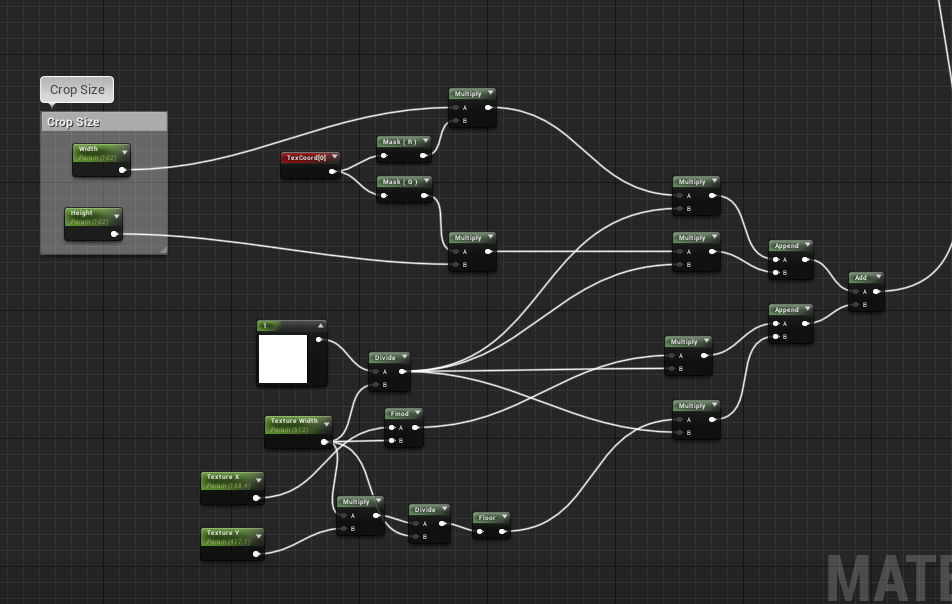
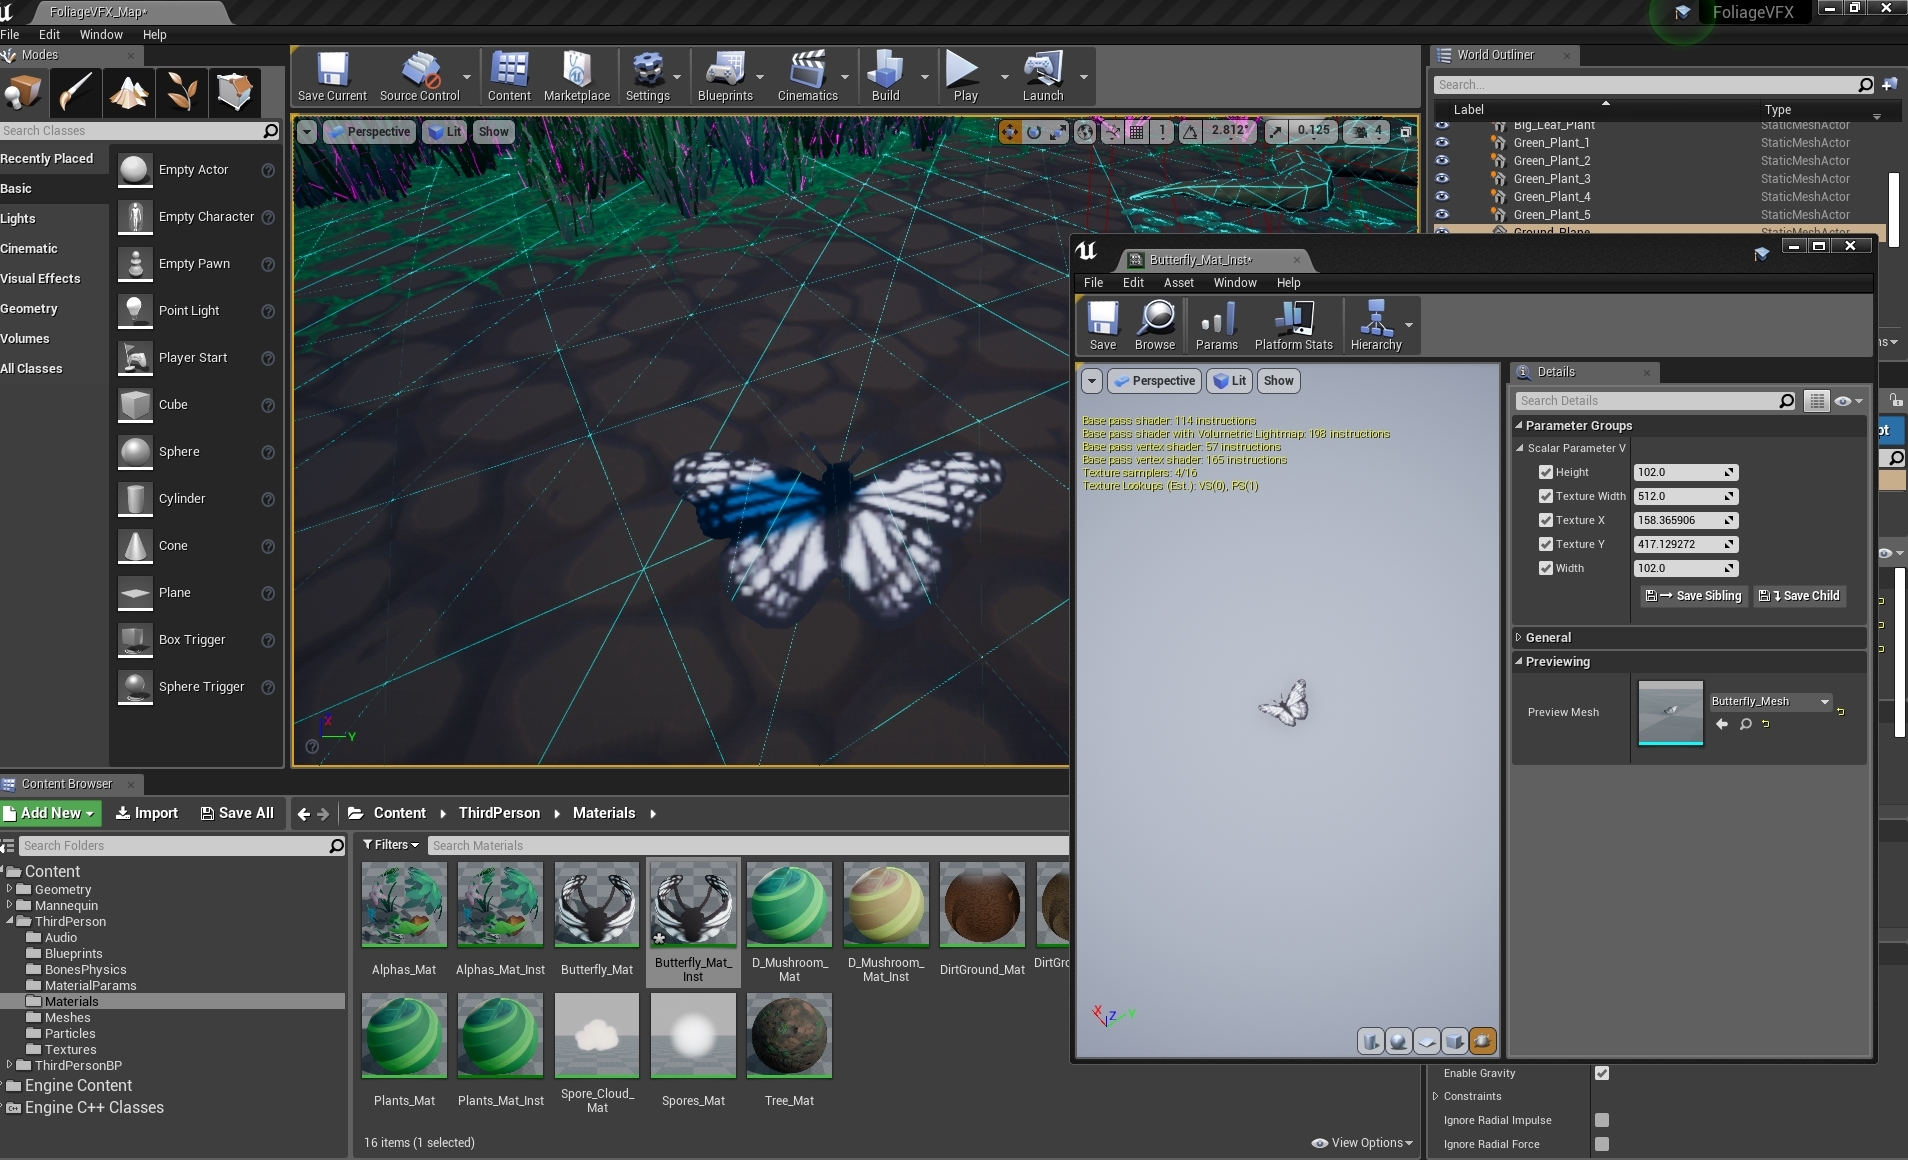
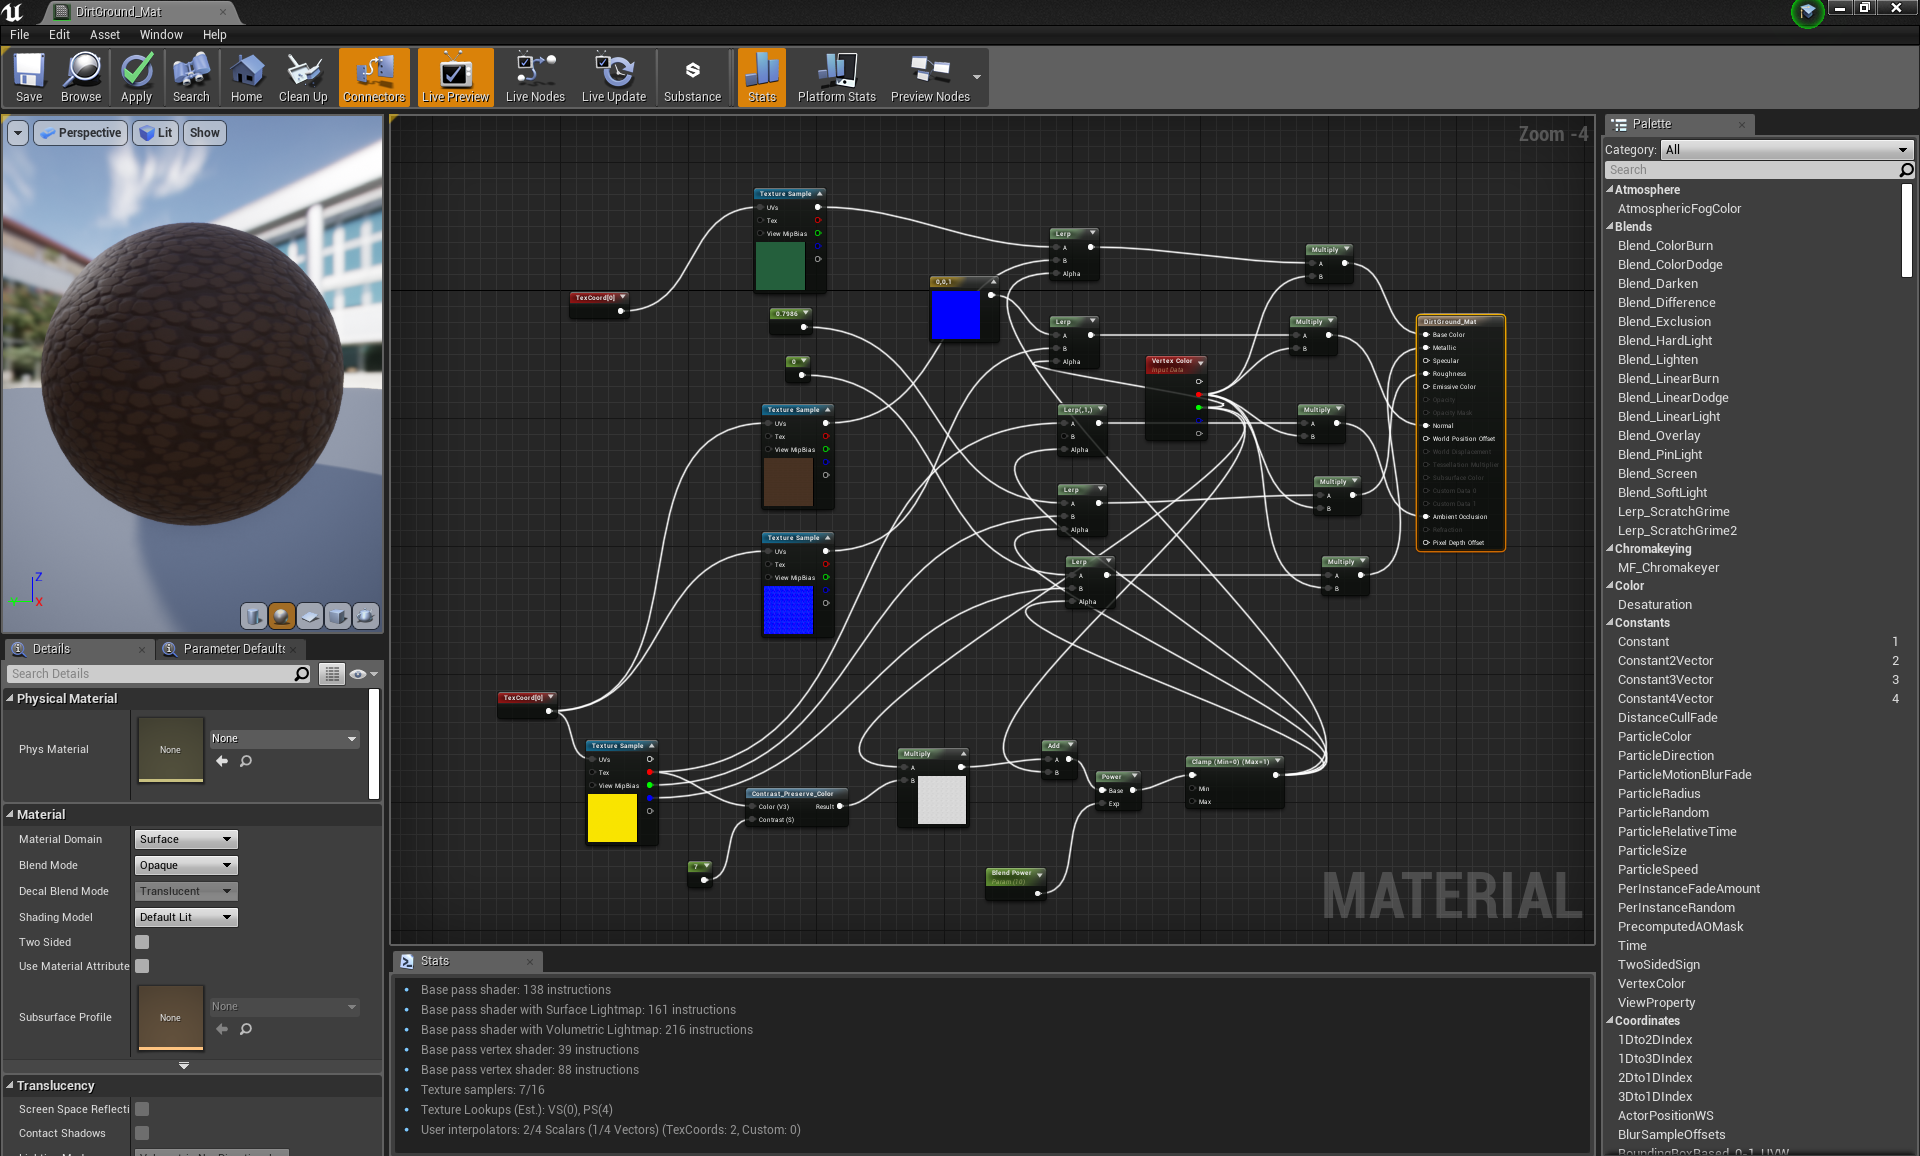
By viewing the mesh edges, I could use the UV crop nodes in an instance to correctly scale and place the butterfly texture in the center of the mesh I made in 3ds max, so that the animation vertex painting created within the material editor would then apply correctly to that cropped section of the texture sheet, and the butterfly would bend in the correct area.

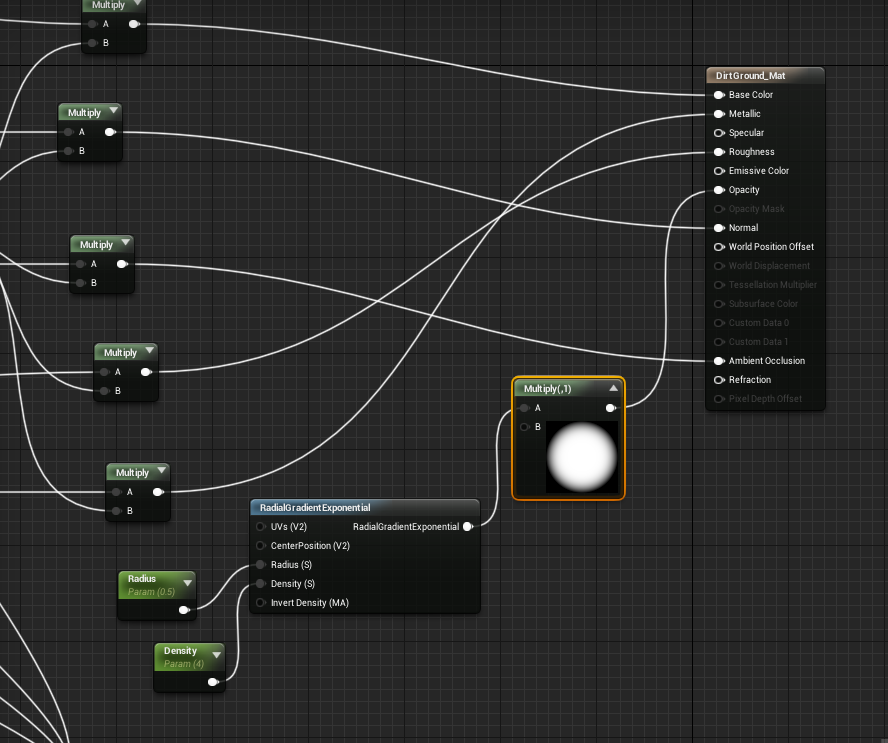
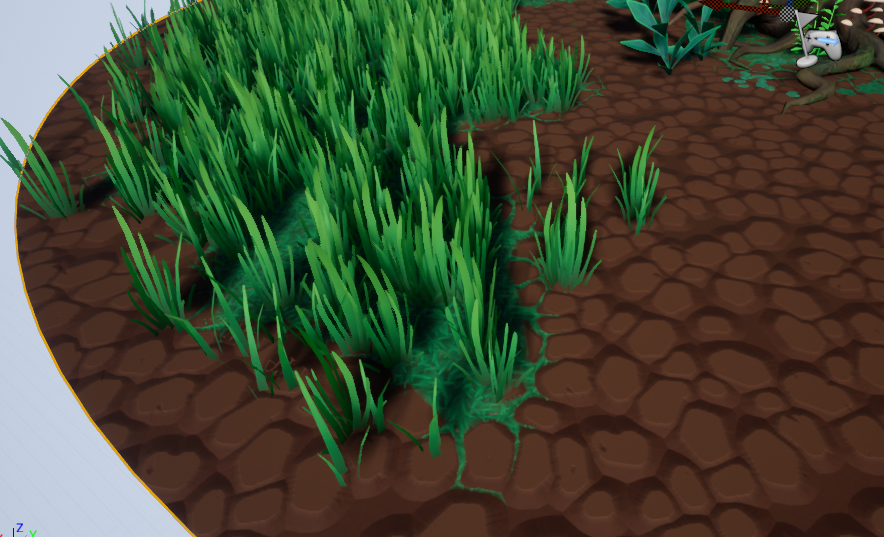
I also added a translucency mask to the ground plinth for aesthetic presentation, however it would most likely be too costly and inefficient to have in game, as it essentially turns the entire plinth into an alpha and doesn't allow shadows to be cast onto it:
With Translucency
Without Translucency
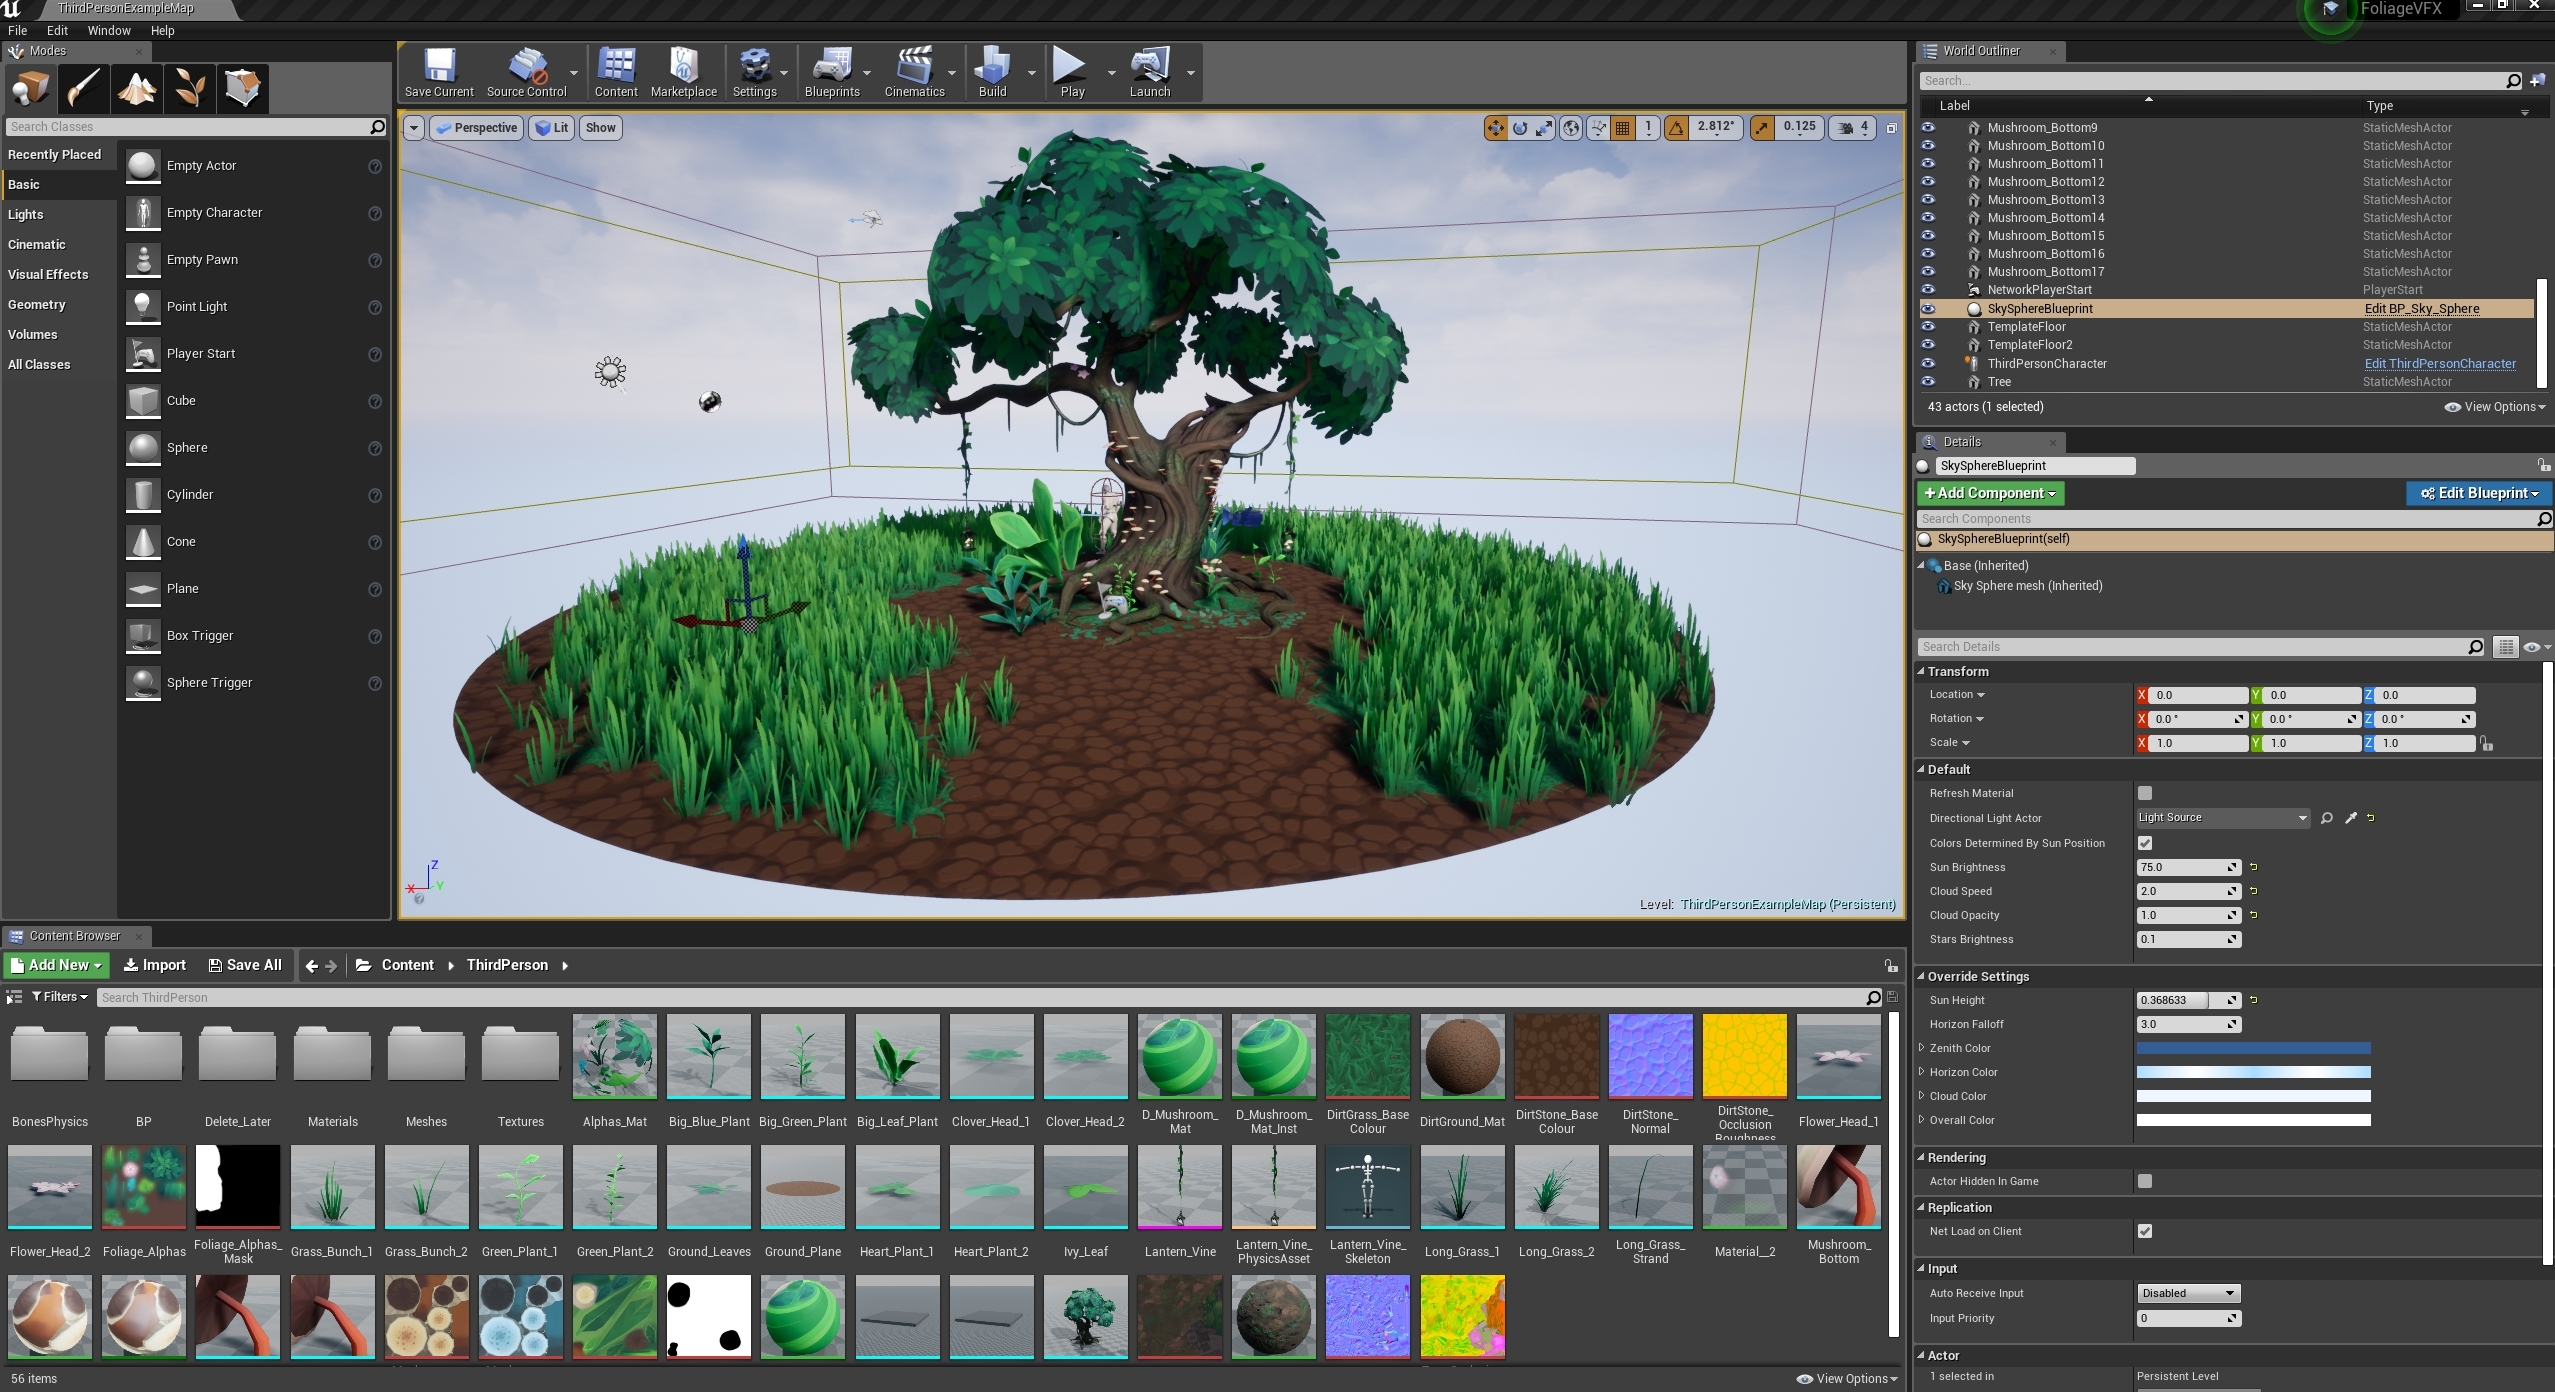
Finally, with my remaining time I built lighting (and changed lightmap density), turned some assets into movable objects to receive dynamic lighting instead, messed with the skysphere colours and post processing to achieve the night time look I wanted, then I added some music and sound effects downloaded from here, here and here. I then added them into blueprints to start upon playing the game and upon overlap with the spore particle collisions.


Saturday, November 30, 2019

Foliage VFX: Week 2 Friday

On Friday I brought everything together into the scene:
Before doing this however, I quickly compiled together 2 tiling textures in substance designer, a dirt rock texture and a grass texture:
To save texture space for other things, I had to scrap the AO/MR maps for the grass and add that information in the material editor instead.
In UE4 material editor I then combined the two textures in perpetration for vertex painting. I also added the AO map for the dirt stones into the equation, in place of a height map (to save texture space). I added a contrast filter to it and used it to identify where the gaps between stones were, so that I could gradient out the grass through the cracks for a more realistic/immersive effect:

Saturday, November 23, 2019

Foliage VFX: Week 1 Friday

On Friday I finished sculpting the tree and decimated it to be retopped in 3ds max. I primarily used the clay tubes brush to build up the layers of the tree in a fashion that left a grain, trying to follow the form displayed in the concept. I loosely followed the tips displayed in this post: https://www.artstation.com/artwork/mOex1 using the orb cracks brush in some areas to emphasise the gaps. For extra reference, I used some disney tree images like chip n dale's treehouse:
To keep things neat, I kept everything on separate layers, then projected a higher poly version onto a zremesh-ed version to keep the details, while maintaining a tri count that would allow the tree to be exported to 3ds max.
During this, I specifically learnt how to polypaint so that I could keep the thin areas of the branches higher poly than the rest of the sculpt when zremeshing, to avoid the issue of losing geometry to smoothing.

Thursday, November 14, 2019

Helmeted Character: Week 4 Friday

On Friday I exported the rigged mesh into marmoset and applied the textures for the final render scene. I added lighting for the main lighting, side lighting, a blue light from the sky, a reflective light from the ground and a rim light from the back, as well as fog and a shadow catcher:

I messed around with different scene colours, in which I came to a final 2 that I was pleased with, brown and blue:

In the end, I decided on the blue, as it had more hue contrast and made the character pop more. After this, I went back to the textures and added some more edgewear and dirt, especially to the helmet and jacket, then started testing out the camera lens options, going between 35mm, 50mm and 85mm lenses to see which one gave the best effect:


Friday, November 8, 2019

Helmeted Character: Week 3 Friday

On Friday I continued retopping:
I started using the conform relax tool and conform move tool to ensure that the topology wasn't too jagged, but was also filling the creases that extrude from the silhouette so that the bake will look more natural. At this point I was paying attention to the loops going around the hipbones towards the crotch area, and the loops then extending down the legs.

I paid extra attention to where I was placing geometery, trying not to add any triangles if possible, and if so not near any deformation areas when adding extra loops. I also added joint specific topology for areas such as the fingers:


Friday, November 1, 2019

Helmeted Character: Week 2 Friday

On Friday I started working on the Helmet in zbrush:
After subdividing the geometry and enabling the layer recording mode, I used the smooth tool to smooth down any unwanted sharp edges left behind by the turbosmooth while still keeping some edges on the snout for a more manmade effect. I used pinch, trim dynamic, flatten and hpolish to create more of a dramatic transition between different angles, furthering the man-made helmet vibe as opposed to a smooth organic shape. I used damstandard and slash on a higher subdivision level for any line indents, and used the planar tool to try and flatten the center of the concave areas. For the tongue and the 'X' marks, I masked off areas with the mask lasso and pen tools, then extracted them. The teeth were made from appended cones that were manipulated into shape through the move elastic tool and smooth, then duplicated and placed accordingly. I also masked off an area around the mouth for the indented markings, and used the layer tool to subtract a layer around the mouth.

Friday, October 25, 2019

Helmeted Character: Week 1 Friday

On Friday, I started sculpting the shoes loosely following this guide so that they would be crisp with a flat sole.
With this tutorial I learnt how to use the bend tool to create the bend in the sole, and mask gradients to move sections of the sculpt around.
I used the extract tool for the different parts of the shoe, making sure to create new polygroups in case I needed those areas again. When it came to the detailing stage, I masked off areas with the lasso tool and used the layer brush to take away an even amount of the inverted mask. For the bulging areas I used form soft and dam standard.

Friday, October 18, 2019

Water VFX: Week 3 Friday

On Friday I did a quick bake in marmoset, textured and set everything up in my temporary scene:

I edited the parameters and the texture map tiling size so that the VFX would fit within the buckets, and positioned all of my assets into a small environment to showcase the water:


I didn't have enough time to apply the reactive ripple blueprint to the shallow water on the plinth, but will be adding that in the future. I also intend to delete all of the temporary test content and add post processing to create a more dynamic scene.

Friday, October 11, 2019

Water VFX Brief: Week 2 Friday

Now that all of the water was out of the way, I started working on the water feature model itself.
I wanted to combine these aspects into a cute stylised plinth:
Image result for Fountain
Image result for water pump
The style was based somewhat on this:
Related image
Image result for sea of thieves plantsImage result for sea of thieves plants
Simple stylised texturing, with some some bold, chunky details sculpted in and PBR used to a realistic degree.


I started with the lowpoly sculpts of the buckets and the water, which I then turbosmoothed to allow for more dynamic fluidity in the material editor later.

Thursday, October 10, 2019

Water VFX Brief: Week 2 Thursday

On Thursday I worked on my final particle effect, which was to be an interspersed stream of droplets falling down from the top of the waterfall based on these reference images:
Image result for Fountaincascadas de jardin modernas - Buscar con Googlesmall pond and water garden

My first issue was that the droplets were a little too round and looked like little beans falling down, so I tried adding a ribbon emitter to fill out the gaps at the top and taper out:

This made it a little better, but it looked a little too ribbon-like for my tastes, So I removed it again and this time focused on size by speed, which made the droplets more oval-shaped, which made them seem stretched by gravity, or in clumps rather than separate balls: