Showing posts with label Tuesday. Show all posts

Wednesday, December 4, 2019

Foliage VFX: Week 3 Tuesday

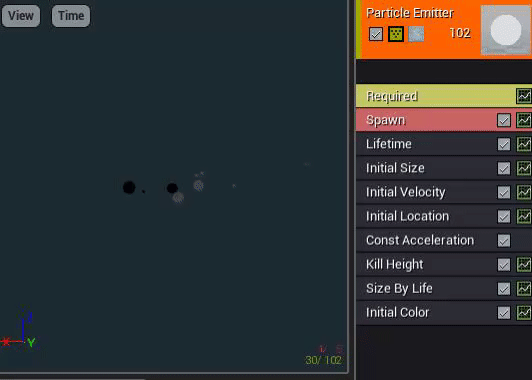
On Tuesday I started to work on the particle effects.
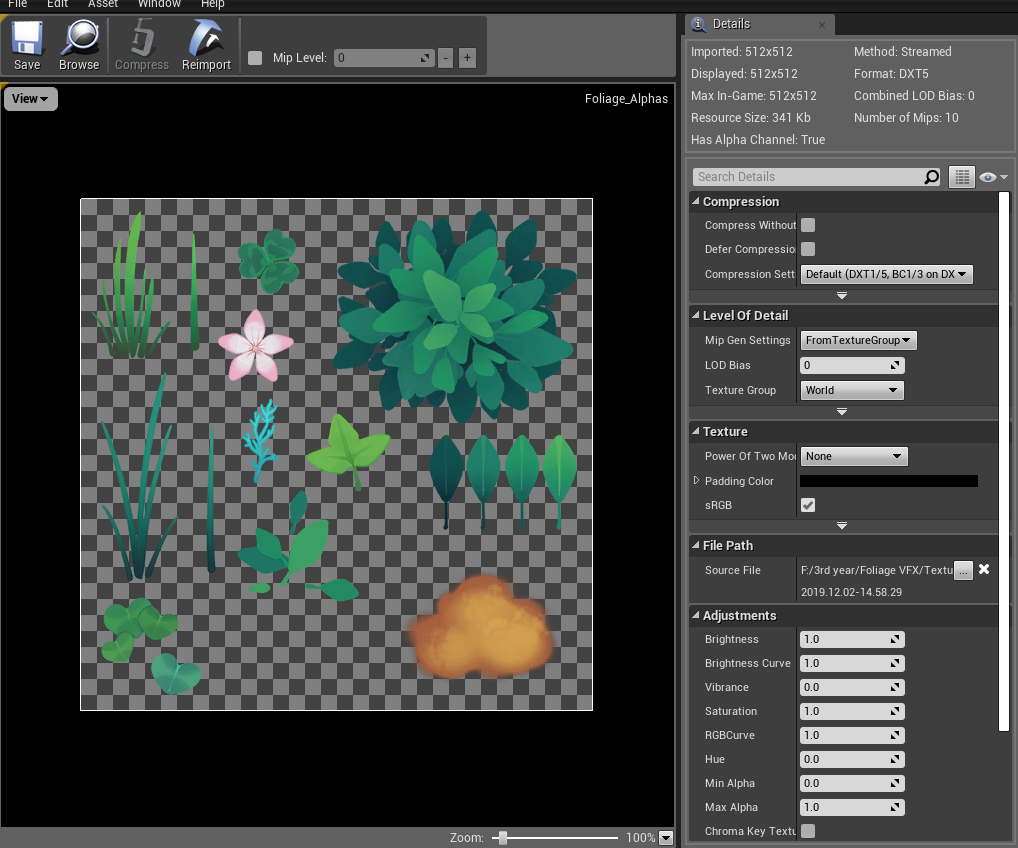
I created a spore cloud in some of the empty space left on my alpha map to pair with some spore particles to burst out of the mushrooms on hit.
For reference, I had watched several spore explosion videos like this and this and wanted to have a similar feel to the mushrooms seen in viva pinata, where despite being a shape that doesn't usually have spore explosions, they still seem to emit spores from underneath the caps.

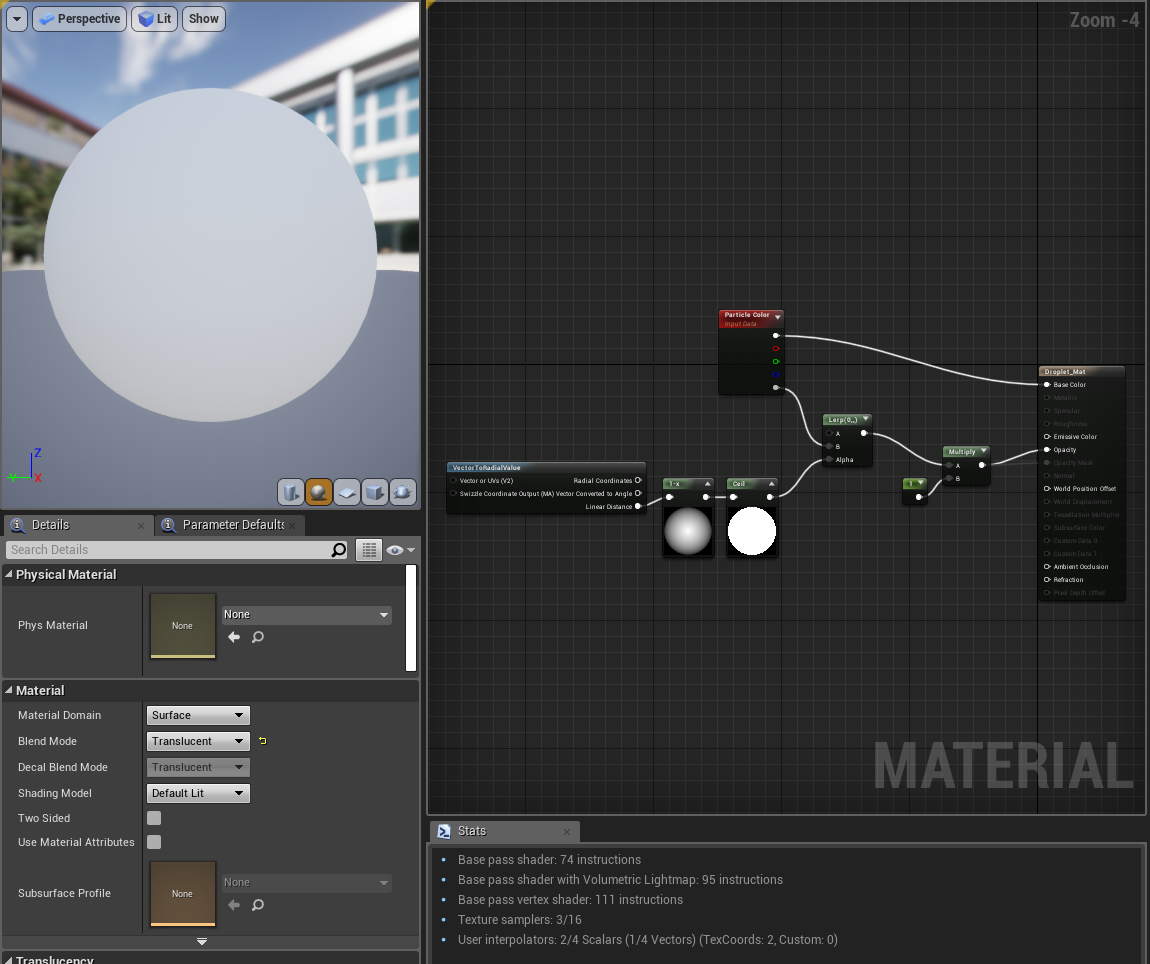
for the spores, I made a really simple soft circle particle material:
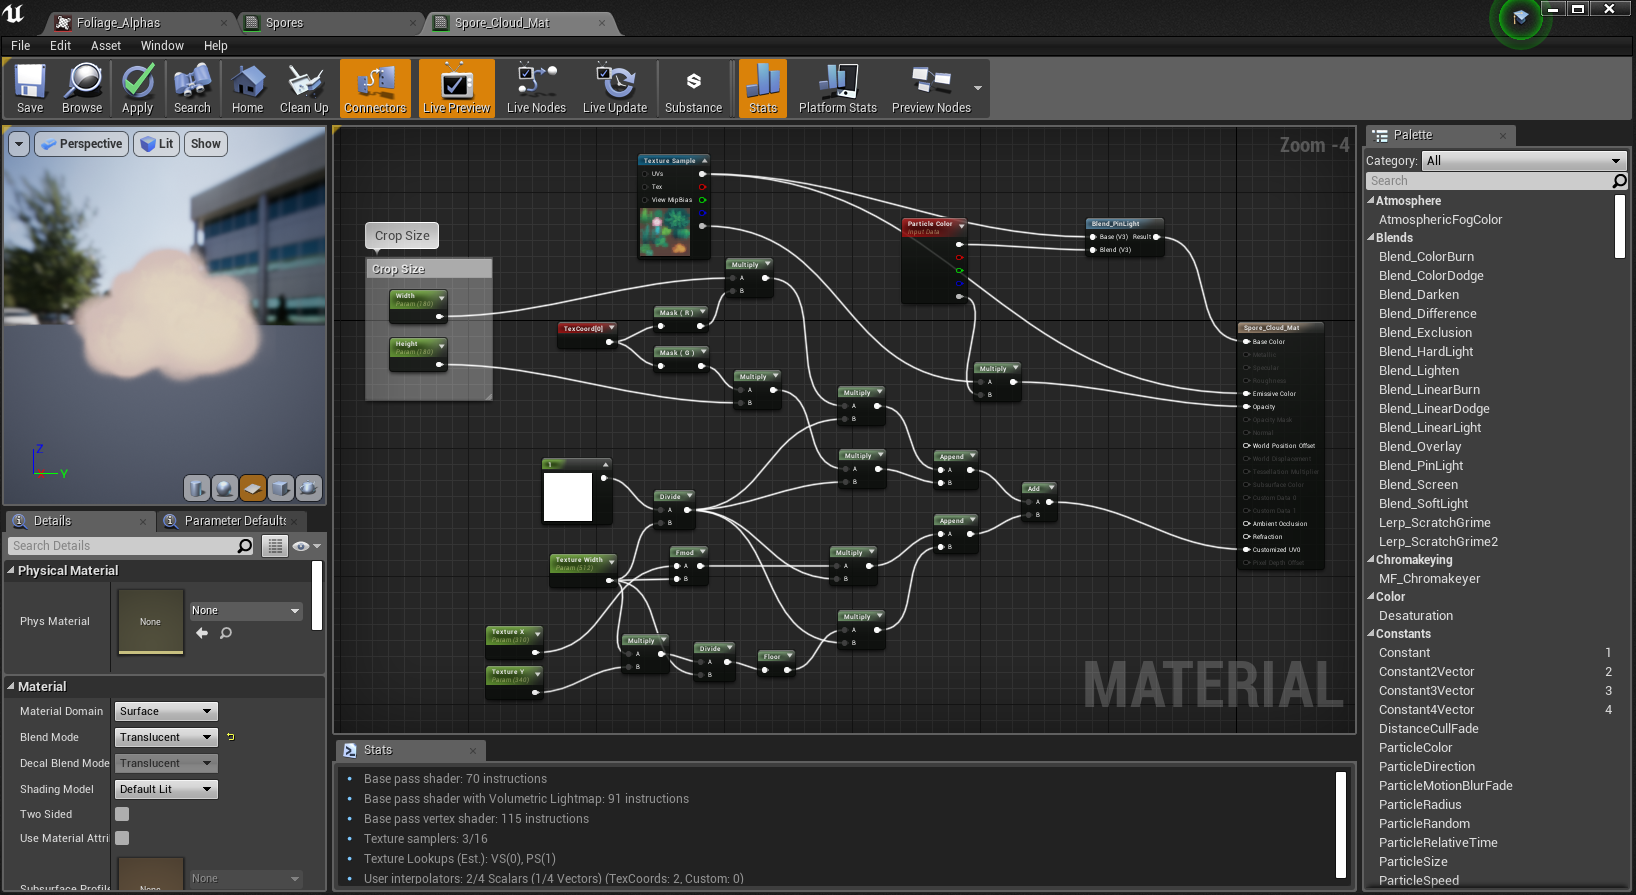
while for the clouds, I followed this tutorial on cropping textures to create a cloud material:
I added both to a particle effect, messing around with the lifetime, size, velocity, colour, opacity, acceleration and rotation to create an effect that loses force and disperses after the initial explosion from the centre.
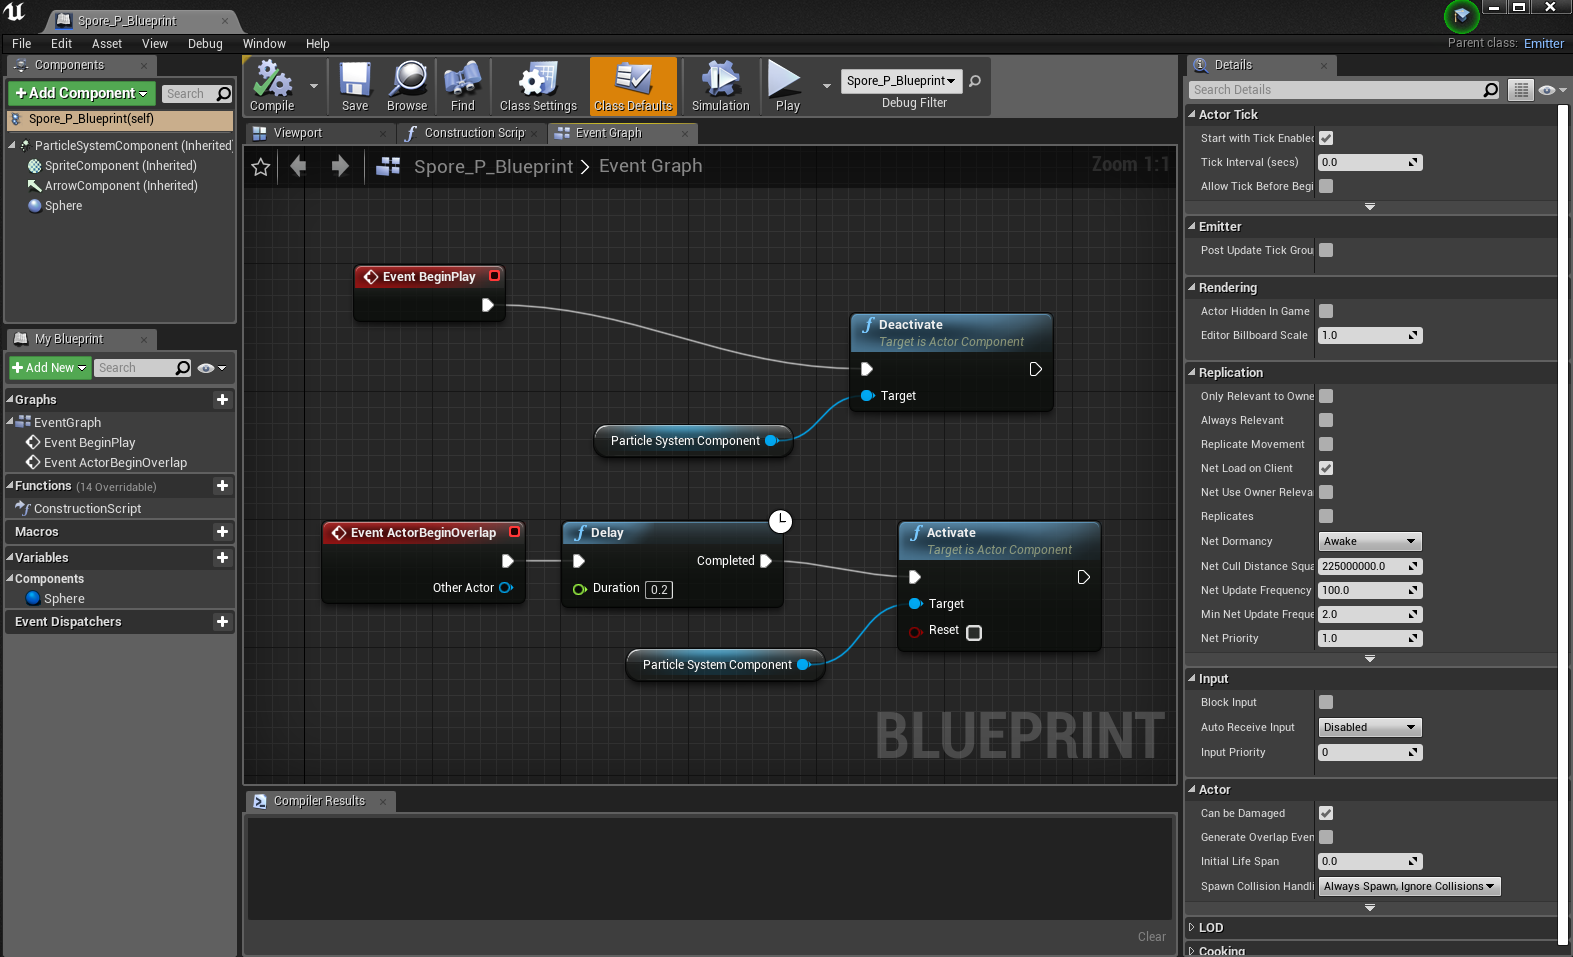
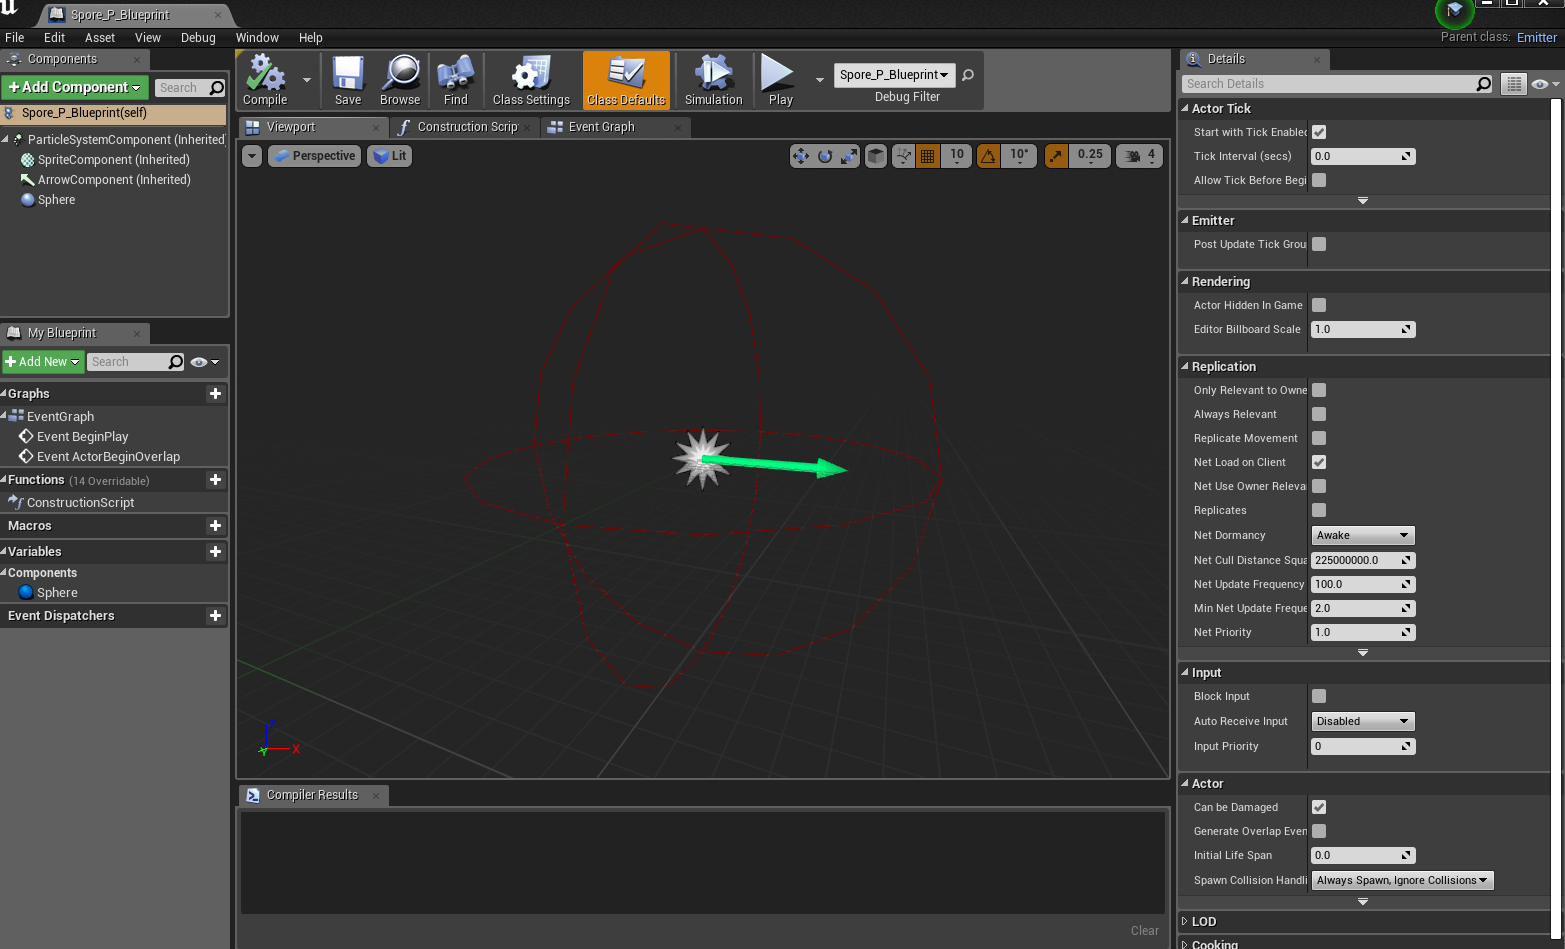
Finally, I moved onto making a blueprint for it:
it was a simple blueprint that turns the particle effect on upon the character overlapping the collision sphere I had added to it in the viewport:

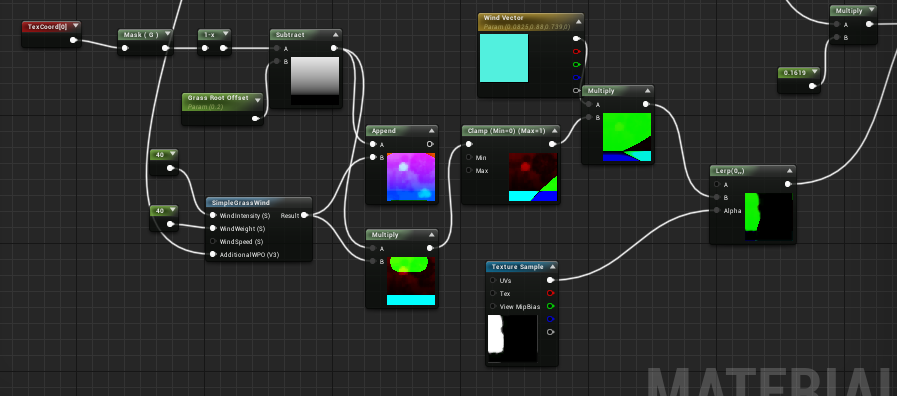
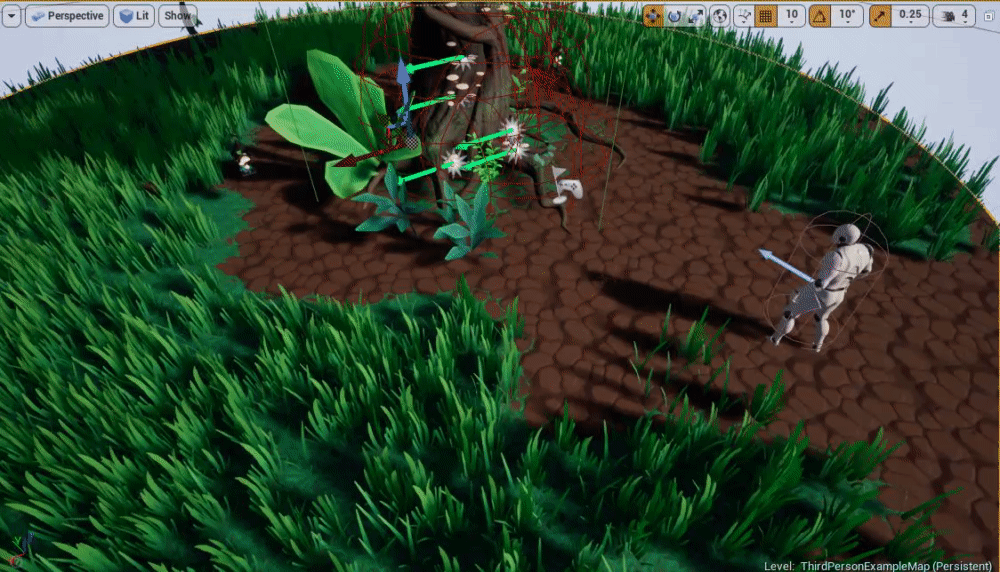
After this, I began working on the wind effect for the grass, combining this tutorial with the simple grass wind in UE4:
but I still had a long way to go, the grass felt too jittery and the mushrooms still felt too static.


Wednesday, November 27, 2019

Foliage VFX: Week 2 Tuesday

On Tuesday I went back to the tree and started the tedious task of re-topping, using a mixture of step build and strip modelling cylinders (then adding swift loops and conforming them to the highpoly surface), using the conform relax tool in some areas along the way to keep the geometry even. I did this to keep the surface as close to the high poly version as possible, while also saving as much time as possible.

Wednesday, November 20, 2019

Foliage VFX: Week 1 Tuesday

On Tuesday I started making the alpha texture sheet for the scene:


I wanted to keep everything to a single 1012 alpha sheet so that I could size everything to a similar pixel density without having to worry about several individual small sheets. I tried to keep the rendering simple yet vibrant to keep to the concepts I was referencing. I left space at the bottom right corner on purpose for if I needed any texture space later in the project for particle effects.
To complete the map, I added Gaussian blur so that the edges of the alphas wouldn't bleed the background colour.

Tuesday, November 12, 2019

Helmeted Character: Week 4 Tuesday

On Tuesday I started texturing the character in Substance Painter. This day consisted of mostly me dragging smart materials into the scene based on which material values I thought would fit best with the material of each piece of clothing, placing them into labelled folders and then masking them to create the base I would be working with. After this, I went through each folder and changed the base colour, roughness and height levels depending on the effect I wanted. I tweaked, added and deleted detail layers to create my own edgewear, highlights, grunge and dirt stains using smart masks such as dirt cavities, dust occlusion, edge damage, edges uber, edges strong, fabric edges, paint damage, paint old and surface worn. I also created my own masks using the bitmap mask function, using the curvature map and levels to identify edges and cavities without the use of smart masks.


When painting the masks, I used both the planar uv painting mode on the 2D view and the tangent|wrap painting mode on the 3d viewport so that I could easily mask whole islands without it wrapping, then covering up any seams by having the paint wrap onto neighbouring islands while painting in the 3d viewport for accuracy.

I used the substance font alphas to write out the text in different font based on whichever matched the concept font the closest, using font Orbitron for 'HELL' and '24-HOUR OLFACTORY CAMERA'. I also used it for the '050' but used the eraser to remove a '/' from the 0s. Finally, I used the Han Sans Japanese Chinese font for the '臭覚カメラ' (olfactory camera), adding some height to it so that it appeared as if it had been printed onto the jacket. I also added some patches of wear to the text on the helmet and the cross on the jacket so that it acted like worn off paint.


Tuesday, November 5, 2019

Helmeted Character: Week 3 Tuesday

On Tuesday I continued modelling the jacket:


Once again, I used dam standard and pinch to create sharper, more detailed folds. I realised that the zipper area had been extended on the concept and so masked off that area in new layer, inverting it, gradient-ing it, moving it and then smoothing out any imperfections. I masked out the shape of a pocket, then used the layer tool to build up a chunk. I smoothed it out, polished and pinched the edges, then applied another masked layer build up for the flap on the top of the pocket. In another layer I created some subtle folds with damstandard again.

After all of this detailing was done, I used the IMM ZipperP tool to create the zips for the jacket opening, the side pockets and the arm pocket. I shat I could edit them to be moothed them down a little and extracted the side pocket zips so that I could edit them into the shape seen in the concept, by trim rect-ing the shape to be shorter. I also used the move and move elastic tool to place them all more accurately against the surface of the jacket.

Tuesday, October 29, 2019

Helmeted Character: Week 2 Tuesday

WIP
On Tuesday I started sculpting the gloves, using the same techniques I had learnt from the shoes to mask off areas and sculpt in layers of detail for the leather shapes. I decided to slightly edit the concept image to add more interest to the gloves, with varying layers based on biking gloves:


Tuesday, October 22, 2019

Helmeted Character: Week 1 Tuesday

On Tuesday I opened zbrush and created a blockout from a zsphere, paying attention to the anatomy reference on my pureref file:
I wanted to use this time to practice sculpting bodies and to get back into the flow of zbrush, so I decided to loosely sculpt in some muscle definition before making the clothes:

 I didn't want to waste too much time on muscles that wouldn't be seen later in the sculpt, so I stopped here and moved onto testing whether or not marvelous would be a good choice for my next step.

Tuesday, October 15, 2019

Water VFX Brief: Week 3 Tuesday

On Tuesday I finished up the sculpt, decimated and exported it back into 3ds max for retopology. I only sculpted 5 planks to save time, with the intention of copying and rotating them later to fill the gaps. I also copied it across to create the smaller bucket of water, sculpting another specific plank to replace the area where the spout of water would come out from:


I also sculpted the extra planks of wood that needed to be added to the smaller bucket where the pump would be placed. I decimated again and combined all of the highpoly items into 2 seperate buckets ready for the 2 lowpoly versions to be created:


Tuesday, October 8, 2019

Water VFX Brief: Week 2 Tuesday

On Tuesday I started working on the particle effects!
I wanted to make a splash effect for where the stream of water touched the pool beneath it, but wasn't sure which method to choose. I looked at several different methods: flipbook animations, sculpting a spash mesh in houdini and finally decided on going with bold droplet particle effects being dispersed in several different directions.

For the material itself I kept it simple, leaving most of the work up to the emitter itself.

I adjusted the size to be varied, decreasing over time, as well as velocity and constant acceleration to give the effect of being shot up into the air and then dragged back down by gravity. I also changed the initial location so that they weren't all spawning from the same spot, then added a kill height so that they wouldn't exist lower than the water plane. I adjusted the max draw count to 10 so that there wasn't too much overcrowding too.

I made the droplets solid in colour so that I could introduce the inspiration I gor from RiME into the scene more, as I wanted the water translucency and detail of the kind of water seen in Sea of Thieves, with the whimsical and bold effects seen in RiME water, such as the white foam.

Tuesday, October 1, 2019

Water VFX brief: Week 1 Tuesday

On Tuesday my day consisted of gathering as many extra tutorials as possible for the upcoming tasks:

Waterfall particle effects scrapped:

I ended up not following these tutorials in particular as the particle effects were too misty, and were unfit to be used for a small scale water feature where the water is pouring more gently.

Particle events:
https://wiki.unrealengine.com/index.php?title=Particle_Events

I deemed this video to be useful in the future for when I make a trickling water particle effect that generates a splash particle effect upon hitting the water surface.

Rain particle effects:
https://www.youtube.com/watch?v=Qmb2FrFunME

This video was chosen in case I decide to add rain, but also to serve as a base guide to creating a trickling water effect.

Ripple particle effects:

This video in particular was used as a inspiration and guide to creating a ripple effect, however, I ended up heavily changing the blueprint shown in order to make the ripple react directly to the water coming into contact with an actor.

Infiltrator breakdown; droplet effect:

This video was less helpful as it didn't teach me anything, but still helped me consider the shape of the water droplets and splashes.

Waterfall shader:

I ended up using this tutorial as a loose guide to create a scrolling texture for falling water, however I will be comparing it to the effect of using a particle effect for slower and smaller amounts of water in order to keep it as realistic to the intensity of water as possible.

Buoyancy tutorial:

This tutorial was considered in case I wanted to make lily pads and other things float on top of the water, but will most likely be kept to a stretch goal if I have time closer to the end of the project.

Waterfall preview:

I found this tutorial unhelpful, but very interesting as I'd love to know what the spline in the middle of the waterfall is for, and how the ends of the mesh generate the splash particle effect on play. Just like the buoyancy tutorial however, I will most likely shelf this enquiry until I decide on whether I'll be using a panning texture for the stream effect or a particle effect, as they will require different blueprints to react with the water surface.

Finally, I found a complete blueprint guide to creating a fluid, reactive surface in UE4:
https://docs.unrealengine.com/en-US/Engine/Rendering/RenderTargets/BlueprintRenderTargets/HowTo/FluidSurface/index.html

I decided to test this out, and if it worked I would scrap my previous water shader for this one, adding in any edits that I needed to create the perfect water.