Thursday, November 28, 2019

Foliage VFX: Week 2 Wednesday

On Wednesday I unwrapped anything that hadn't already been unwrapped (in which my reference copies of the lowpoly plants came in handy) as well as the tree, keeping an eye on my texture budget and assigning maps accordingly. I mapped out a plan to use the following maps: 512 alphas, 256 mushrooms, 1024 tree + vines, 512 opaque plants, 512 tileable texture 1 and 512 tileable texture 2. This ate into my budget for additional maps a little bit, but I had accounted for that earlier by sacrificing some normal maps.

I tried to avoid leaving much unused texture space as I wasn't intending on modelling anything else after this.
I exported the tree, lantern and vine into marmoset to bake normal maps without them printing onto each other, then placed them into substance painter ready for texturing:


I baked the lantern at a slightly higher resolution than the tree as I wanted it to be a bigger focus, but then resized it after texturing so that it would fit on the tree branches properly.

Wednesday, November 27, 2019

Foliage VFX: Week 2 Tuesday

On Tuesday I went back to the tree and started the tedious task of re-topping, using a mixture of step build and strip modelling cylinders (then adding swift loops and conforming them to the highpoly surface), using the conform relax tool in some areas along the way to keep the geometry even. I did this to keep the surface as close to the high poly version as possible, while also saving as much time as possible.

Tuesday, November 26, 2019

Foliage VFX: Week 2 Monday

On Monday I decided to ignore the tree for a bit and to start focusing on the vine lanterns:
I used a lot of symmetry and box modelling to create a highpoly and lowpoly version of a lantern attached to a vine, using a line and helix splines on path deforming binding (WSM) modifiers to shape cylinders into a vine shape, then using the animation position constraint to attach leaves along them. I used a torus knot to create the knot at the end, and tried to position the metal ring so that it would come out of the knot in realistic areas rather than clipping straight through the flesh of it.
I intentionally rotated the top a little despite the reference I was using in order to create some more interest and contrast in the way that it was built:
After this was completed, I then went on to create the bones of the vine, as I wanted it to have physics within the scene.
I followed this tutorial using CAT bones and rigging it to the mesh, then went back to it later in the week to follow their guide on exporting to UE4 and implementing a light.

Saturday, November 23, 2019

Foliage VFX: Week 1 Friday

On Friday I finished sculpting the tree and decimated it to be retopped in 3ds max. I primarily used the clay tubes brush to build up the layers of the tree in a fashion that left a grain, trying to follow the form displayed in the concept. I loosely followed the tips displayed in this post: https://www.artstation.com/artwork/mOex1 using the orb cracks brush in some areas to emphasise the gaps. For extra reference, I used some disney tree images like chip n dale's treehouse:
To keep things neat, I kept everything on separate layers, then projected a higher poly version onto a zremesh-ed version to keep the details, while maintaining a tri count that would allow the tree to be exported to 3ds max.
During this, I specifically learnt how to polypaint so that I could keep the thin areas of the branches higher poly than the rest of the sculpt when zremeshing, to avoid the issue of losing geometry to smoothing.

Friday, November 22, 2019

Foliage VFX: Week 1 Thursday

On Thursday, I started working on the tree sculpt. I specifically wanted this part to be sculpted because it was going to be the centrepiece of the plinth and is obviously more shapely than the rest of the foliage. Combining both reference images together, I focused on using one of the references for the roots, as I had to consider how the plants would fit around the tree to match the concept, and the other for the rest of the tree. I decided to use zspheres as they allowed for flexible, snake like branches, keeping to 2 subtools so that I could separate areas and make the sculpting process easier to keep clean and neat later on:

During this process I modelled the tree over the top of the concept images to make sure the branches aligned, then later made adjustments to ensure that the tree wouldn't look flat, as I had the issue of only having one view to work from in the concept image. I had to line up the tree with the concept image several times and settle with some slight changes to ensure that the tree would look good from more than one angle.

Thursday, November 21, 2019

Foliage VFX: Week 1 Wednesday

On wednesday I began constructing all of the foliage that would be in the scene, starting with the alphas and ending with the solid/opaque foliage.
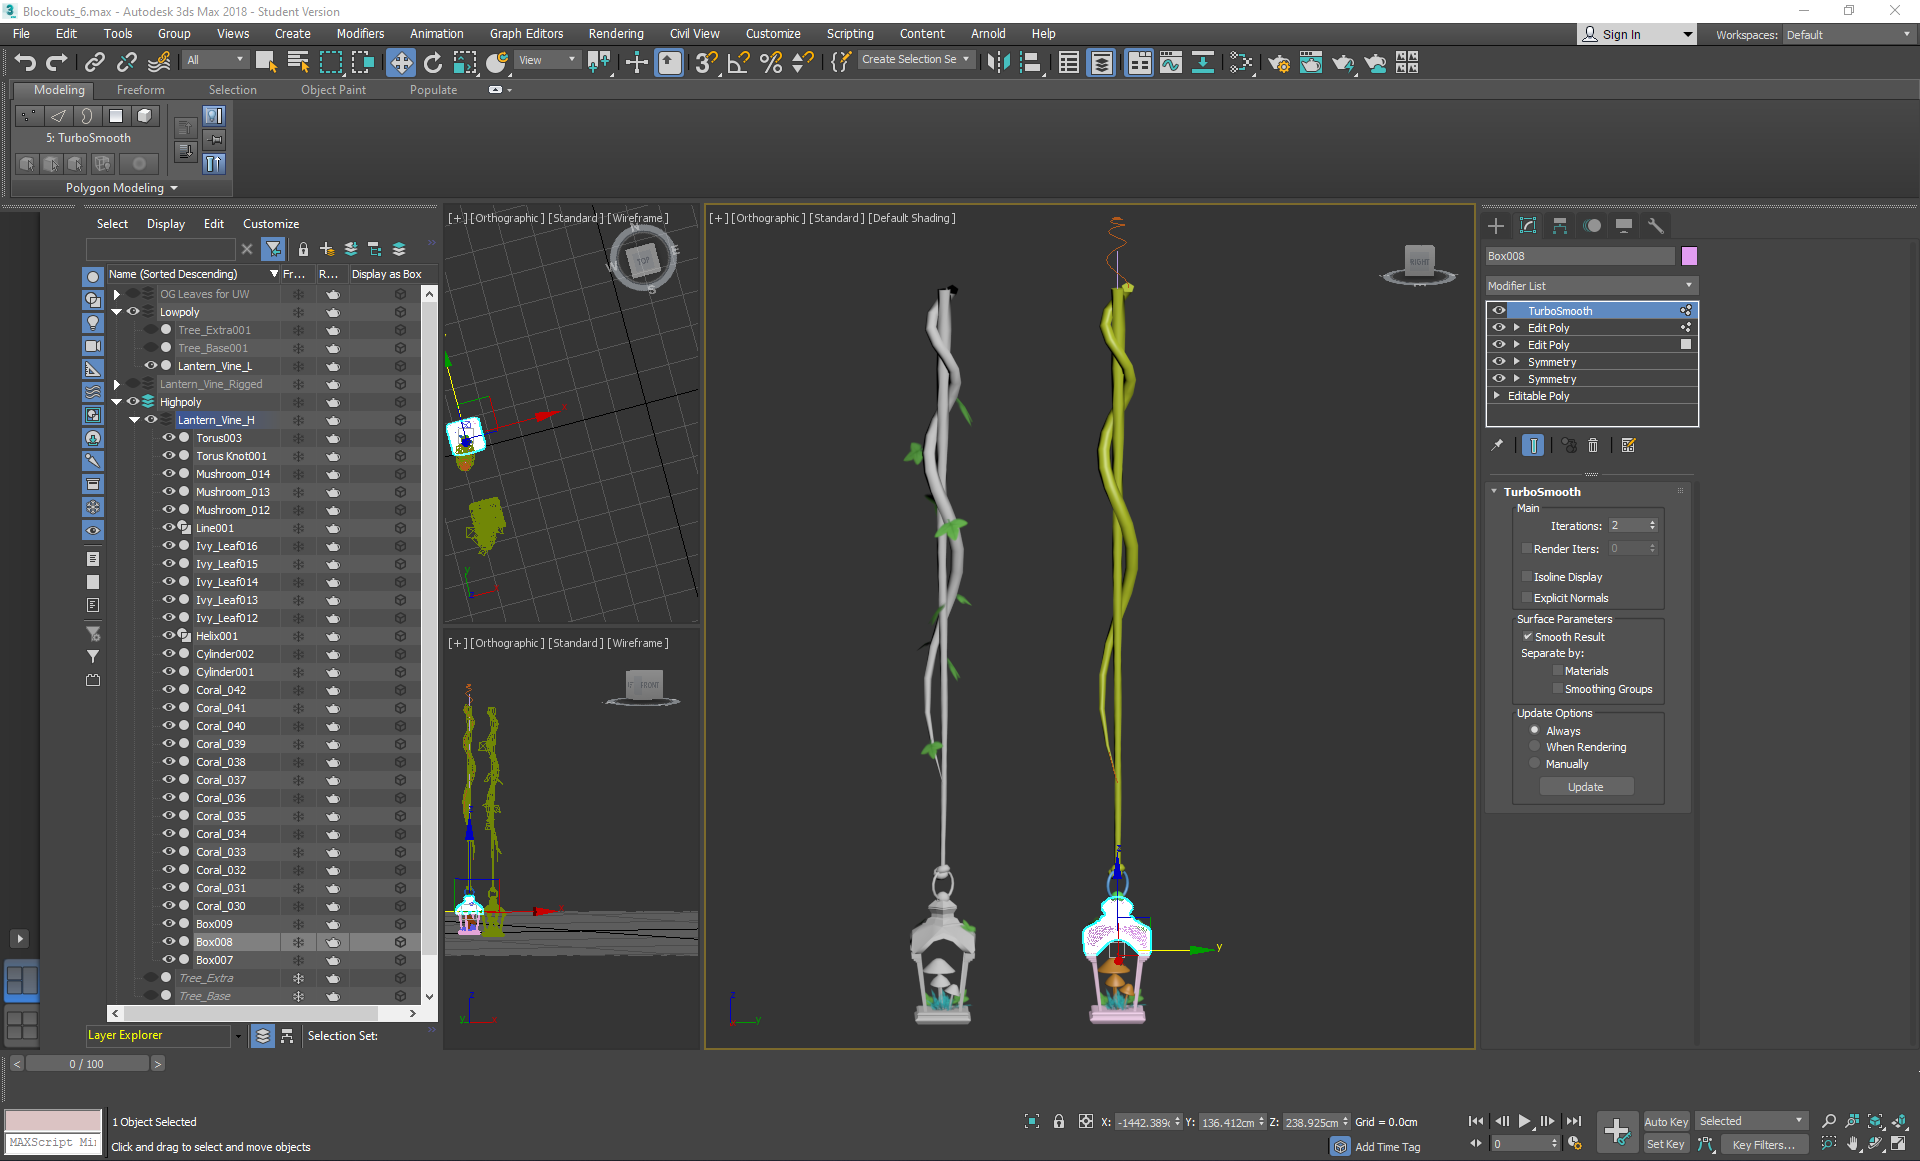
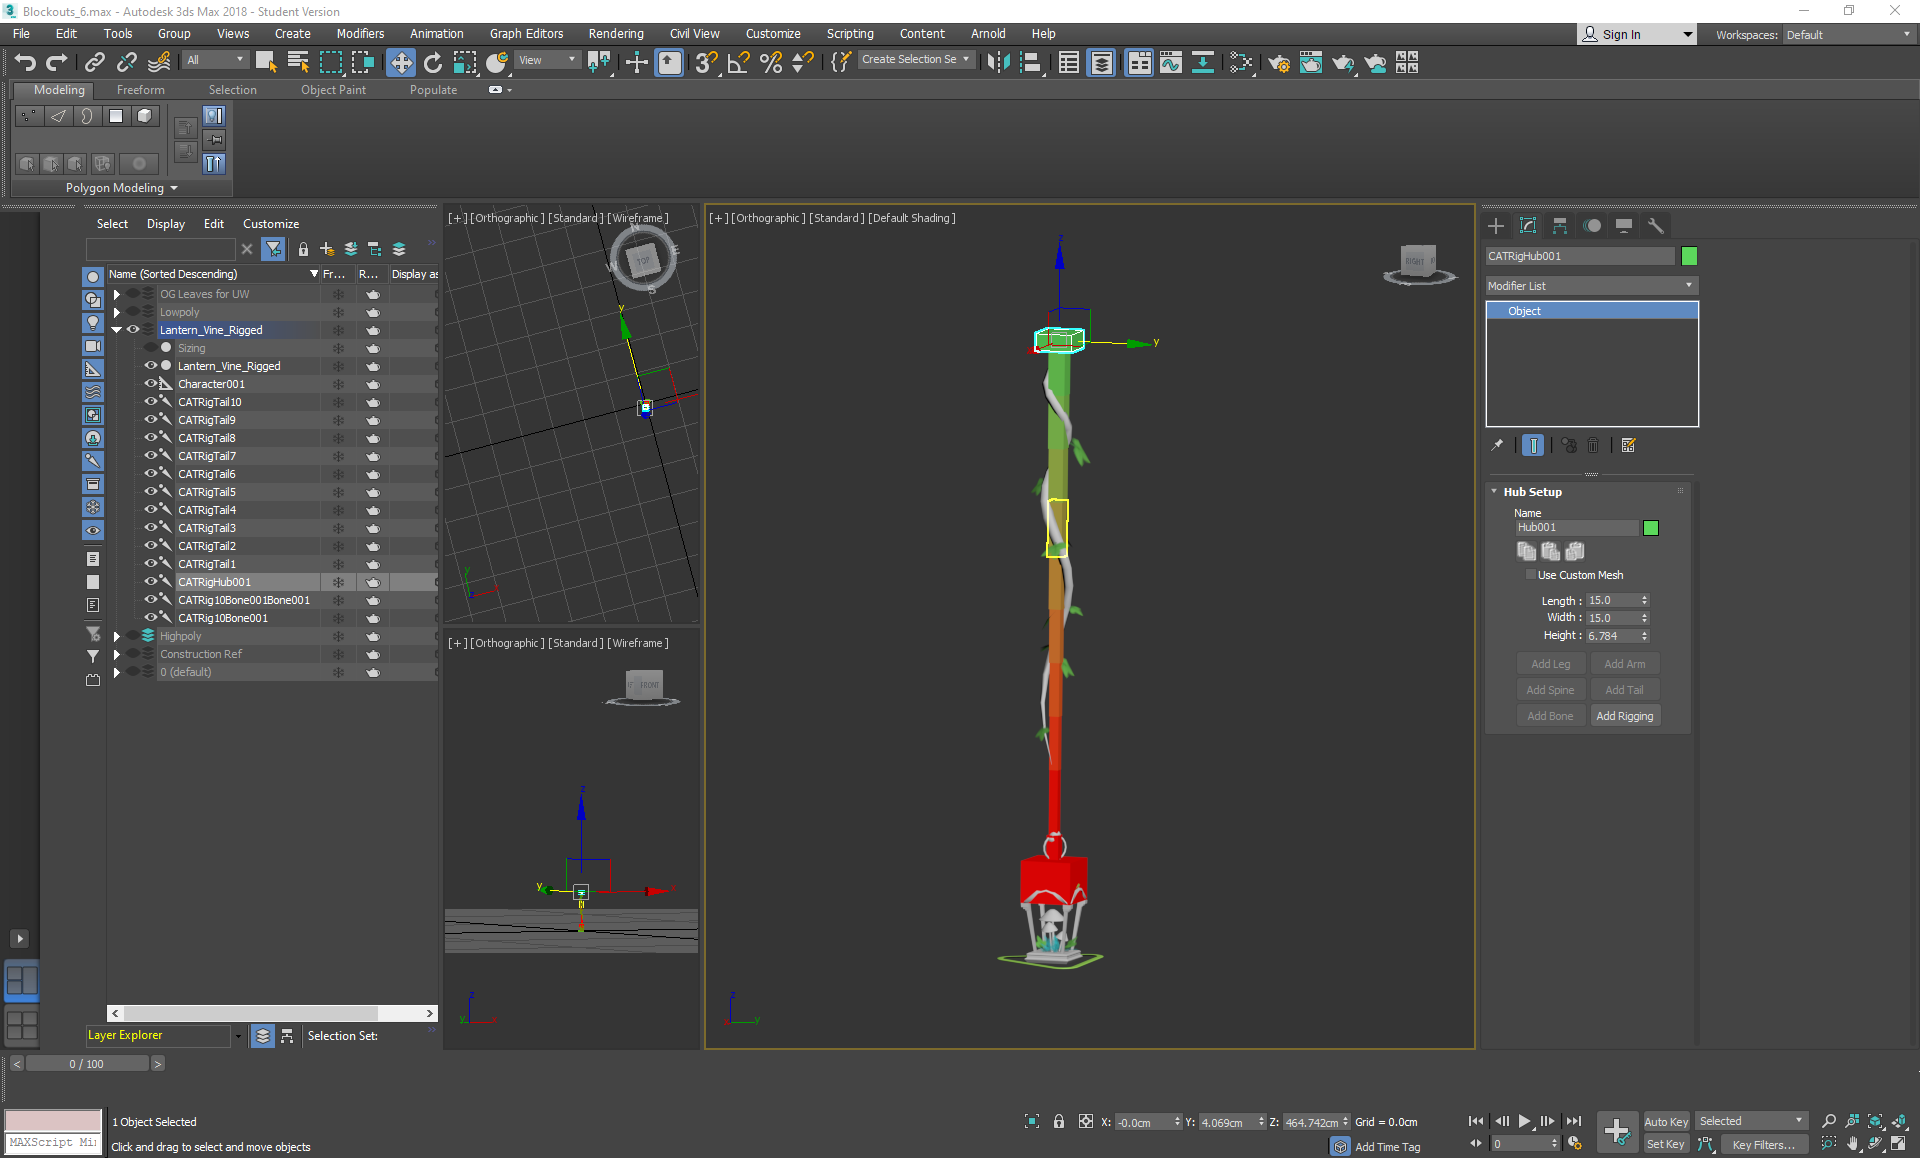
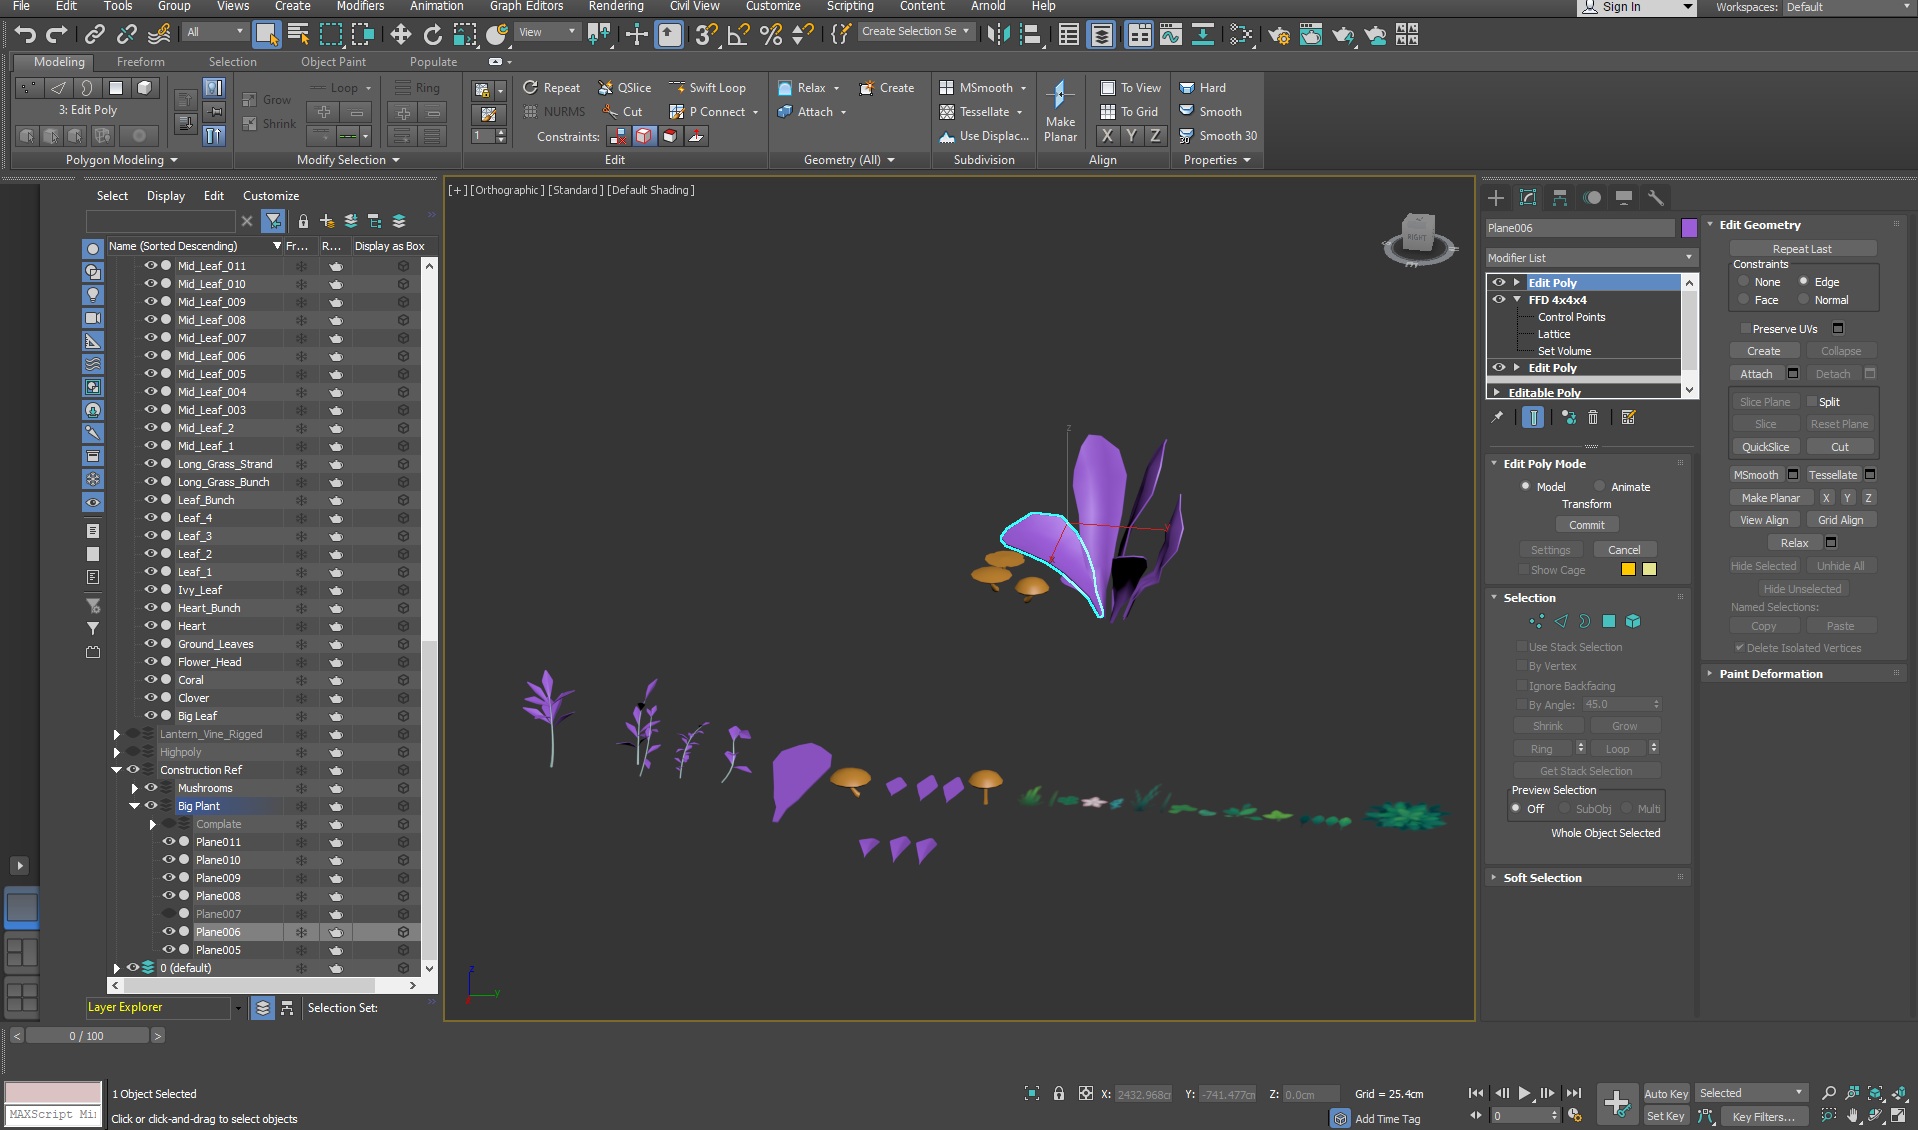
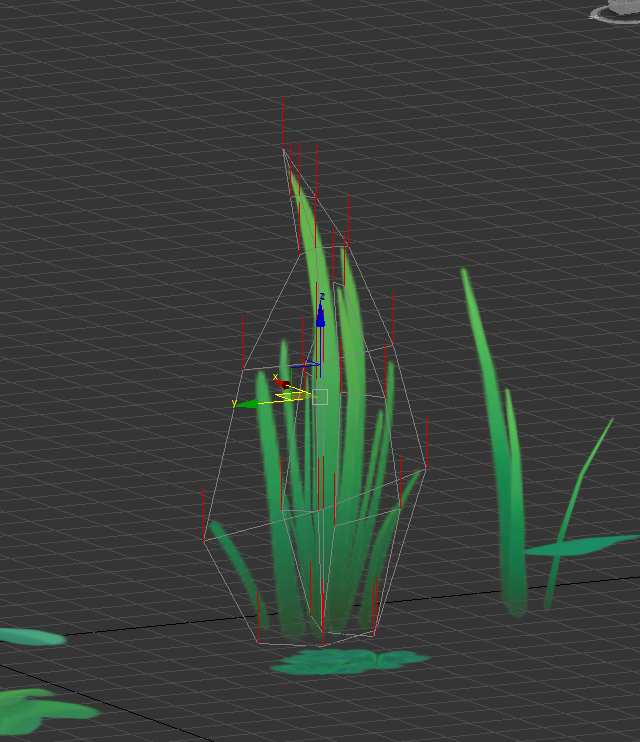
To avoid using too much texture space, I specifically modelled a flat leaf for texturing, then made several reference versions with a ffd modifier stacked onto their individual unique shelves:

I made sure that each alpha was bent slightly or overlapped so that it could be visible from all angles and made sure that the normals were pointing upwards to avoid any bad lighting angles. In the future, if I wanted to be particularly cheap with my budget, I would consider then projecting these alphas onto an even lower poly plane. In other circumstances I would also consider adding normal maps, but the concept was fairly cell shaded and flat, so I decided to utilise that texture space for something else instead.
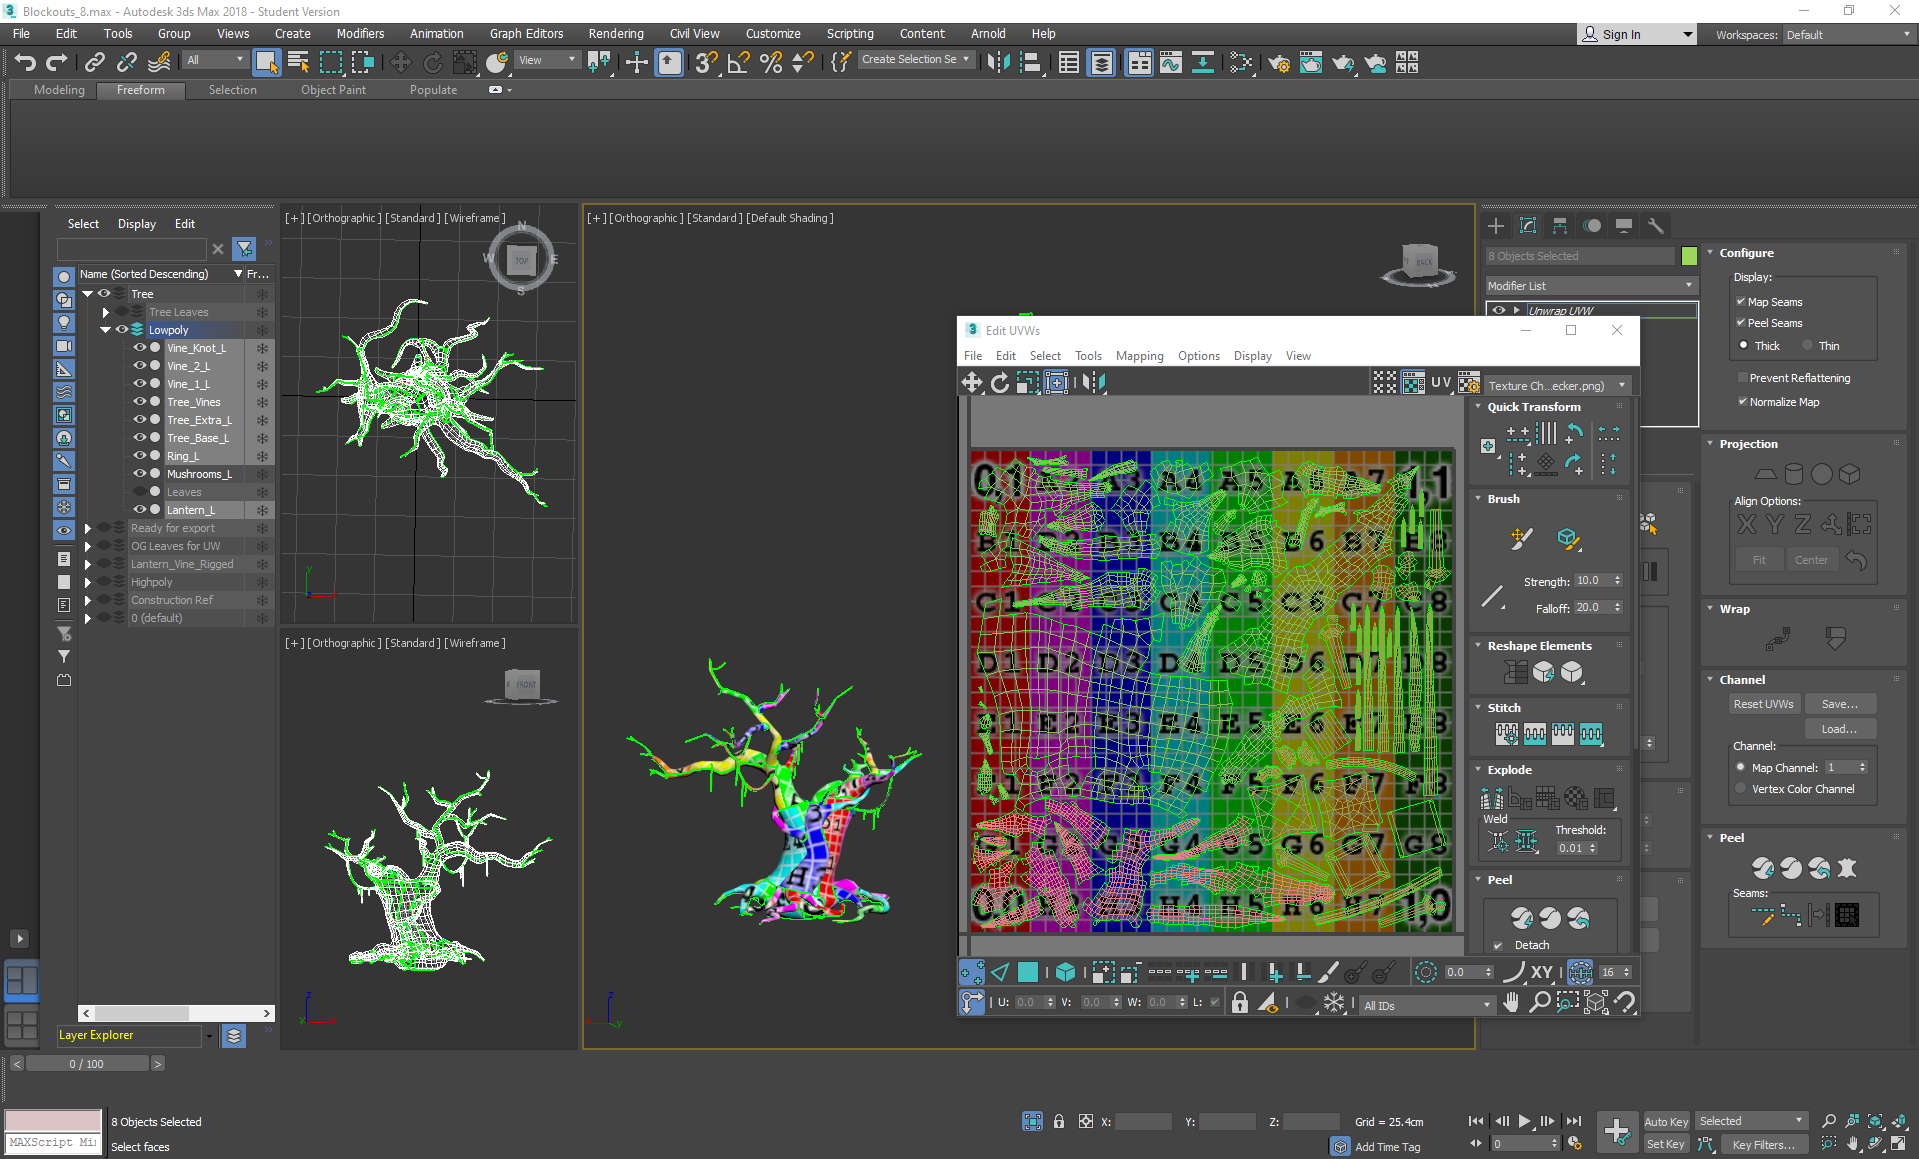
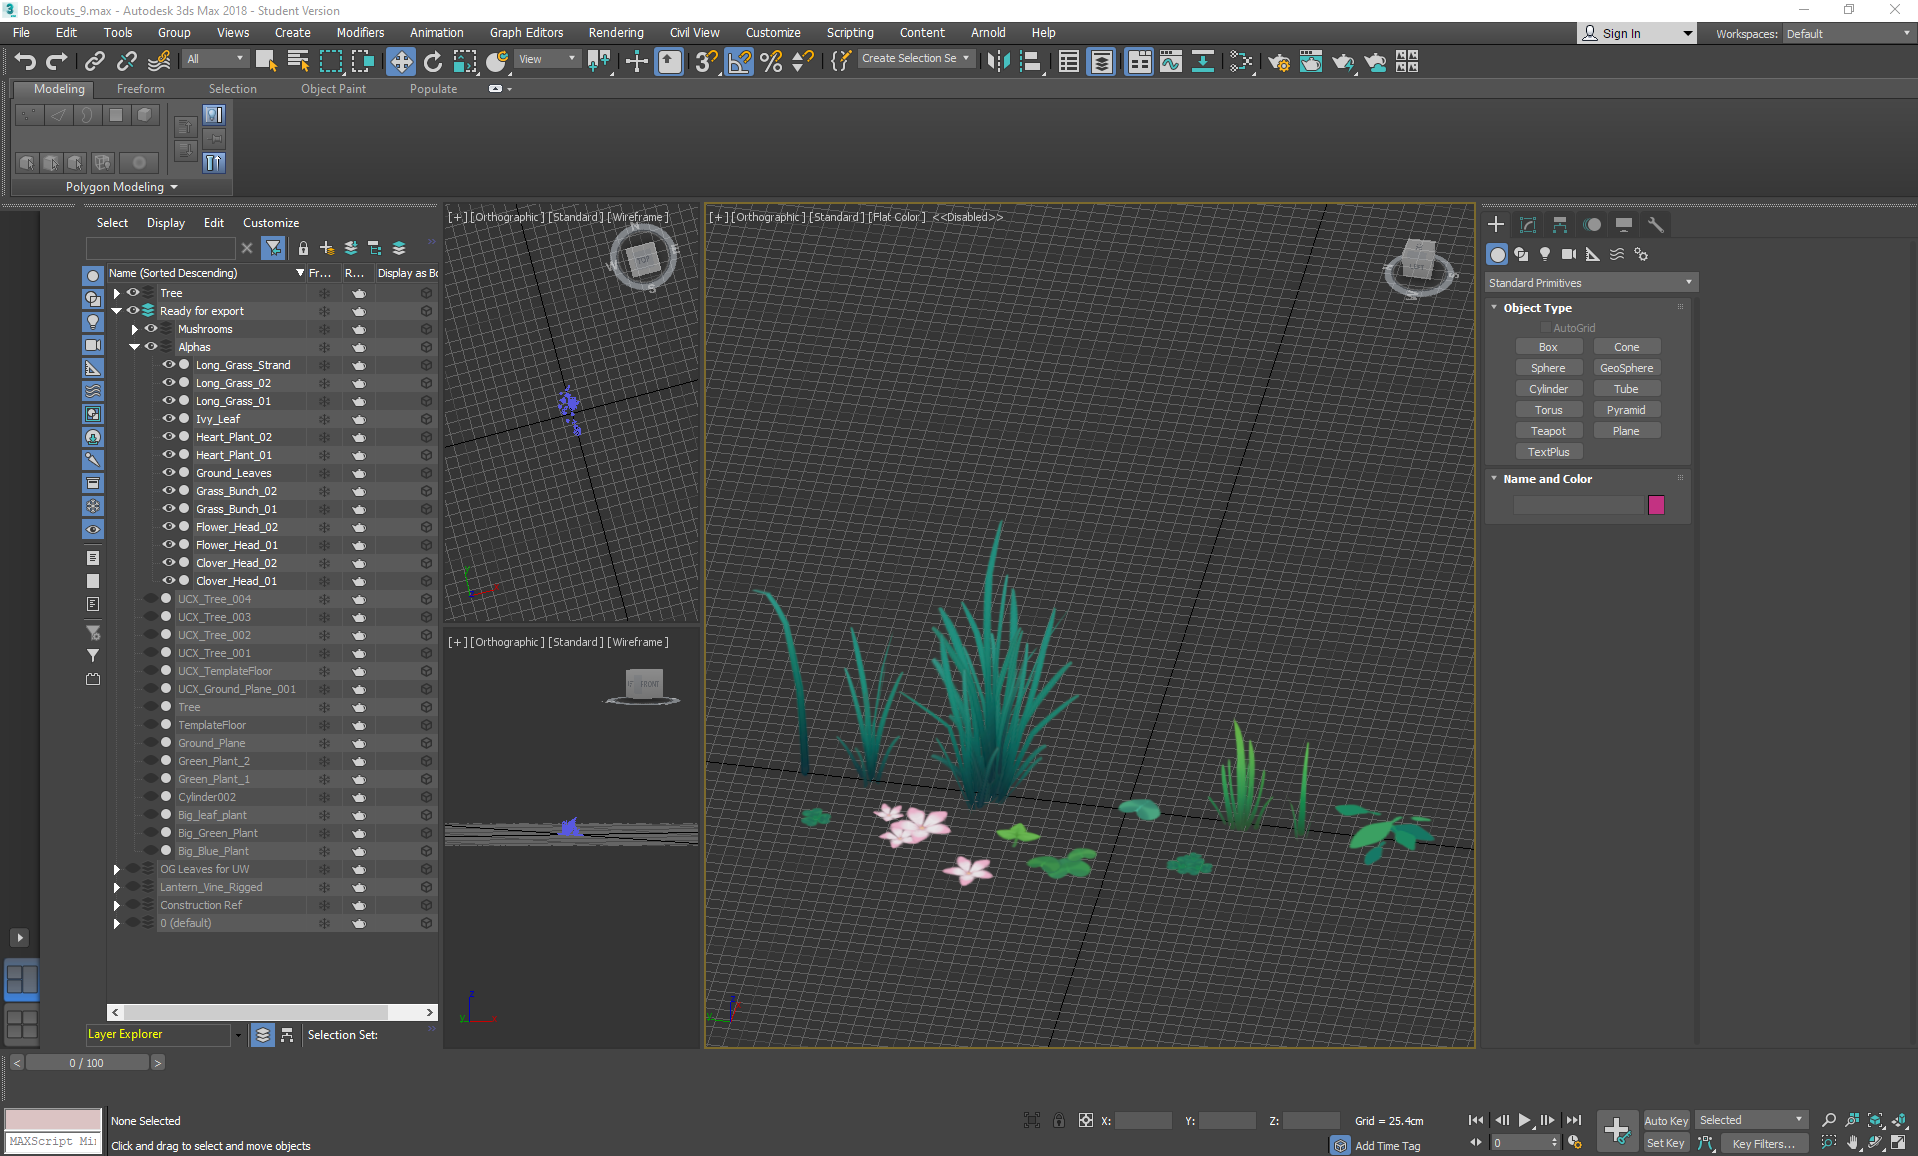
After merging everything together, I made sure everything was moved to the centre of the grid ready to be exported to UE4, with light maps in place.

Wednesday, November 20, 2019

Foliage VFX: Week 1 Tuesday

On Tuesday I started making the alpha texture sheet for the scene:


I wanted to keep everything to a single 1012 alpha sheet so that I could size everything to a similar pixel density without having to worry about several individual small sheets. I tried to keep the rendering simple yet vibrant to keep to the concepts I was referencing. I left space at the bottom right corner on purpose for if I needed any texture space later in the project for particle effects.
To complete the map, I added Gaussian blur so that the edges of the alphas wouldn't bleed the background colour.